9.Check for damaged parts. Before using any tool, any part that appears damaged should be carefully checked to determine that it will operate properly and perform its intended function. Check for loose parts and any other condition that may affect the operation of this product. Replace loose or worn parts immediately. Any part that is damaged should be properly repaired or replaced by a qualified technician.
10.Replacement parts. When servicing, use only identical replacement parts. Use of any other parts will void the warranty.
Warning: The warnings, cautions, and instructions discussed in this instruc- tion manual cannot cover all possible conditions and situations that may occur. It must be understood by the operator that common sense and caution are factors which cannot be built into this product, but must be supplied by the operator.
Unpacking
When unpacking, check to make sure the following parts are included. If any parts are missing or broken, please call Harbor Freight Tools at the number on the cover of this manual.
Assembly Instructions
1.Assemble all parts on a smooth surface to avoid scratching.
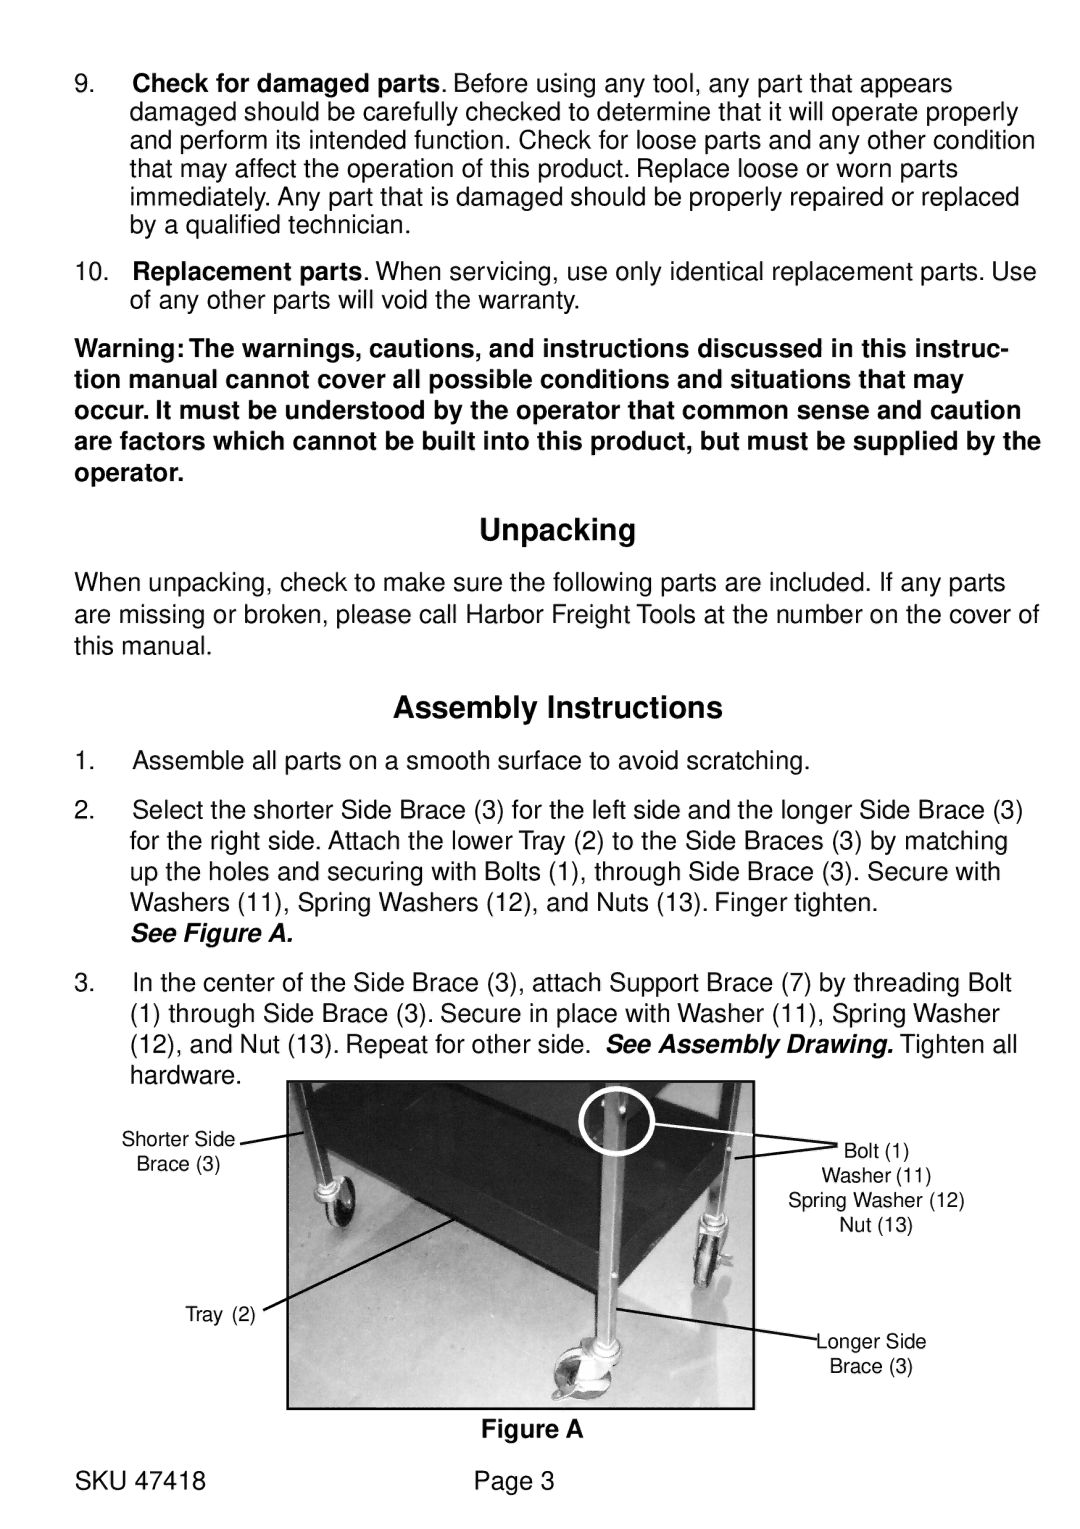
2.Select the shorter Side Brace (3) for the left side and the longer Side Brace (3) for the right side. Attach the lower Tray (2) to the Side Braces (3) by matching up the holes and securing with Bolts (1), through Side Brace (3). Secure with Washers (11), Spring Washers (12), and Nuts (13). Finger tighten.
See Figure A.
3.In the center of the Side Brace (3), attach Support Brace (7) by threading Bolt
(1)through Side Brace (3). Secure in place with Washer (11), Spring Washer (12), and Nut (13). Repeat for other side. See Assembly Drawing. Tighten all hardware.
Shorter Side | Bolt (1) | |
Brace (3) | ||
Washer (11) | ||
| ||
| Spring Washer (12) | |
| Nut (13) |
Tray (2)
Longer Side
Brace (3)
Figure A
SKU 47418 | Page 3 |
