Installing the Battery.
Refer to figure 1.
Uses 2 “AA” batteries (not included). Open the Battery Compartment Cover (#8) and install the batteries. Close the Battery Compartment Cover (#8).
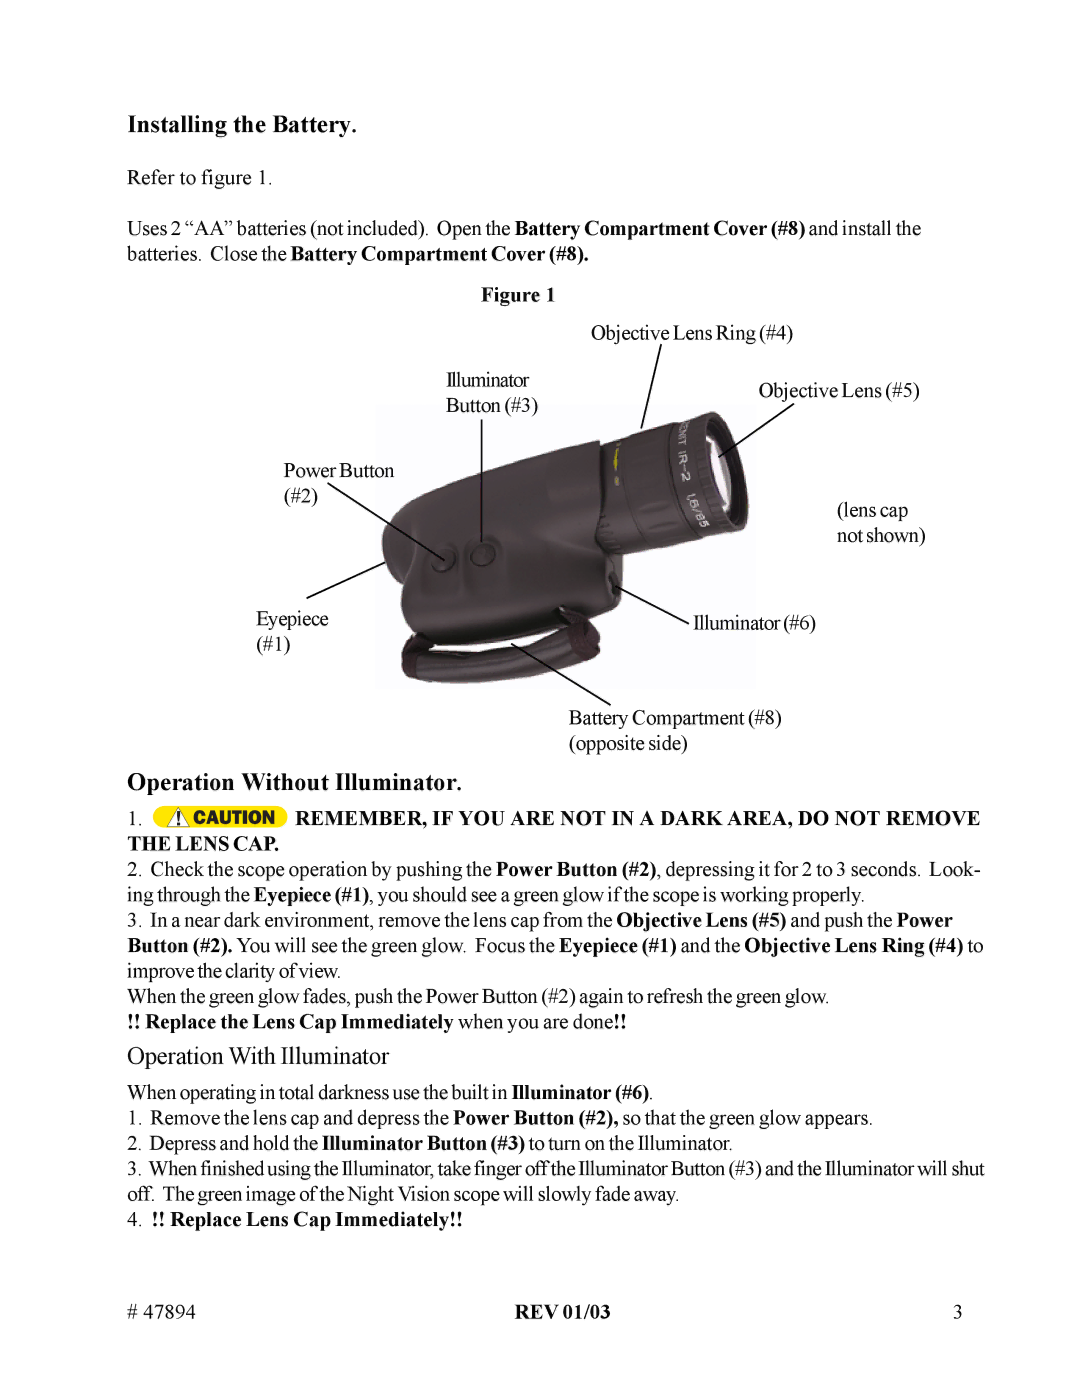
Figure 1 |
| |
| Objective Lens Ring (#4) | |
Illuminator | Objective Lens (#5) | |
Button (#3) | ||
|
Power Button (#2)
(lens cap not shown)
Eyepiece | Illuminator (#6) |
(#1) |
|
Battery Compartment (#8) (opposite side)
Operation Without Illuminator.
1. ![]() REMEMBER, IF YOU ARE NOT IN A DARK AREA, DO NOT REMOVE
REMEMBER, IF YOU ARE NOT IN A DARK AREA, DO NOT REMOVE
THE LENS CAP.
2.Check the scope operation by pushing the Power Button (#2), depressing it for 2 to 3 seconds. Look- ing through the Eyepiece (#1), you should see a green glow if the scope is working properly.
3.In a near dark environment, remove the lens cap from the Objective Lens (#5) and push the Power Button (#2). You will see the green glow. Focus the Eyepiece (#1) and the Objective Lens Ring (#4) to improve the clarity of view.
When the green glow fades, push the Power Button (#2) again to refresh the green glow. !! Replace the Lens Cap Immediately when you are done!!
Operation With Illuminator
When operating in total darkness use the built in Illuminator (#6).
1.Remove the lens cap and depress the Power Button (#2), so that the green glow appears.
2.Depress and hold the Illuminator Button (#3) to turn on the Illuminator.
3.When finished using the Illuminator, take finger off the Illuminator Button (#3) and the Illuminator will shut off. The green image of the Night Vision scope will slowly fade away.
4.!! Replace Lens Cap Immediately!!
# 47894 | REV 01/03 | 3 |