4.Slide the strip of Staples forward in the Moving Rail (part #76). NOTE: The Moving Rail will hold up to 110, 18 gauge, Staples. (See Figure C.)
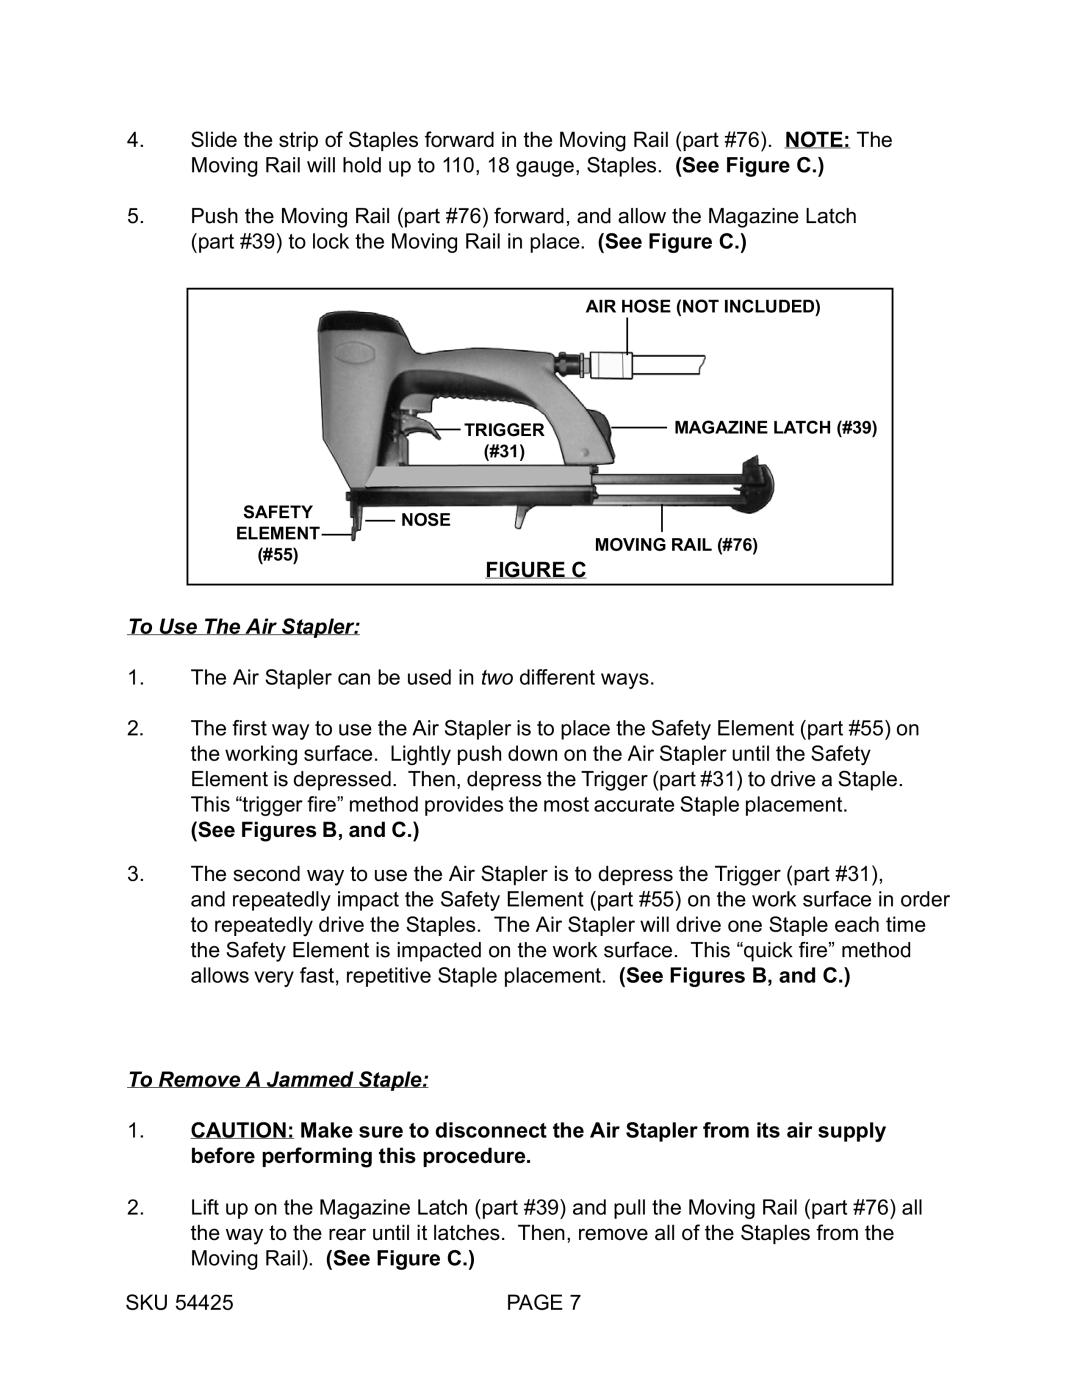
5.Push the Moving Rail (part #76) forward, and allow the Magazine Latch (part #39) to lock the Moving Rail in place. (See Figure C.)
AIR HOSE (NOT INCLUDED)
TRIGGER |
| MAGAZINE LATCH (#39) |
| ||
(#31) |
|
|
SAFETY NOSE
ELEMENT
(#55)
MOVING RAIL (#76)
FIGURE C
To Use The Air Stapler:
1.The Air Stapler can be used in two different ways.
2.The first way to use the Air Stapler is to place the Safety Element (part #55) on the working surface. Lightly push down on the Air Stapler until the Safety Element is depressed. Then, depress the Trigger (part #31) to drive a Staple. This “trigger fire” method provides the most accurate Staple placement.
(See Figures B, and C.)
3.The second way to use the Air Stapler is to depress the Trigger (part #31),
and repeatedly impact the Safety Element (part #55) on the work surface in order to repeatedly drive the Staples. The Air Stapler will drive one Staple each time the Safety Element is impacted on the work surface. This “quick fire” method allows very fast, repetitive Staple placement. (See Figures B, and C.)
To Remove A Jammed Staple:
1.CAUTION: Make sure to disconnect the Air Stapler from its air supply before performing this procedure.
2.Lift up on the Magazine Latch (part #39) and pull the Moving Rail (part #76) all the way to the rear until it latches. Then, remove all of the Staples from the Moving Rail). (See Figure C.)
SKU 54425 | PAGE 7 |