Operating Other Manufacturers’ TV
You can use the remote control to operate other manufactures’ TV.
•Refer also to the manuals supplied for the other products.
•To operate the other products, aim the remote control directly at the remote sensor on the target product.
❏To change the transmittable signals for operating a
TV
1.Press CONTROL TV.
2.Press and hold TV ![]() .
.
3.Enter manufacturer’s code using buttons
4.Press 7.
5.Release TV ![]() .
.
Now, you can perform the following operations on the TV.
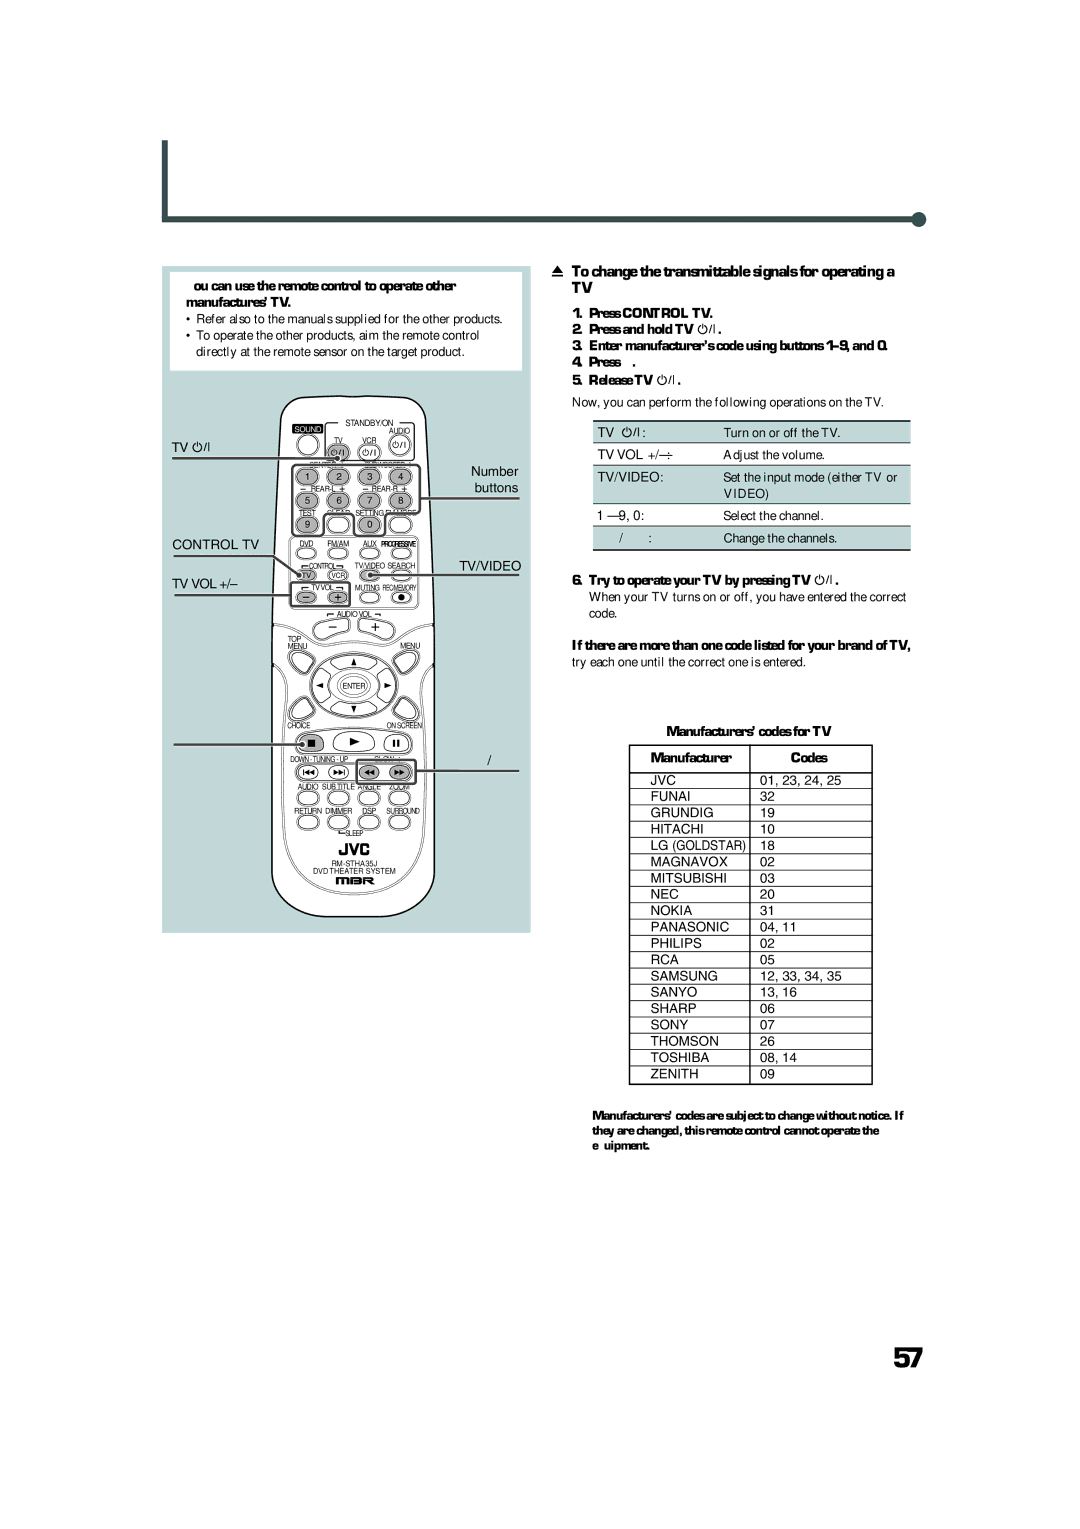
TV ![]()
CONTROL TV
TV VOL +/–
SOUND | STANDBY/ON |
|
| |
AUDIO |
| |||
| TV | VCR |
|
|
CENTER | SUBWOOFER | Number | ||
1 | 2 | 3 | 4 | |
|
| buttons | ||
5 | 6 | 7 | 8 |
|
TEST CLEAR SETTING FM MODE
90
DVD FM/AM AUX PROGRESSIVE
CONTROL | TV/VIDEO SEARCH | TV/VIDEO | |
TV | VCR |
|
|
TVVOL | MUTING REC/MEMORY |
| AUDIOVOL |
TOP | MENU |
MENU |
TV |
| : | Turn on or off the TV. |
| |||
| |||
TV VOL | Adjust the volume. | ||
|
|
| |
TV/VIDEO: | Set the input mode (either TV or | ||
|
|
| VIDEO) |
1 – 9, 0: | Select the channel. | ||
|
|
| |
1/ ¡: | Change the channels. | ||
|
|
|
|
6.Try to operate your TV by pressing TV  .
.
When your TV turns on or off, you have entered the correct code.
If there are more than one code listed for your brand of TV,
try each one until the correct one is entered.
| ENTER |
|
|
|
| |
7 | CHOICE |
| ON SCREEN |
| Manufacturers’ codes for TV | |
|
|
|
| |||
| DOWN | SLOW | 1 ¡ | Manufacturer | Codes | |
|
|
|
| / |
|
|
| AUDIO SUBTITLE ANGLE | ZOOM |
| JVC | 01, 23, 24, 25 | |
|
| FUNAI | 32 | |||
|
|
|
|
| ||
| RETURN DIMMER | DSP | SURROUND |
| GRUNDIG | 19 |
| SLEEP |
|
| HITACHI | 10 | |
|
|
|
|
| LG (GOLDSTAR) | 18 |
|
|
| MAGNAVOX | 02 | ||
| DVD THEATER SYSTEM |
| MITSUBISHI | 03 | ||
|
|
|
|
| ||
|
|
|
|
| NEC | 20 |
|
|
|
|
| NOKIA | 31 |
|
|
|
|
| PANASONIC | 04, 11 |
|
|
|
|
| PHILIPS | 02 |
|
|
|
|
| RCA | 05 |
|
|
|
|
| SAMSUNG | 12, 33, 34, 35 |
|
|
|
|
| SANYO | 13, 16 |
|
|
|
|
| SHARP | 06 |
|
|
|
|
| SONY | 07 |
|
|
|
|
| THOMSON | 26 |
|
|
|
|
| TOSHIBA | 08, 14 |
|
|
|
|
| ZENITH | 09 |
Manufacturers’ codes are subject to change without notice. If they are changed, this remote control cannot operate the equipment.
57