WARNING: Some dust created by power sanding, sawing, grinding, drilling, and other construc- tion activites, contain chemicals known [to the State of California] to cause cancer, birth defects or other reproductive harm. some examples of these chemicals are:
-Lead from
-Crystalline cilica from bricks and cement or other masonry products
-Arsenic and chromium from chemically treated lumber
(California Health & Safety Code 25249.5, et seq. )
Unpacking
When unpacking, check to make sure the parts listed on page 8 are included. If any parts are missing or broken, please call Harbor Freight Tools at the number on the cover of this manual as soon as possible
Operation
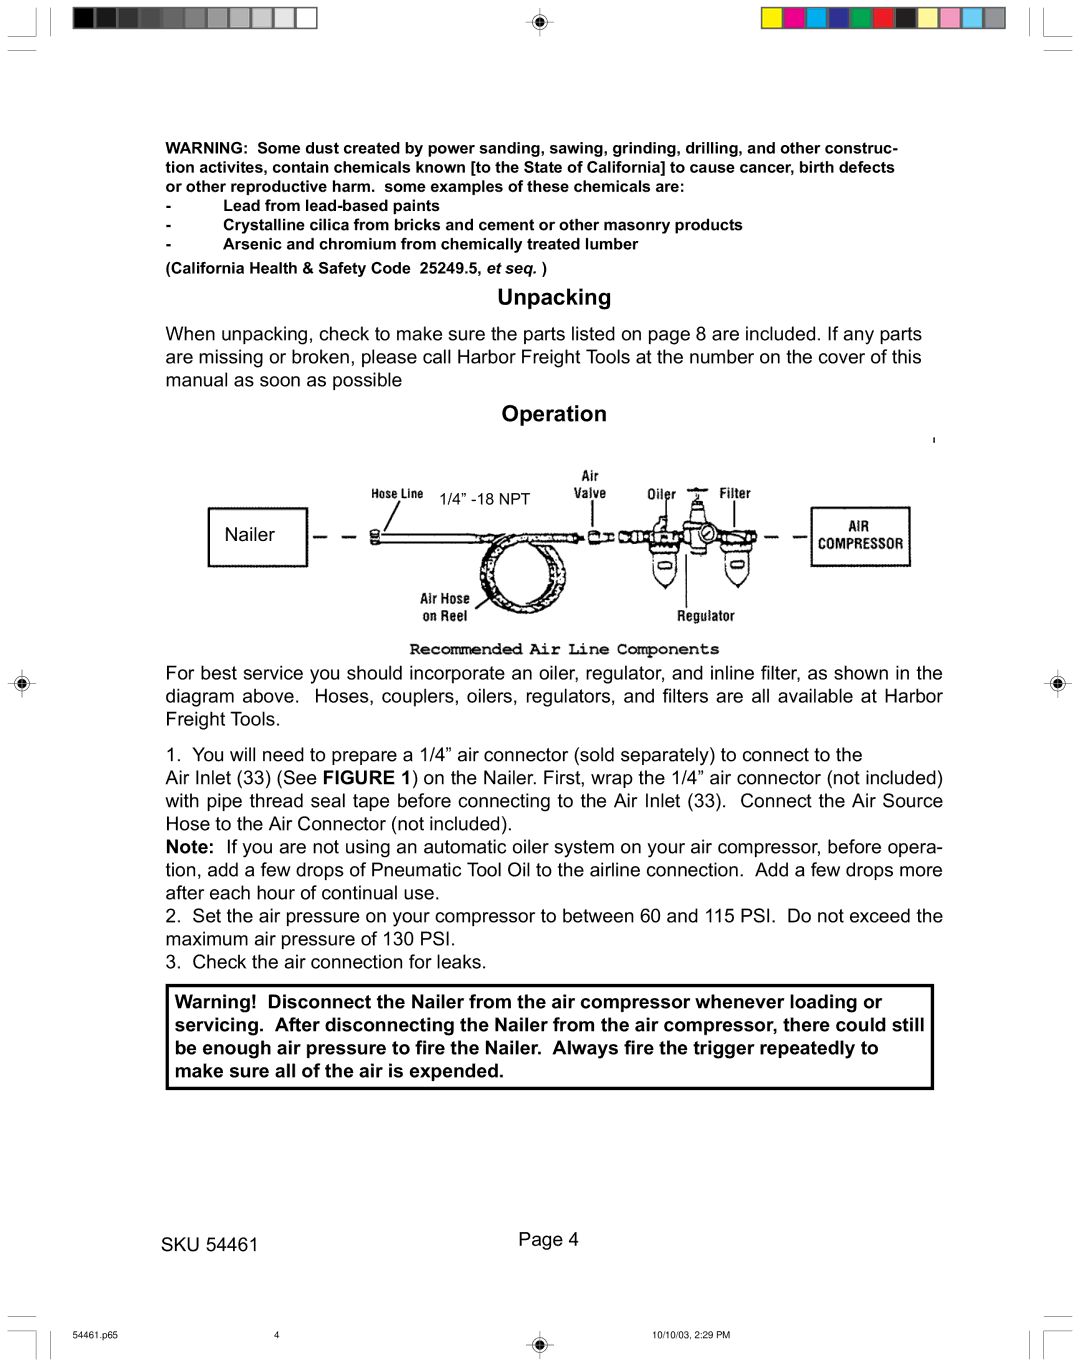
1/4”
Nailer
For best service you should incorporate an oiler, regulator, and inline filter, as shown in the diagram above. Hoses, couplers, oilers, regulators, and filters are all available at Harbor Freight Tools.
1. You will need to prepare a 1/4” air connector (sold separately) to connect to the
Air Inlet (33) (See FIGURE 1) on the Nailer. First, wrap the 1/4” air connector (not included) with pipe thread seal tape before connecting to the Air Inlet (33). Connect the Air Source Hose to the Air Connector (not included).
Note: If you are not using an automatic oiler system on your air compressor, before opera- tion, add a few drops of Pneumatic Tool Oil to the airline connection. Add a few drops more after each hour of continual use.
2.Set the air pressure on your compressor to between 60 and 115 PSI. Do not exceed the maximum air pressure of 130 PSI.
3.Check the air connection for leaks.
Warning! Disconnect the Nailer from the air compressor whenever loading or servicing. After disconnecting the Nailer from the air compressor, there could still be enough air pressure to fire the Nailer. Always fire the trigger repeatedly to make sure all of the air is expended.
SKU 54461 | Page 4 |
|
54461.p65 | 4 | 10/10/03, 2:29 PM |