Assembly
MIG Welder Unit
1.Insert the Handle (4) into the Handle Sockets (3) and mount the Handle Sockets to the Side Panel B (1) top using supplied hardware.
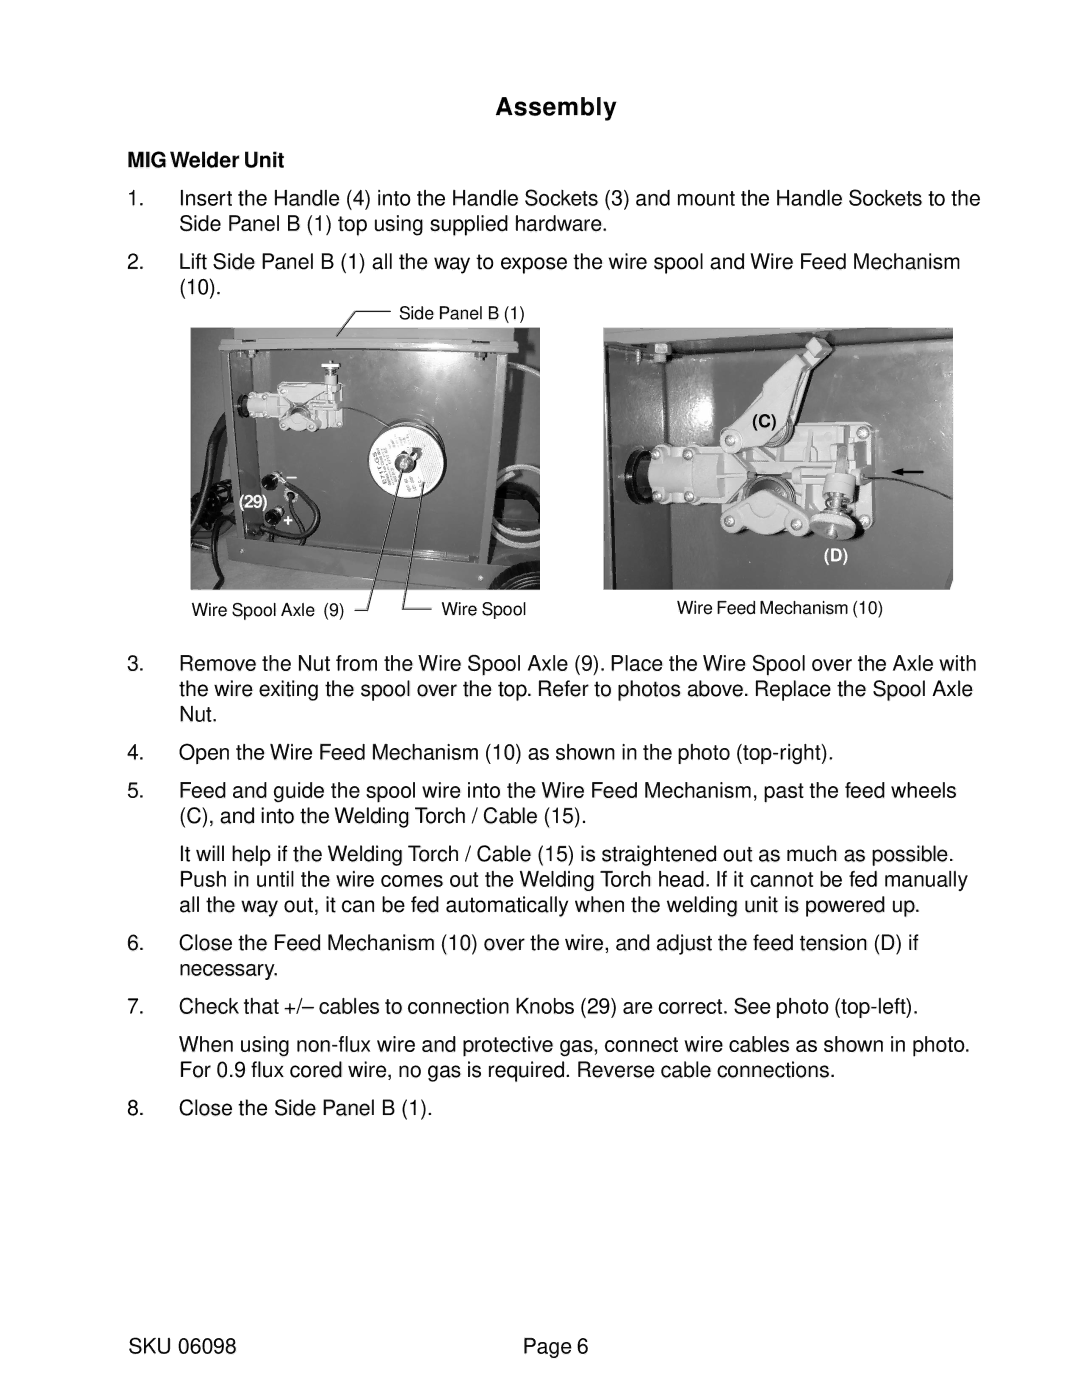
2.Lift Side Panel B (1) all the way to expose the wire spool and Wire Feed Mechanism (10).
![]()
![]() Side Panel B (1)
Side Panel B (1)
(C)
–
(29)
+
(D)
Wire Spool Axle (9) |
|
|
| Wire Spool | Wire Feed Mechanism (10) |
|
|
|
3.Remove the Nut from the Wire Spool Axle (9). Place the Wire Spool over the Axle with the wire exiting the spool over the top. Refer to photos above. Replace the Spool Axle Nut.
4.Open the Wire Feed Mechanism (10) as shown in the photo
5.Feed and guide the spool wire into the Wire Feed Mechanism, past the feed wheels (C), and into the Welding Torch / Cable (15).
It will help if the Welding Torch / Cable (15) is straightened out as much as possible. Push in until the wire comes out the Welding Torch head. If it cannot be fed manually all the way out, it can be fed automatically when the welding unit is powered up.
6.Close the Feed Mechanism (10) over the wire, and adjust the feed tension (D) if necessary.
7.Check that +/– cables to connection Knobs (29) are correct. See photo
When using
8.Close the Side Panel B (1).
SKU 06098 | Page 6 |