6.Position batteries in proper polarity and do not install batteries of different types, charge levels,
or capacities together.
7.People with pacemakers should consult their physician(s) before use. Electromagnetic fields in close proximity to heart pacemaker could cause pacemaker interference or pacemaker failure.
Instructions
Read the ENTIRE IMPORTANT SAFETY INFORMATION section at the beginning of this document before set up or use of this product.
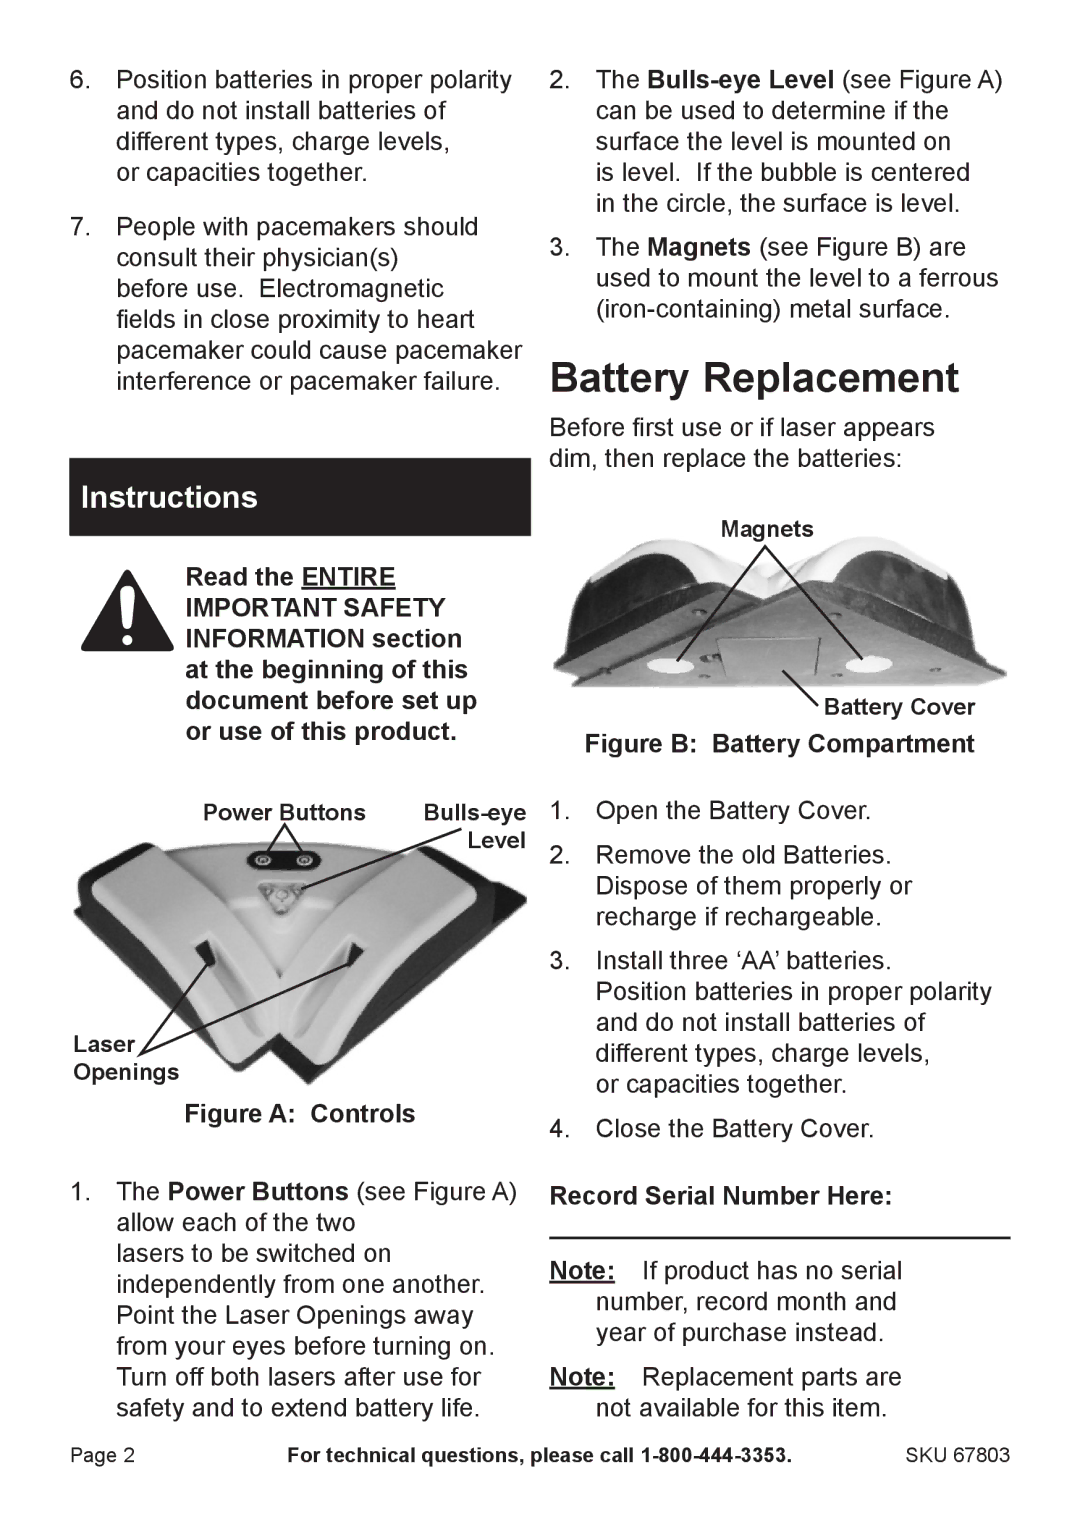
2.The Bulls‑eye Level (see Figure A) can be used to determine if the surface the level is mounted on
is level. If the bubble is centered in the circle, the surface is level.
3.The Magnets (see Figure B) are used to mount the level to a ferrous
Battery Replacement
Before first use or if laser appears dim, then replace the batteries:
Magnets
![]() Battery Cover
Battery Cover
Figure B: Battery Compartment
Power Buttons | Bulls‑eye |
| Level |
Laser
Openings
Figure A: Controls
1.The Power Buttons (see Figure A) allow each of the two
lasers to be switched on independently from one another. Point the Laser Openings away from your eyes before turning on. Turn off both lasers after use for safety and to extend battery life.
1.Open the Battery Cover.
2.Remove the old Batteries. Dispose of them properly or recharge if rechargeable.
3.Install three ‘AA’ batteries. Position batteries in proper polarity and do not install batteries of different types, charge levels,
or capacities together.
4.Close the Battery Cover.
Record Serial Number Here:
Note: If product has no serial number, record month and year of purchase instead.
Note: Replacement parts are not available for this item.
Page 2 | For technical questions, please call | SKU 67803 |
