Instructions for Putting into Use
Read the ENTIRE IMPORTANT SAFETY INFORMATION section at the beginning of this manual including all text under subheadings therein before
set up or use of this product.
TO PREVENT SERIOUS INJURY FROM ACCIDENTAL OPERATION:
Turn the Power Switch of the tool off and unplug the tool from its electrical outlet before assembling or making any adjustments to the tool.
Note: For additional information regarding the parts listed in the following pages, refer to Parts List and Assembly Diagram on page 13.
Blade Installation
1.WARNING! Do not use wet blades with this Tile Saw; it is not suitable for use with lubricant or water.
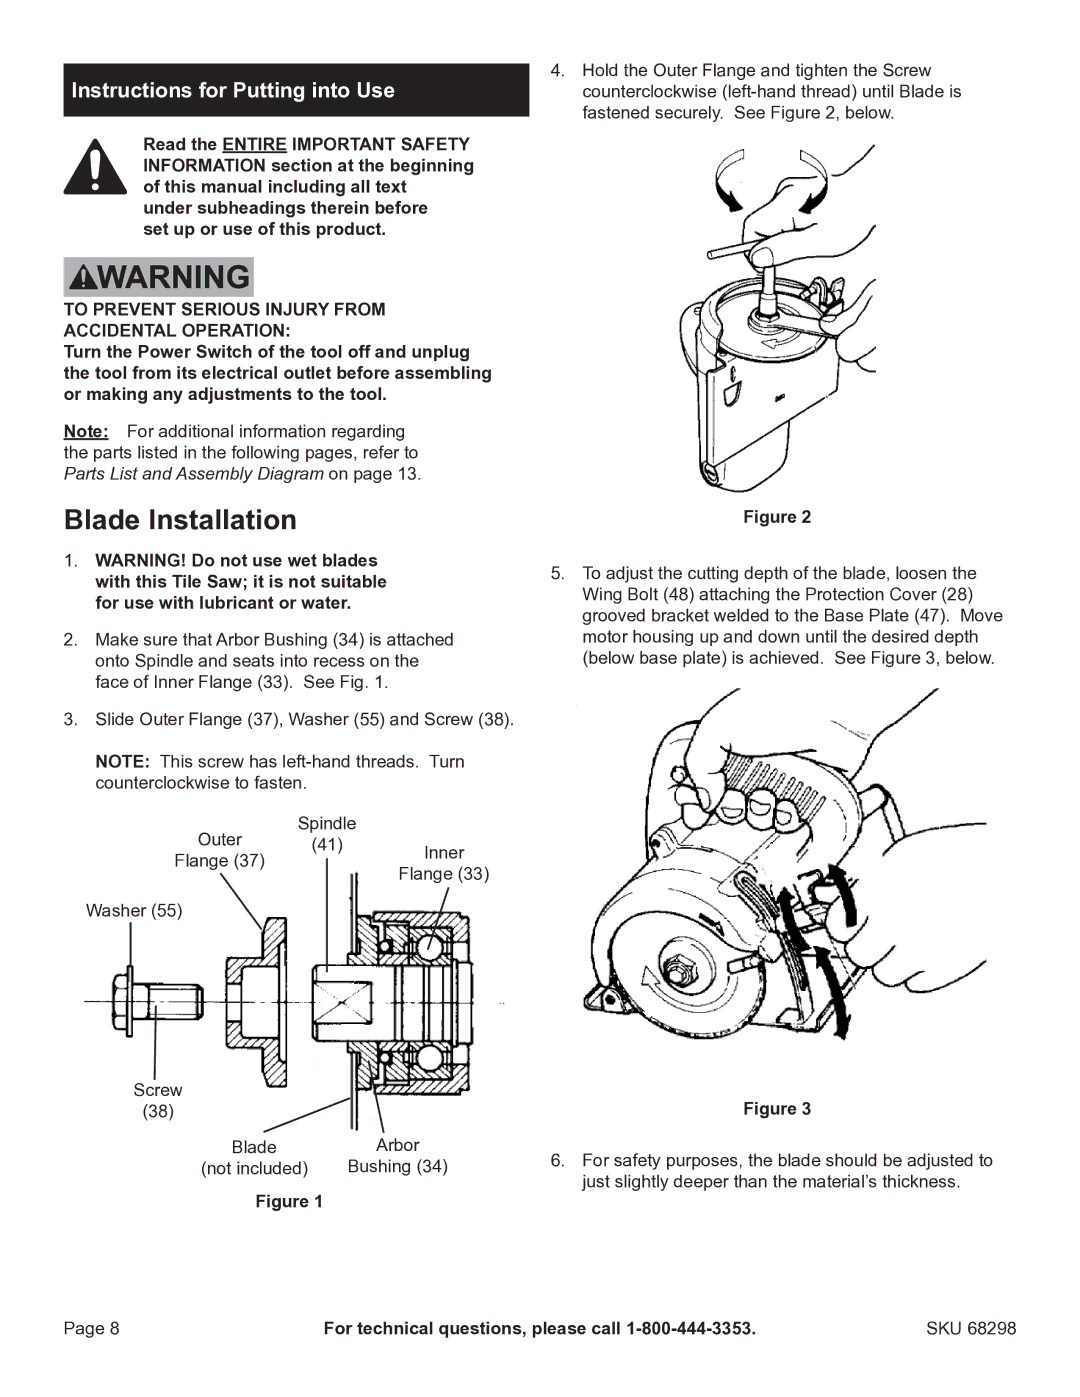
2.Make sure that Arbor Bushing (34) is attached onto Spindle and seats into recess on the face of Inner Flange (33). See Fig. 1.
3.Slide Outer Flange (37), Washer (55) and Screw (38).
NOTE: This screw has
| Outer | Spindle |
| |
| (41) | Inner | ||
| Flange (37) |
|
| |
|
|
| Flange (33) | |
|
|
|
| |
Washer (55) |
|
|
| |
|
|
|
|
|
|
|
|
|
|
Screw
(38)
BladeArbor
(not included) Bushing (34)
Figure 1
4.Hold the Outer Flange and tighten the Screw counterclockwise
Figure 2
5.To adjust the cutting depth of the blade, loosen the Wing Bolt (48) attaching the Protection Cover (28) grooved bracket welded to the Base Plate (47). Move motor housing up and down until the desired depth (below base plate) is achieved. See Figure 3, below.
Figure 3
6.For safety purposes, the blade should be adjusted to just slightly deeper than the material’s thickness.
Page 8 | For technical questions, please call | SKU 68298 |
