OPERATION
Setup
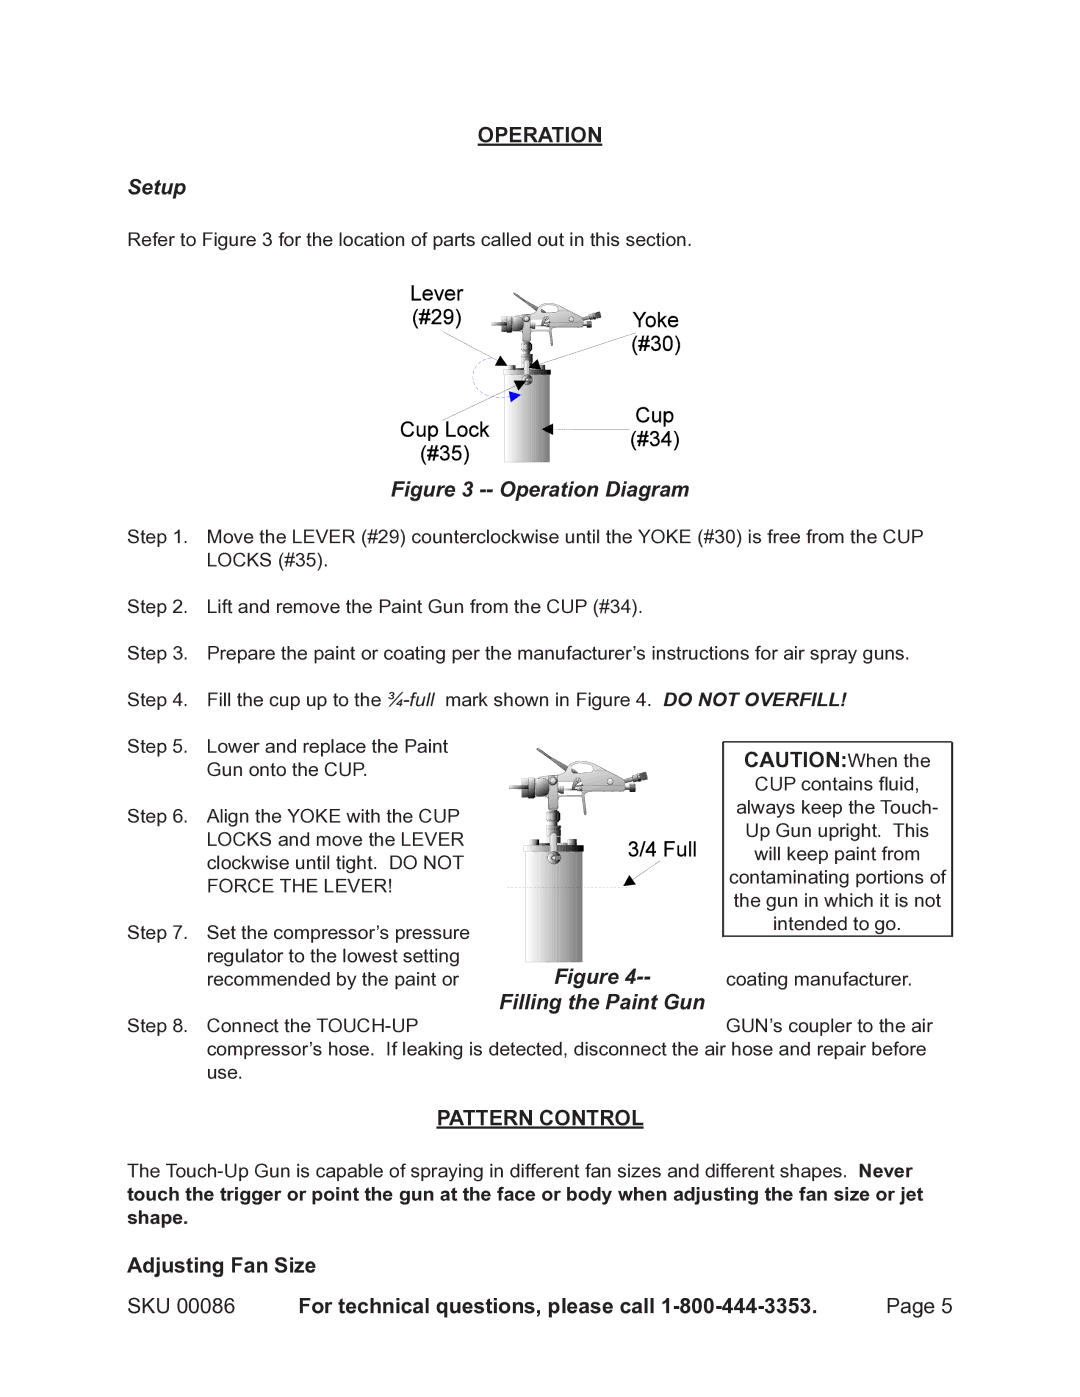
Refer to Figure 3 for the location of parts called out in this section.
Figure 3 -- Operation Diagram
Step 1. Move the LEVER (#29) counterclockwise until the YOKE (#30) is free from the CUP LOCKS (#35).
Step 2. Lift and remove the Paint Gun from the CUP (#34).
Step 3. Prepare the paint or coating per the manufacturer’s instructions for air spray guns.
Step 4. Fill the cup up to the
Step 5. Lower and replace the Paint
Gun onto the CUP.
Step 6. Align the YOKE with the CUP LOCKS and move the LEVER clockwise until tight. DO NOT FORCE THE LEVER!
Step 7. Set the compressor’s pressure regulator to the lowest setting recommended by the paint or
| CAUTION:When the |
| CUP contains fluid, |
| always keep the Touch- |
| Up Gun upright. This |
| will keep paint from |
| contaminating portions of |
| the gun in which it is not |
| intended to go. |
Figure | coating manufacturer. |
Filling the Paint Gun
Step 8. Connect the
PATTERN CONTROL
The
Adjusting Fan Size
SKU 00086 | For technical questions, please call | Page 5 |