Operating Instructions
Read the entire Important Safety Information section at the beginning of this manual including all text under subheadings therein before set up or use of this product.
Inspect tool before use, looking for damaged, loose, and missing parts. If any problems are found, do not use tool until repaired.
Tool Set Up
To prevent serious injury
from accidental operation:
Turn off the tool, detach the air supply, safely discharge any residual air pressure in the tool, and release the Trigger before performing any inspection, maintenance, or cleaning procedures.
To prevent serious injury: Do not adjust or tamper with any control or component in a way not specifically explained within this manual. Improper adjustment can result in tool failure or other serious hazards.
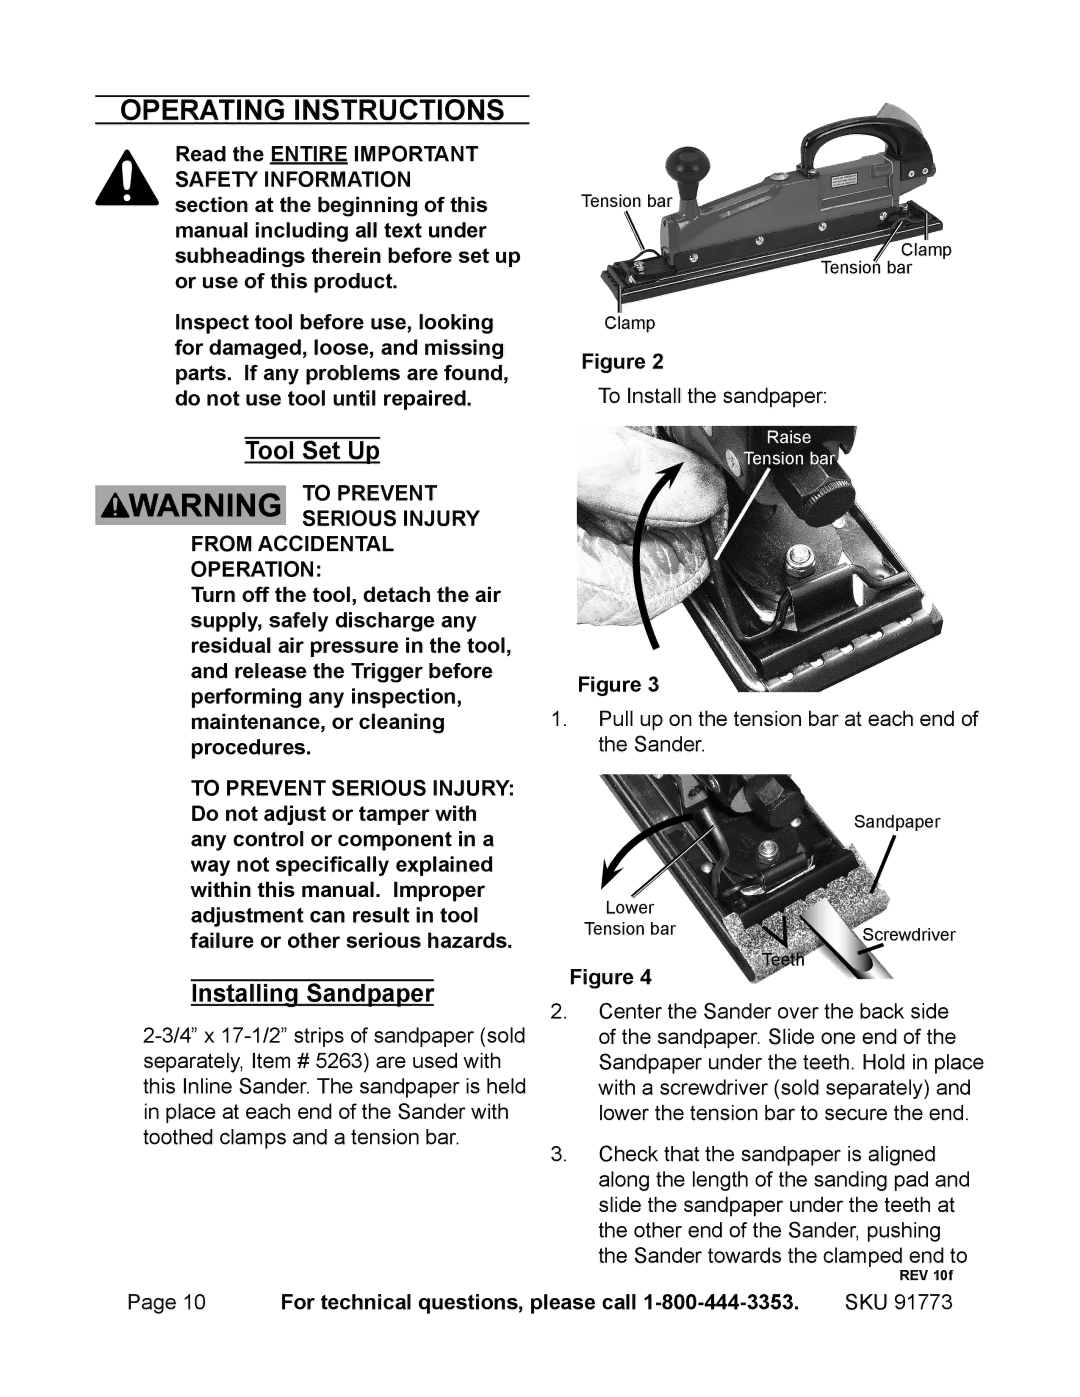
Tension bar
Clamp
Tension bar
Clamp
Figure 2
To Install the sandpaper:
Raise
Tension bar
Figure 3
1.Pull up on the tension bar at each end of the Sander.
| Sandpaper |
Lower |
|
Tension bar | Screwdriver |
Installing Sandpaper
Figure 4
Teeth
2.Center the Sander over the back side of the sandpaper. Slide one end of the Sandpaper under the teeth. Hold in place with a screwdriver (sold separately) and lower the tension bar to secure the end.
3.Check that the sandpaper is aligned along the length of the sanding pad and slide the sandpaper under the teeth at the other end of the Sander, pushing the Sander towards the clamped end to
REV 10f
Page 10 | For technical questions, please call | SKU 91773 |