6.Plug the Power Cord Plug (20) into the nearest 120 volt, grounded, electrical outlet, making sure to form a “drip loop” with the Power Cord. (See Figure D, page 9.)
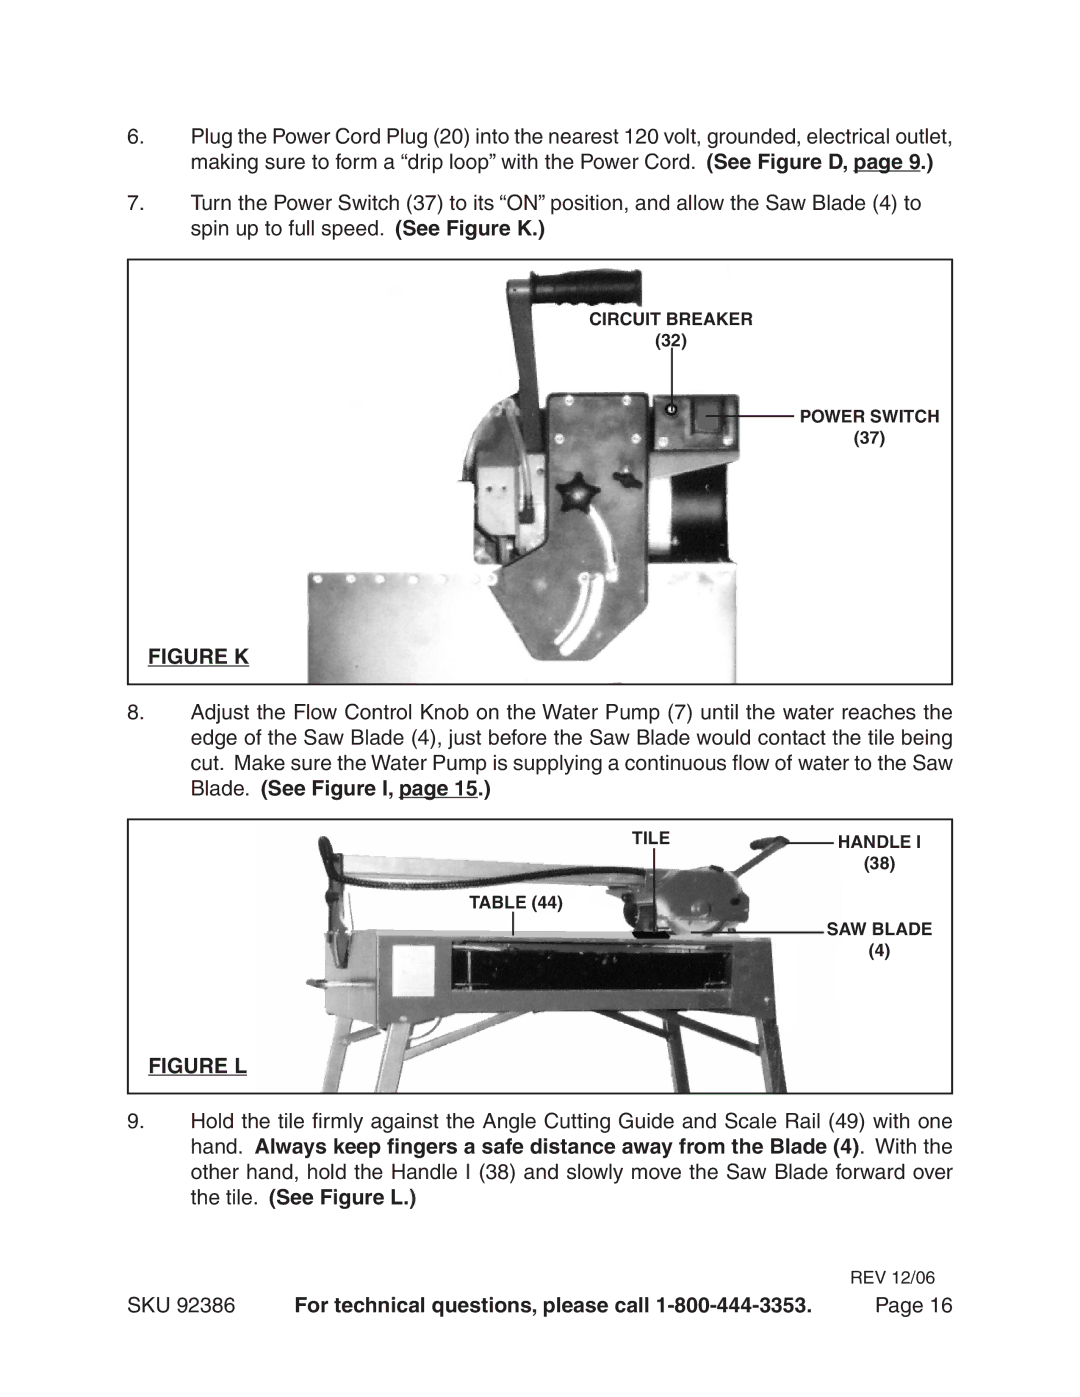
7.Turn the Power Switch (37) to its “ON” position, and allow the Saw Blade (4) to spin up to full speed. (See Figure K.)
CIRCUIT BREAKER
(32)
POWER SWITCH
(37)
FIGURE K
8.Adjust the Flow Control Knob on the Water Pump (7) until the water reaches the edge of the Saw Blade (4), just before the Saw Blade would contact the tile being cut. Make sure the Water Pump is supplying a continuous flow of water to the Saw Blade. (See Figure I, page 15.)
TILE |
| HANDLE I |
| ||
| (38) | |
TABLE (44)
SAW BLADE
(4)
FIGURE L
9.Hold the tile firmly against the Angle Cutting Guide and Scale Rail (49) with one hand. Always keep fingers a safe distance away from the Blade (4). With the other hand, hold the Handle I (38) and slowly move the Saw Blade forward over the tile. (See Figure L.)
REV 12/06
SKU 92386 | For technical questions, please call | Page 16 |
