Assembly
1.Remove the tripod from the case.
2.Open tripod’s legs and adjust positioning of each leg until base is level. Use bubble level in tripod base as a guide.
3.Remove the Laser Level from the case.
4.Install batteries, making sure to align batteries according to indicated polarity.
5.Attach the Laser to the tripod base. Do this by threading the bolt at the top of the tripod through the holes at the center of the Laser Level’s lower base.
6.Level the Laser by using the
7.Loosen the brass screw located under the center of the Laser Level’s upper base until the pendulum lock is released.
8.Turn on the Laser. Allow the laser lines to stabilize for 4 to 6 seconds before starting any measuring or leveling tasks.
9.To disassemble and store, follow the above directions in reverse. Please note: Retighten the brass screw under the Laser Level before continuing. This will lock down the pendulum during disassembly.
To prevent serious injury
from accidental operation: Turn Power Switch to Off before adjusting Level.
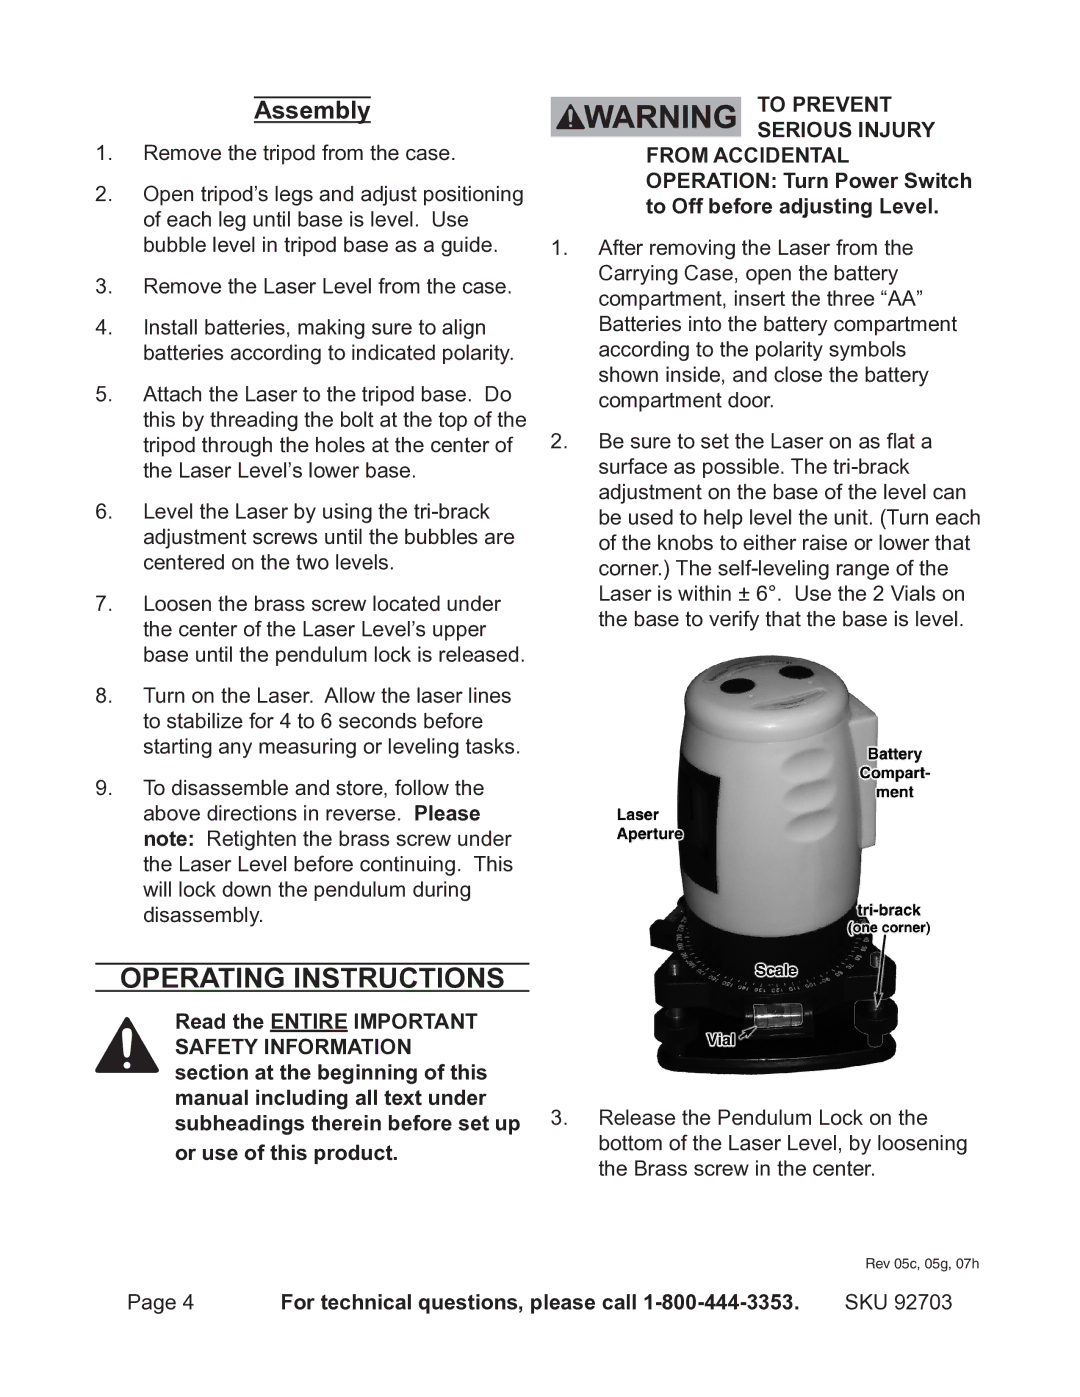
1.After removing the Laser from the Carrying Case, open the battery compartment, insert the three “AA” Batteries into the battery compartment according to the polarity symbols shown inside, and close the battery compartment door.
2.Be sure to set the Laser on as flat a surface as possible. The
Operating Instructions
Read the entire Important |
| |
Safety Information |
| |
section at the beginning of this |
| |
manual including all text under | 3. Release the Pendulum Lock on the | |
subheadings therein before set up | ||
or use of this product. | bottom of the Laser Level, by loosening | |
the Brass screw in the center. | ||
|
|
| Rev 05c, 05g, 07h |
Page 4 | For technical questions, please call | SKU 92703 |
