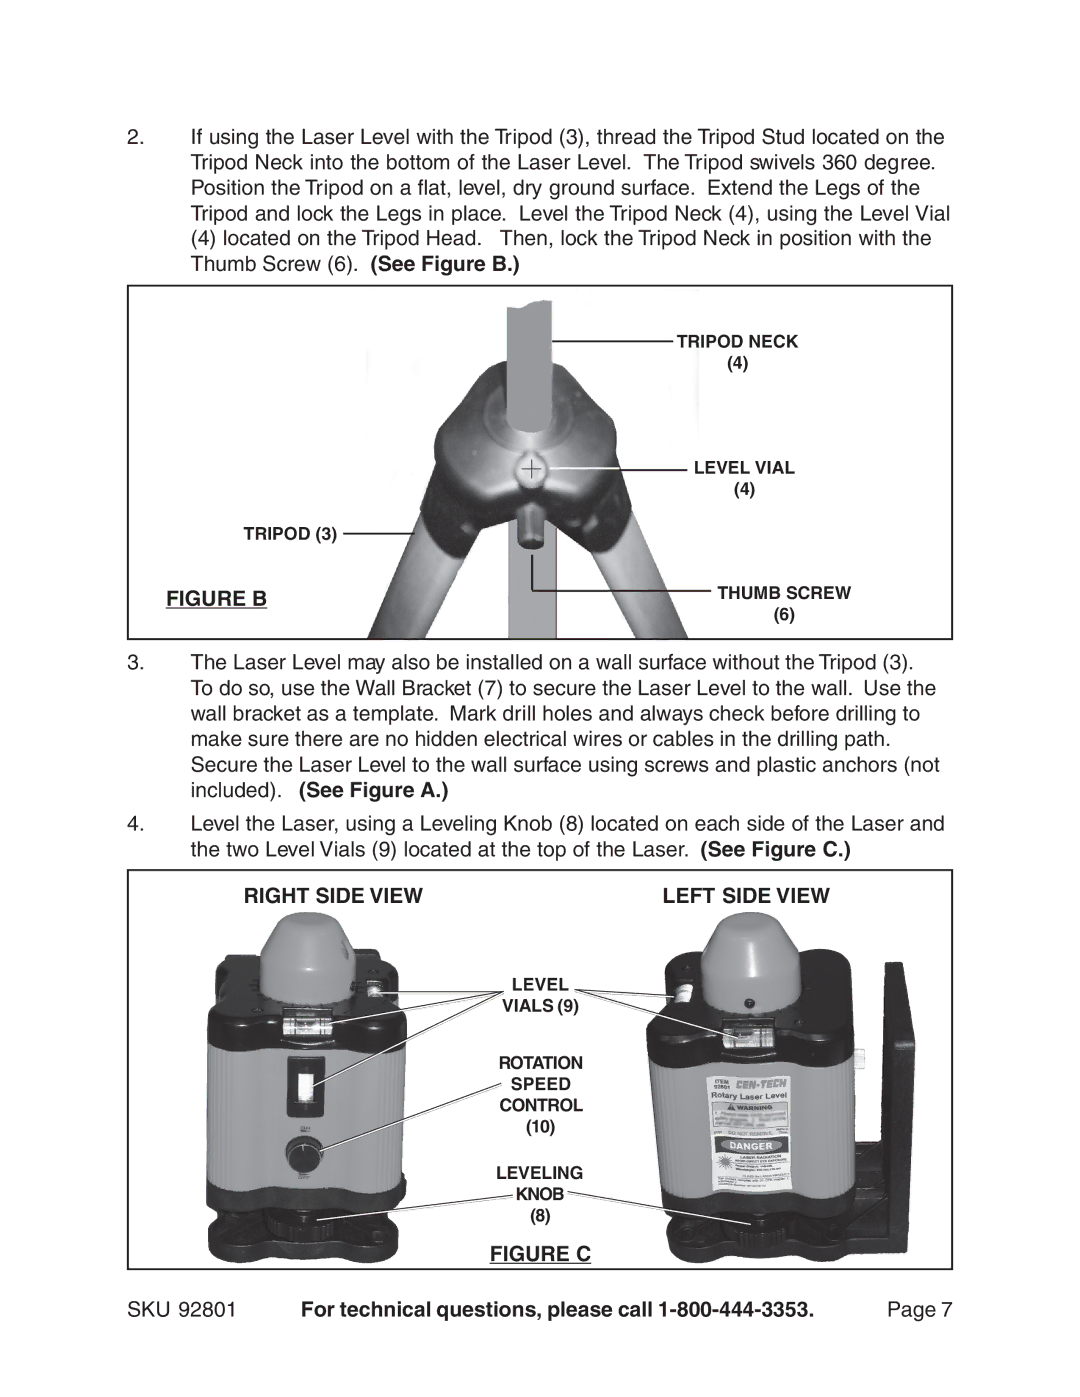
2.If using the Laser Level with the Tripod (3), thread the Tripod Stud located on the Tripod Neck into the bottom of the Laser Level. The Tripod swivels 360 degree. Position the Tripod on a flat, level, dry ground surface. Extend the Legs of the Tripod and lock the Legs in place. Level the Tripod Neck (4), using the Level Vial
(4) located on the Tripod Head. Then, lock the Tripod Neck in position with the Thumb Screw (6). (See Figure B.)
TRIPOD (3)
FIGURE B
TRIPOD NECK
(4)
![]() LEVEL VIAL
LEVEL VIAL
(4)
THUMB SCREW
(6)
3.The Laser Level may also be installed on a wall surface without the Tripod (3). To do so, use the Wall Bracket (7) to secure the Laser Level to the wall. Use the wall bracket as a template. Mark drill holes and always check before drilling to make sure there are no hidden electrical wires or cables in the drilling path. Secure the Laser Level to the wall surface using screws and plastic anchors (not included). (See Figure A.)
4.Level the Laser, using a Leveling Knob (8) located on each side of the Laser and the two Level Vials (9) located at the top of the Laser. (See Figure C.)
RIGHT SIDE VIEW | LEFT SIDE VIEW |
LEVEL
VIALS (9)
ROTATION
SPEED
CONTROL (10)
LEVELING
KNOB
(8)
FIGURE C
SKU 92801 | For technical questions, please call | Page 7 |