Assembly
Please note: It is recommended that two or more able workers assemble this product.
Setting up the Tripod Base
1.Place the Tripod Base Assembly (1) on the floor with the Casters (4) down.
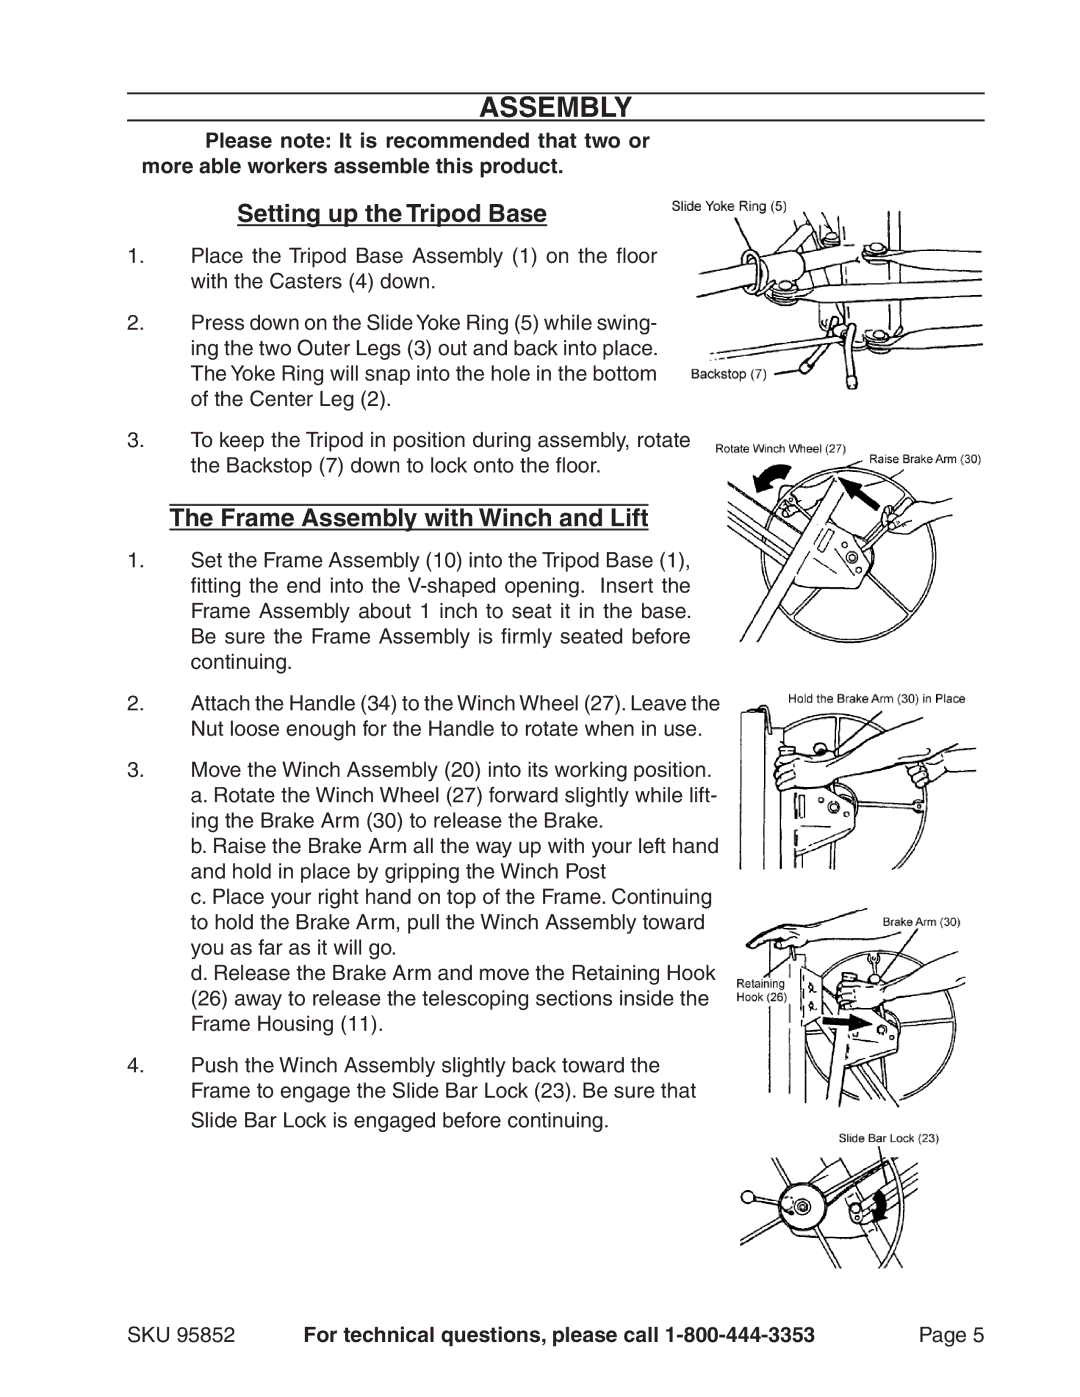
2.Press down on the Slide Yoke Ring (5) while swing- ing the two Outer Legs (3) out and back into place. The Yoke Ring will snap into the hole in the bottom of the Center Leg (2).
3.To keep the Tripod in position during assembly, rotate the Backstop (7) down to lock onto the floor.
The Frame Assembly with Winch and Lift
1.Set the Frame Assembly (10) into the Tripod Base (1), fitting the end into the
2.Attach the Handle (34) to the Winch Wheel (27). Leave the Nut loose enough for the Handle to rotate when in use.
3.Move the Winch Assembly (20) into its working position.
a.Rotate the Winch Wheel (27) forward slightly while lift- ing the Brake Arm (30) to release the Brake.
b.Raise the Brake Arm all the way up with your left hand and hold in place by gripping the Winch Post
c.Place your right hand on top of the Frame. Continuing to hold the Brake Arm, pull the Winch Assembly toward you as far as it will go.
d.Release the Brake Arm and move the Retaining Hook (26) away to release the telescoping sections inside the Frame Housing (11).
4.Push the Winch Assembly slightly back toward the Frame to engage the Slide Bar Lock (23). Be sure that Slide Bar Lock is engaged before continuing.
1.
SKU 95852 | For technical questions, please call | Page |
