ADJUSTMENT
The instructions below describe how each part of the home gym can be adjusted. Refer to the exercise poster accompanying this manual to see how the home gym should be set up for each exercise. IMPORTANT: When attaching the lat bar or nylon strap, make sure that the attachments are in the correct starting position for the exercise to be performed. If there is any slack in the cables or chain as an exercise is performed, the effectiveness of the exercise will be reduced.
ADDING WEIGHTS TO THE WEIGHT CARRIAGE
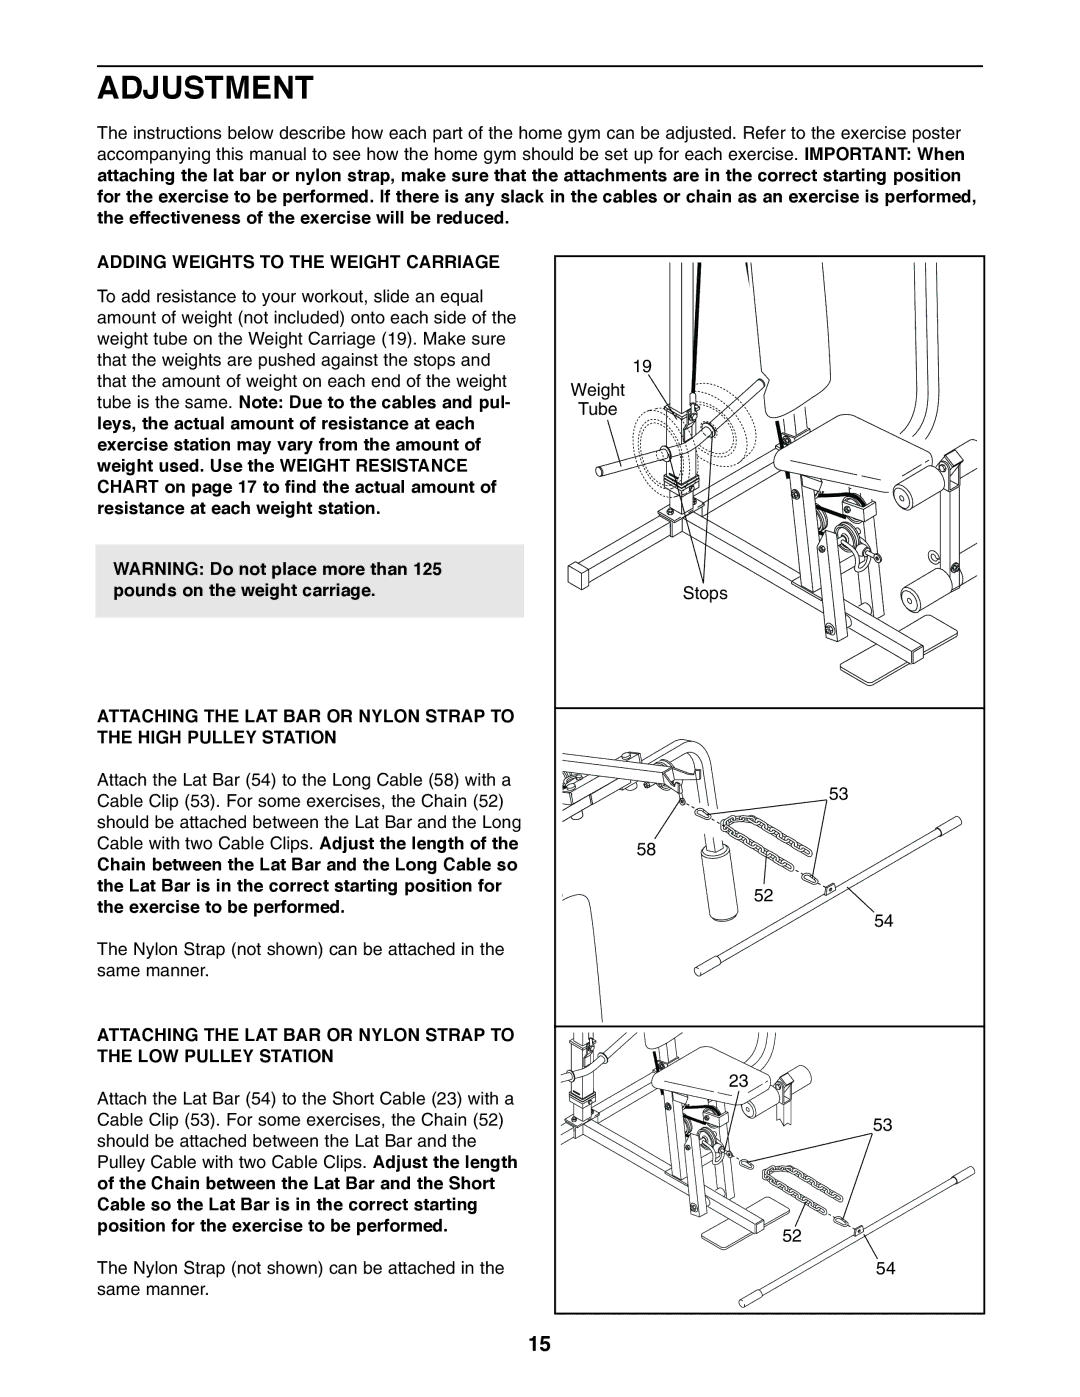
To add resistance to your workout, slide an equal amount of weight (not included) onto each side of the weight tube on the Weight Carriage (19). Make sure that the weights are pushed against the stops and that the amount of weight on each end of the weight tube is the same. Note: Due to the cables and pul- leys, the actual amount of resistance at each exercise station may vary from the amount of weight used. Use the WEIGHT RESISTANCE CHART on page 17 to find the actual amount of resistance at each weight station.
WARNING: Do not place more than 125 pounds on the weight carriage.
ATTACHING THE LAT BAR OR NYLON STRAP TO THE HIGH PULLEY STATION
Attach the Lat Bar (54) to the Long Cable (58) with a Cable Clip (53). For some exercises, the Chain (52) should be attached between the Lat Bar and the Long Cable with two Cable Clips. Adjust the length of the
Chain between the Lat Bar and the Long Cable so the Lat Bar is in the correct starting position for the exercise to be performed.
The Nylon Strap (not shown) can be attached in the same manner.
ATTACHING THE LAT BAR OR NYLON STRAP TO THE LOW PULLEY STATION
Attach the Lat Bar (54) to the Short Cable (23) with a Cable Clip (53). For some exercises, the Chain (52) should be attached between the Lat Bar and the Pulley Cable with two Cable Clips. Adjust the length of the Chain between the Lat Bar and the Short Cable so the Lat Bar is in the correct starting position for the exercise to be performed.
The Nylon Strap (not shown) can be attached in the same manner.
19 |
Weight |
Tube |
Stops |
53 |
58 |
52 |
54 |
23 |
53 |
52 |
54 |
15
