
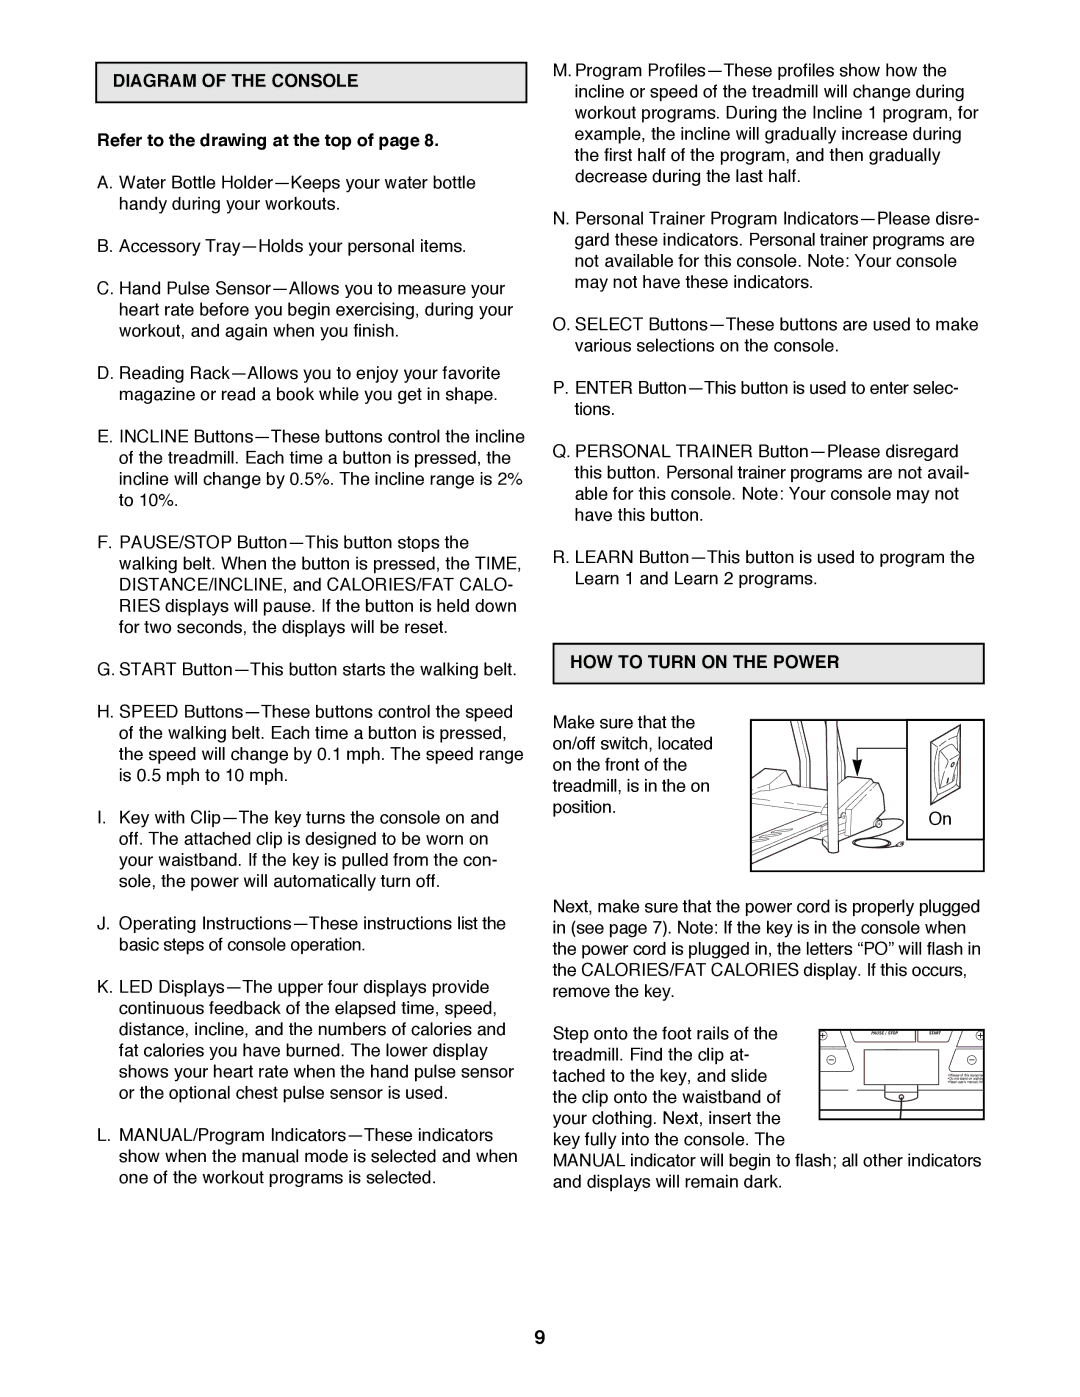
831.297872 specifications
The Healthrider 831.297872 is a versatile piece of fitness equipment designed to enhance your workout experience and support your health and fitness goals. Known for its innovative features and technologies, this machine caters to users of all fitness levels, making it a popular choice for home gyms.One of the standout features of the Healthrider 831.297872 is its adjustable resistance system. This allows users to customize the intensity of their workouts, making it suitable for beginners and advanced athletes alike. The resistance can be easily modified, enabling users to progress at their own pace and achieve their desired fitness outcomes.
The Healthrider 831.297872 also comes equipped with an ergonomic design that prioritizes user comfort. The machine features a padded seat and handlebars, ensuring that users can maintain proper form during workouts without sacrificing comfort. Its adjustable seat height accommodates a variety of body types, promoting a better fit and more effective workout.
Additionally, the Healthrider 831.297872 incorporates advanced tracking technologies. The built-in LCD display provides essential information such as time, distance, speed, and calories burned. This real-time feedback keeps users motivated and allows them to monitor their progress over time. Whether you're aiming to lose weight, build endurance, or improve cardiovascular health, having this data at your fingertips is invaluable.
Another notable characteristic of this machine is its compact design, which makes it ideal for home use. The Healthrider 831.297872 is designed to fit into smaller spaces without compromising on performance. It is lightweight and easily movable, allowing users to store it out of sight when not in use.
Furthermore, the Healthrider 831.297872 supports a variety of workout programs. From interval training to steady-state cardio, the machine offers multiple options to keep your routine fresh and engaging. Many users appreciate the diversity of workouts available, which helps prevent plateaus and keeps motivation high.
In conclusion, the Healthrider 831.297872 stands out as a comprehensive fitness solution. With its adjustable resistance, ergonomic design, advanced tracking technologies, compact form, and diverse workout options, this machine is ideal for anyone looking to improve their fitness and overall well-being. It combines convenience and effectiveness, making it a worthy addition to any home gym setup.