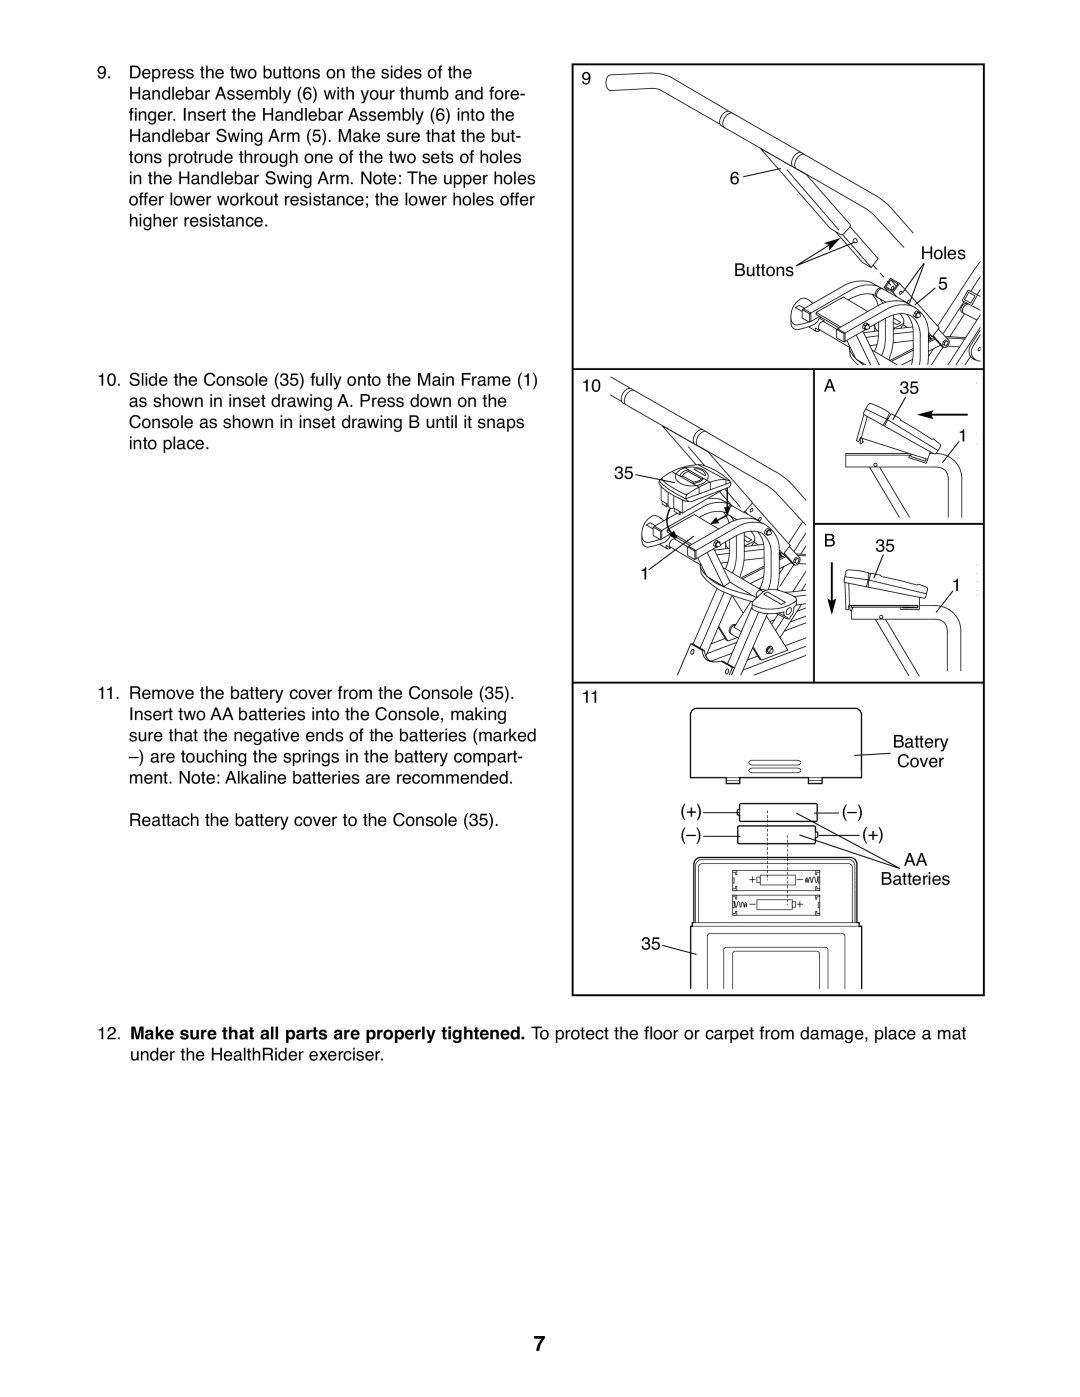
9.Depress the two buttons on the sides of the Handlebar Assembly (6) with your thumb and fore- finger. Insert the Handlebar Assembly (6) into the Handlebar Swing Arm (5). Make sure that the but- tons protrude through one of the two sets of holes in the Handlebar Swing Arm. Note: The upper holes offer lower workout resistance; the lower holes offer higher resistance.
10.Slide the Console (35) fully onto the Main Frame (1) as shown in inset drawing A. Press down on the Console as shown in inset drawing B until it snaps into place.
11.Remove the battery cover from the Console (35). Insert two AA batteries into the Console, making sure that the negative ends of the batteries (marked
9
6 |
| |
Buttons | Holes | |
5 | ||
|
10 |
| A | 35 |
| 35 |
| 1 |
|
|
| |
| 1 | B | 35 |
|
| 1 | |
11 |
|
| Battery |
|
|
| |
|
|
| Cover |
(+) | AA | |
(+) | ||
| Batteries | |
35
12.Make sure that all parts are properly tightened. To protect the floor or carpet from damage, place a mat under the HealthRider exerciser.
7
