R
BODEGA BAY WOOD INSERT
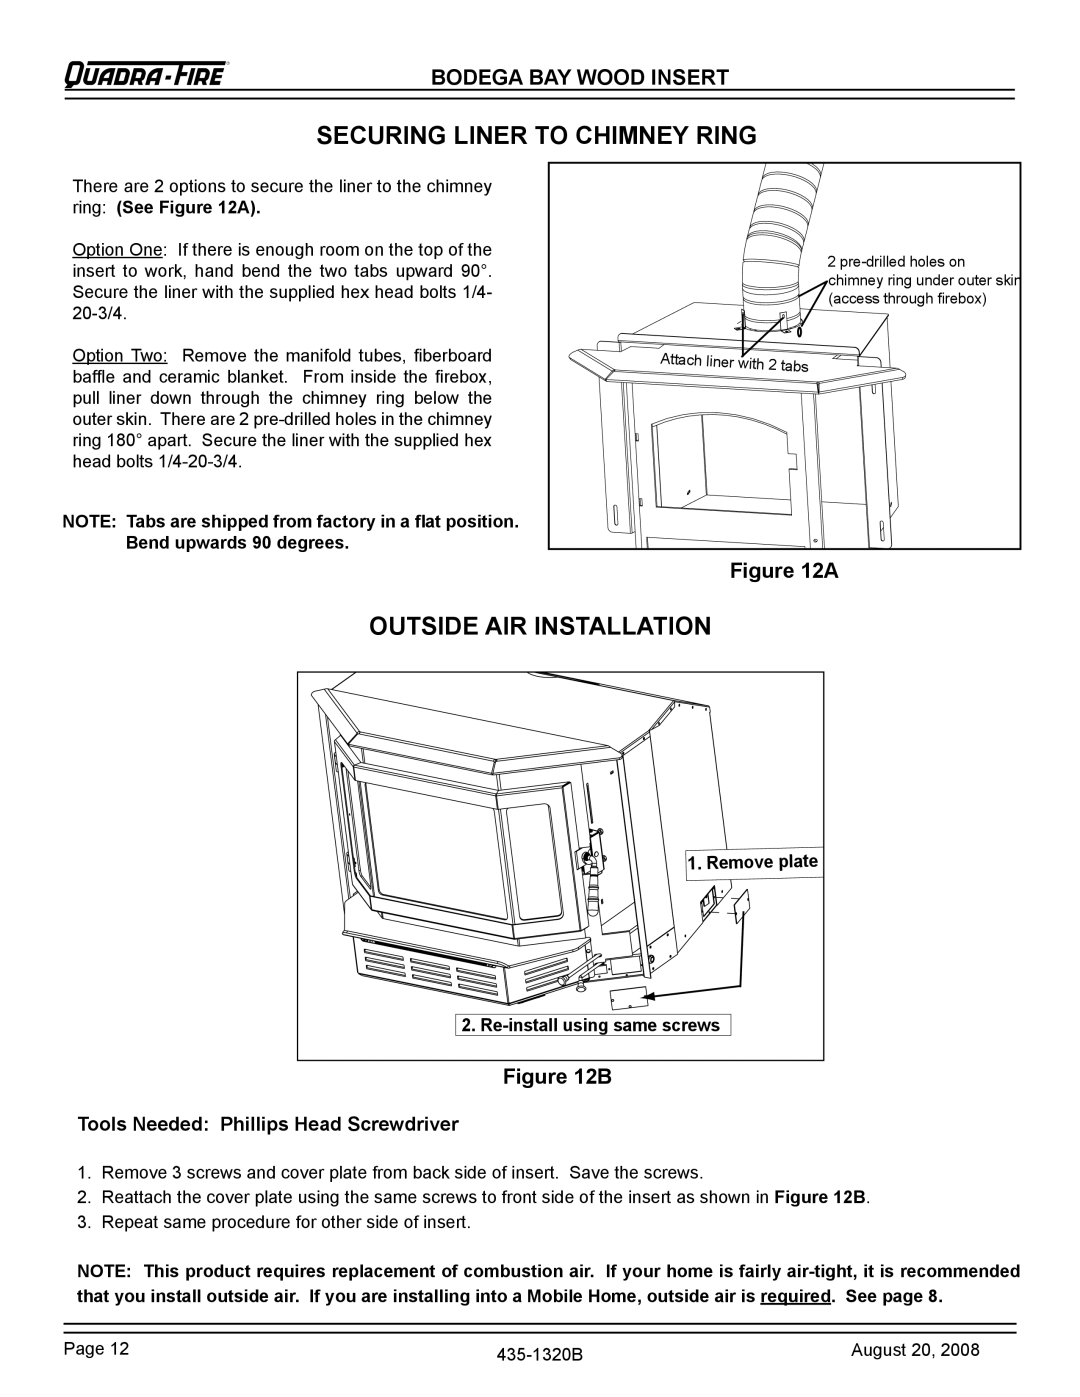
SECURING LINER TO CHIMNEY RING
There are 2 options to secure the liner to the chimney ring: (See Figure 12A).
Option One: If there is enough room on the top of the insert to work, hand bend the two tabs upward 90°. Secure the liner with the supplied hex head bolts 1/4-
Option Two: Remove the manifold tubes, fiberboard baffle and ceramic blanket. From inside the firebox, pull liner down through the chimney ring below the outer skin. There are 2
NOTE: Tabs are shipped from factory in a flat position. Bend upwards 90 degrees.
2
Attach liner with 2 tabs
Figure 12A
OUTSIDE AIR INSTALLATION
1. Remove plate
2.
Figure 12B
Tools Needed: Phillips Head Screwdriver
1.Remove 3 screws and cover plate from back side of insert. Save the screws.
2.Reattach the cover plate using the same screws to front side of the insert as shown in Figure 12B.
3.Repeat same procedure for other side of insert.
NOTE: This product requires replacement of combustion air. If your home is fairly
Page 12 | August 20, 2008 |