
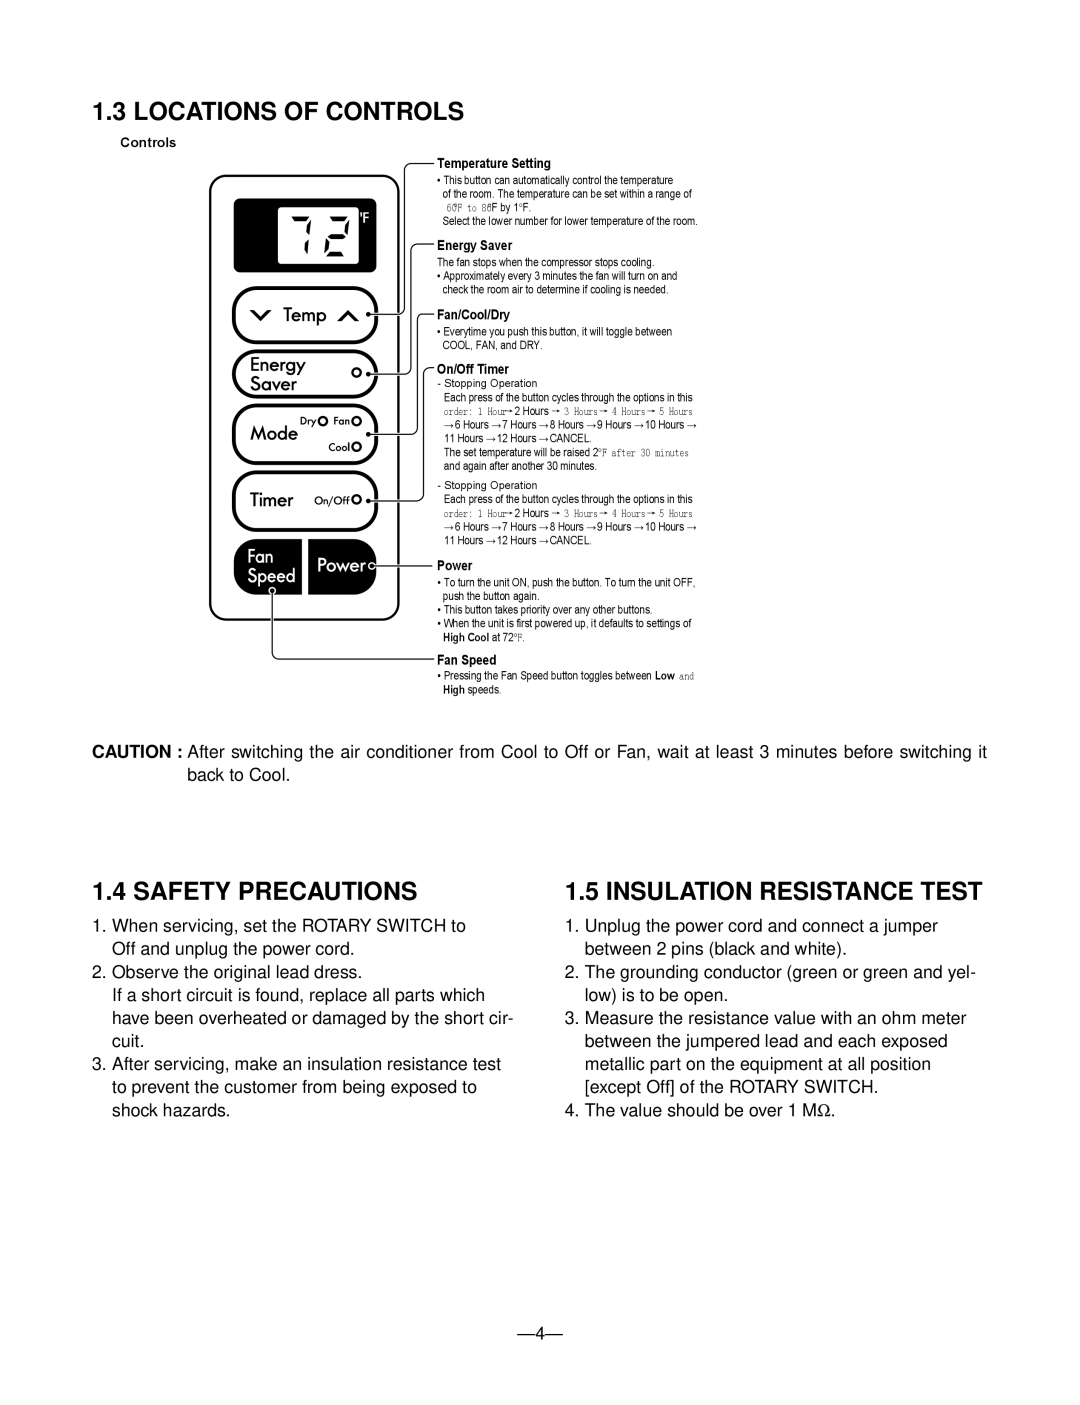
RADS-51B specifications
The Heat Controller RADS-51B is a versatile and efficient heating and cooling solution designed for residential and commercial environments. With a focus on advanced technology and user convenience, this model stands out in the crowded HVAC marketplace.One of the main features of the RADS-51B is its inverter-driven technology. This innovative approach allows the unit to adjust its cooling and heating output according to the immediate needs of the space. Unlike traditional systems that operate at a fixed speed, the inverter technology enables the RADS-51B to operate more efficiently, significantly reducing energy consumption and utility bills. This feature contributes to a more stable indoor environment by minimizing temperature fluctuations.
The RADS-51B is also equipped with a powerful dual-mode operation, which allows users to switch between heating and cooling modes effortlessly. This flexibility makes it ideal for regions that experience varied temperatures throughout the year. The unit’s heating capability even includes a low-temperature operation feature, which ensures reliable heating performance even in extreme cold conditions.
Another notable characteristic of the RADS-51B is its comprehensive digital display and remote control functionality. The user-friendly interface provides easy access to settings and temperature adjustments, allowing users to create customized heating and cooling schedules to suit their lifestyle. The remote control feature adds an extra layer of convenience, enabling adjustments from anywhere in the home or office.
In addition to efficiency and convenience, the RADS-51B prioritizes user comfort with its quiet operation. The design minimizes noise levels, ensuring that the unit operates in a discreet manner without disrupting daily activities.
Built with durability in mind, the RADS-51B features a robust construction designed to withstand the demands of continuous use. The materials are chosen for their resilience, ensuring a longer lifespan and fewer maintenance issues over time.
Environmentally conscious consumers will appreciate that the RADS-51B uses eco-friendly refrigerants, aligning with modern standards for energy-efficient and sustainable practices.
In summary, the Heat Controller RADS-51B combines advanced inverter technology, dual-mode operation, user-friendly controls, and quiet performance to deliver an exceptional indoor climate experience. Whether for residential or commercial applications, the RADS-51B stands as a reliable choice for effective heating and cooling solutions.