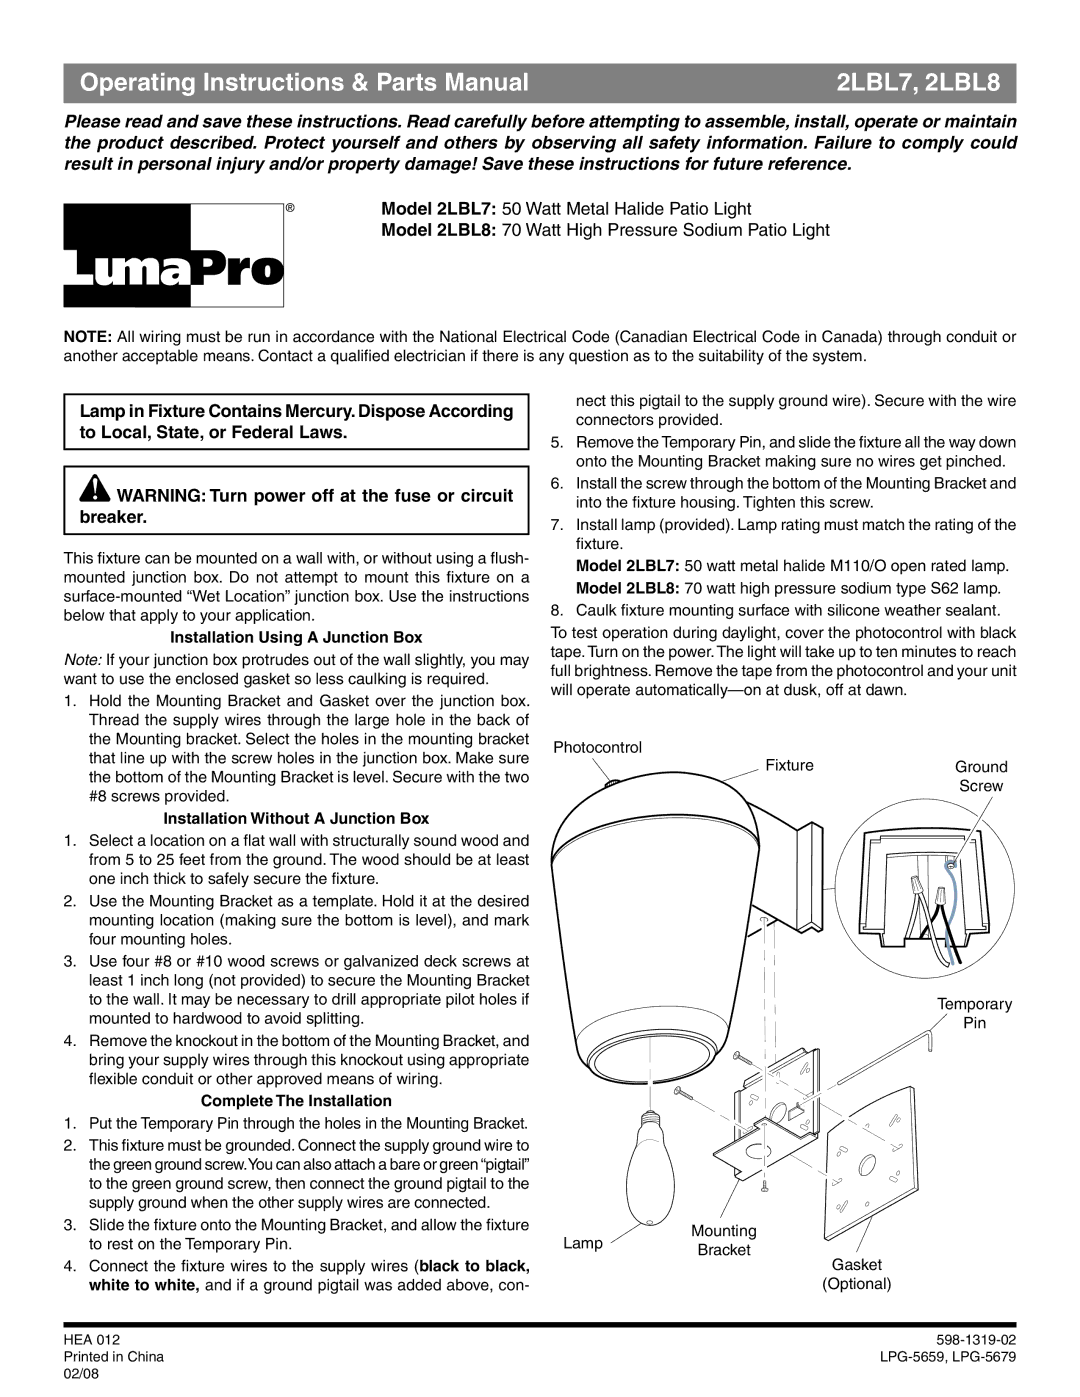
2LBL8, 2LBL7 specifications
Heath Zenith has long been a trusted name in the realm of home security and lighting solutions, and their models 2LBL7 and 2LBL8 exemplify the brand's commitment to quality, innovation, and functionality. These models are particularly popular for outdoor use, bringing together advanced technologies designed to enhance both safety and convenience.One of the standout features of the Heath Zenith 2LBL7 and 2LBL8 is their dual function as both motion-activated lights and security fixtures. Equipped with a high-performance motion sensor, these lights are capable of detecting activity within a range of up to 70 feet, with an adjustable sensitivity setting to reduce the likelihood of false alarms from pets or passing vehicles. This makes them ideal for protecting entrances and driveways, enhancing visibility at night while also providing a deterrent to potential intruders.
In terms of illumination, both models utilize energy-efficient LED technology, which not only ensures a bright and effective lighting output but also contributes to energy savings. The lights have a color temperature of 5000K, delivering a daylight-like brightness that enhances clarity and visibility in outdoor spaces. Additionally, they are designed to provide a significant number of lumens, ensuring that even large areas are well-lit when motion is detected.
Another notable characteristic of the Heath Zenith 2LBL7 and 2LBL8 is their weather-resistant design. Constructed with durable materials, these lights are built to withstand a range of environmental conditions, including rain, snow, and extreme temperatures. This makes them perfectly suitable for various outdoor settings, from residential patios to commercial properties.
Installation is made easier with the included mounting hardware and straightforward instructions, which allow homeowners and business owners alike to set up these fixtures with minimal hassle. The adjustable heads on both models also enable precise direction of the light, optimizing coverage for specific areas as needed.
Overall, the Heath Zenith 2LBL7 and 2LBL8 embody a perfect blend of functionality, efficiency, and durability. With their advanced motion sensing capabilities, energy-efficient LEDs, and weather-resistant construction, they serve as reliable options for enhancing outdoor security and lighting solutions, making them a solid investment for any property owner looking to boost safety and convenience.