Channel Settings
Note: The channel is factory set. Most instal- lations will not require you to change the two dip switches on your remote control or receiver.
Note: If purchasing more than one remote control system, select different operating channels unless you want one remote control to operate multiple receivers.
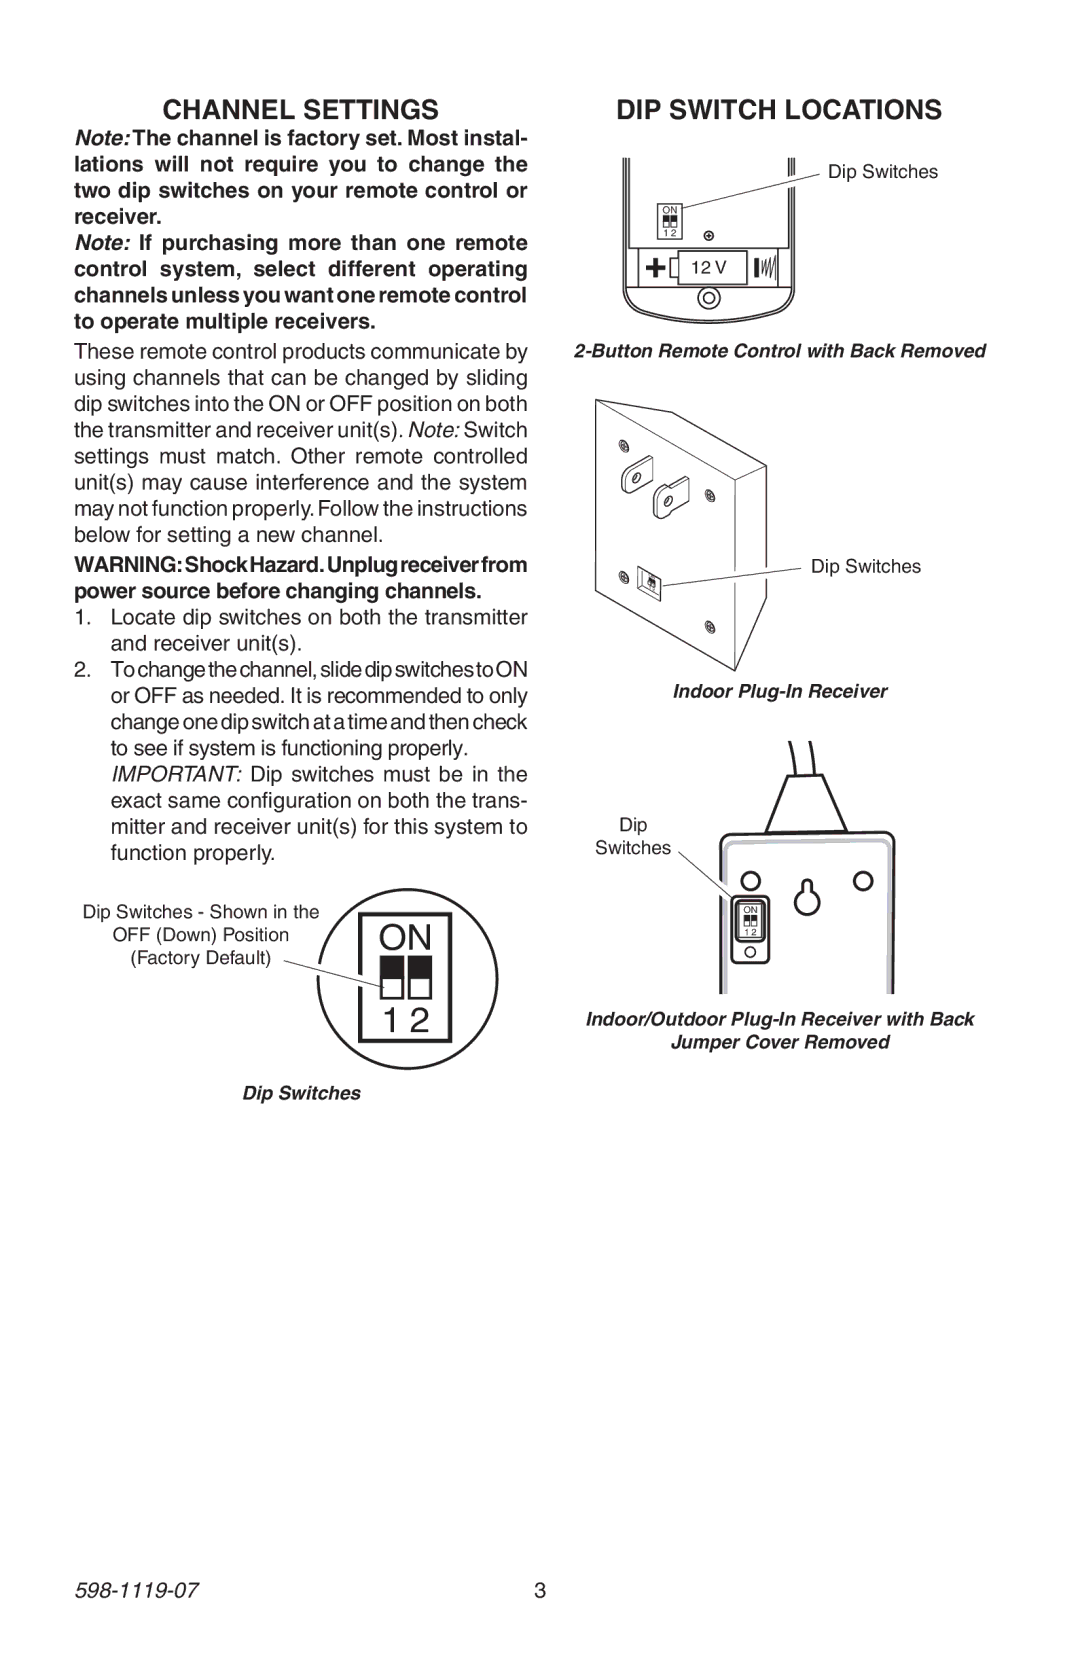
These remote control products communicate by using channels that can be changed by sliding dip switches into the ON or OFF position on both the transmitter and receiver unit(s). Note: Switch settings must match. Other remote controlled unit(s) may cause interference and the system may not function properly. Follow the instructions below for setting a new channel.
WARNING:ShockHazard.Unplugreceiverfrom power source before changing channels.
1.Locate dip switches on both the transmitter and receiver unit(s).
2.Tochangethechannel,slidedipswitchestoON or OFF as needed. It is recommended to only change one dip switch at a time and then check to see if system is functioning properly.
IMPORTANT: Dip switches must be in the exact same configuration on both the trans- mitter and receiver unit(s) for this system to function properly.
Dip Switches - Shown in the
OFF (Down) Position ON
(Factory Default)
1 2
Dip Switches
Dip Switch Locations
Dip Switches
ON
1 2
12 V
Dip Switches
ON
12
Indoor
Dip
Switches
ON
1 2
Indoor/Outdoor
Jumper Cover Removed
