
MSL360FWPB specifications
Heath Zenith MSL360FWPB is a versatile motion-sensor floodlight designed to provide enhanced security and illumination for residential and commercial properties. This robust lighting solution boasts a host of innovative features and technologies that set it apart in the outdoor lighting market.One of the standout characteristics of the MSL360FWPB is its large detection zone. The floodlight is equipped with a motion sensor that detects movement up to 240 degrees, covering areas that are typically more vulnerable to intrusions. This extensive range allows homeowners to benefit from increased security, as the light activates whenever movement is sensed within the designated area.
Another significant feature is the adjustable timer and sensitivity settings. Users can customize how long the light stays on after it detects movement, with options that typically range from a few seconds to several minutes. Additionally, the sensitivity can be fine-tuned to ensure that the light activates only when desired, reducing the chance of false alarms caused by passing animals or environmental factors.
The MSL360FWPB is not just about functionality; it also includes energy-efficient technologies. Utilizing LED bulbs, this floodlight provides bright illumination while consuming significantly less power than traditional incandescent bulbs. This energy efficiency not only leads to lower utility bills but also contributes to a more sustainable living environment.
Durability is another key characteristic of this floodlight. The MSL360FWPB is constructed from high-quality materials designed to withstand various weather conditions. With a weather-resistant rating, it can endure rain, snow, and extreme temperatures, ensuring reliable performance year-round.
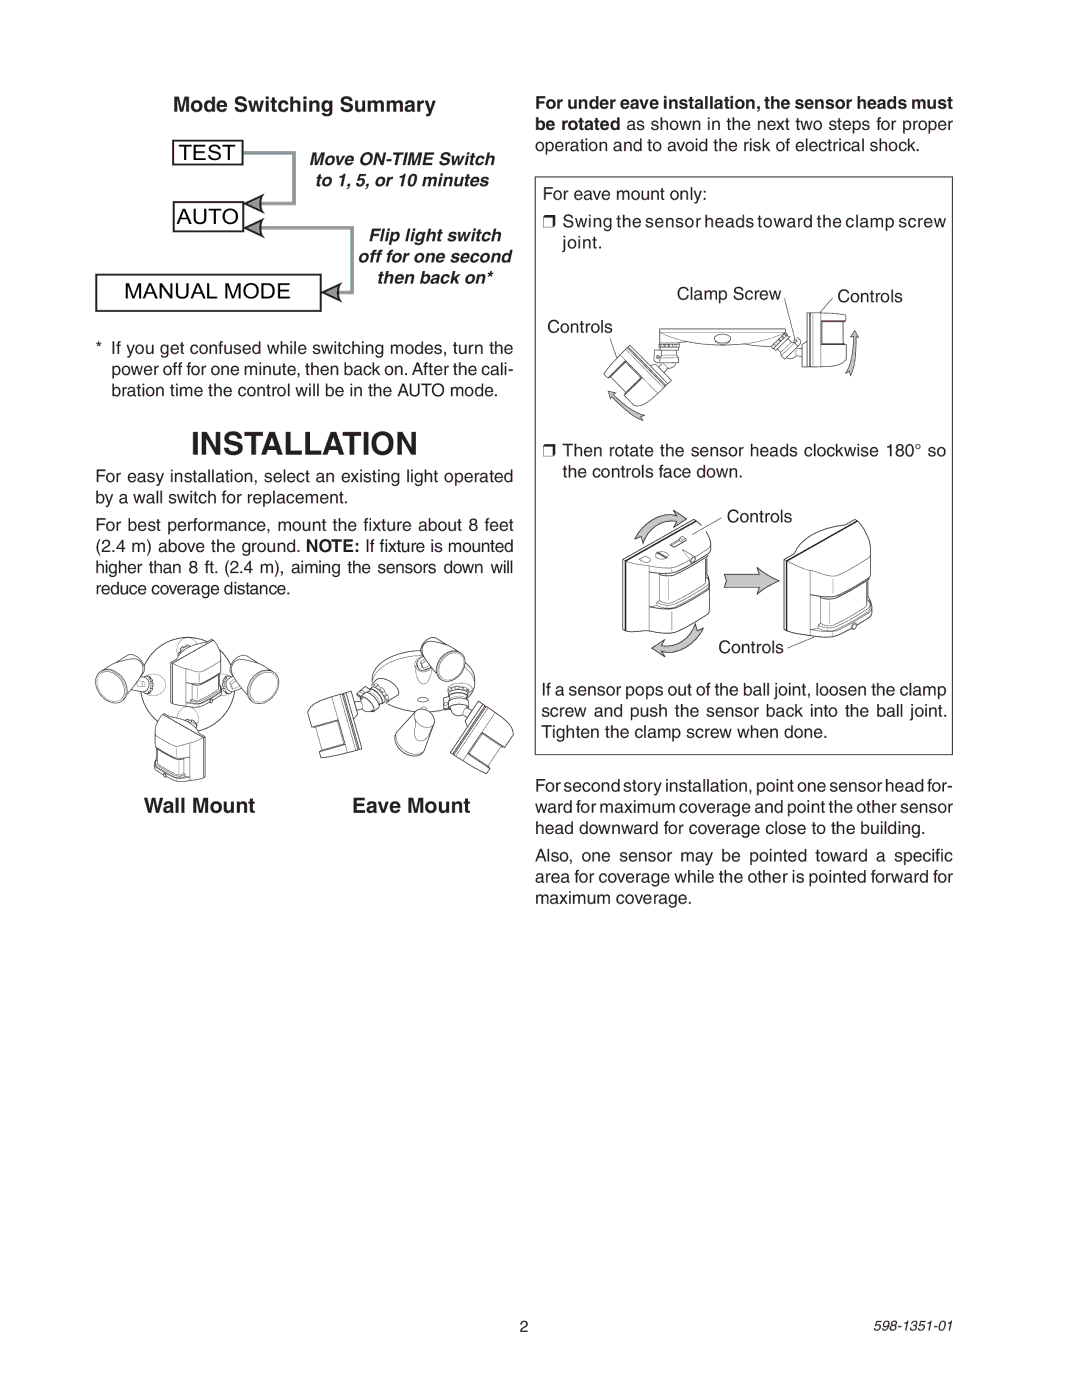
Installation is made easy with the MSL360FWPB, as it includes a mounting bracket and necessary hardware, allowing for quick and hassle-free setup. This user-friendly approach means that even those with limited DIY experience can enjoy the benefits of enhanced outdoor lighting.
Overall, the Heath Zenith MSL360FWPB is a feature-rich motion-sensor floodlight that combines security, energy efficiency, and durability. Its customizable settings, broad detection range, and robust construction make it a preferred choice for property owners looking to illuminate and secure their spaces effectively. Whether for enhancing safety or simply for improved visibility, this floodlight is a reliable solution for any outdoor lighting need.