
SL-7001 specifications
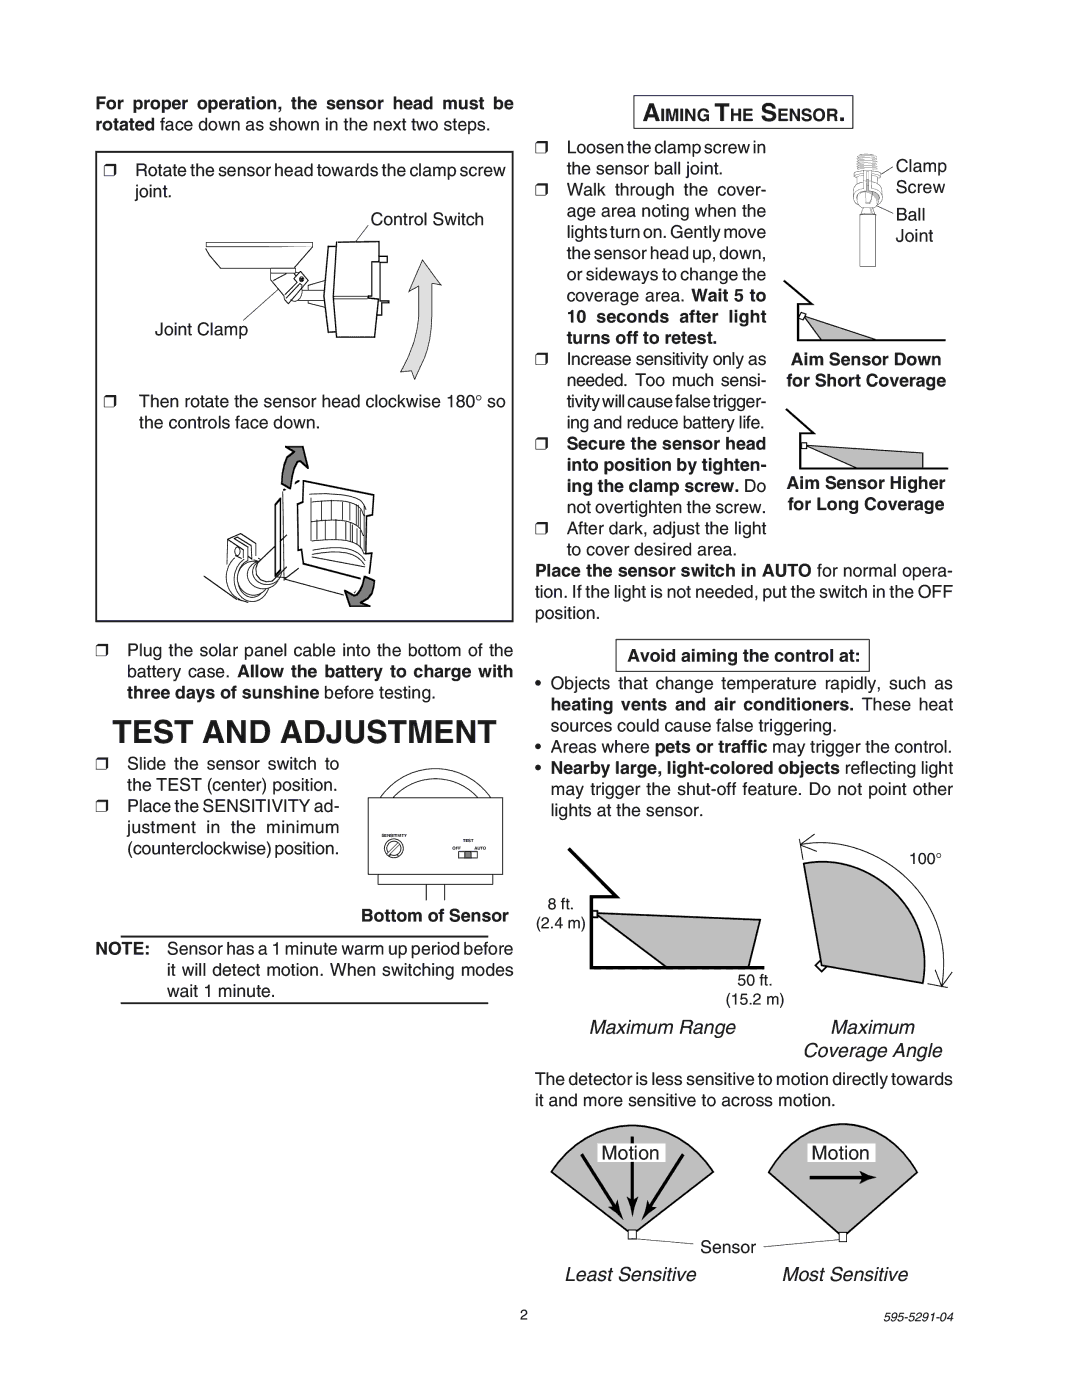
The Heath Zenith SL-7001 is a sophisticated and reliable outdoor motion-activated light that combines advanced technology with practical functionality, making it an ideal choice for home security and convenience.One of the standout features of the SL-7001 is its high-performance motion sensor. Equipped with a 180-degree detection angle and an extended range of up to 30 feet, this sensor ensures that any movement within its perimeter is promptly detected. This wide coverage area is particularly beneficial for large yards or driveways, providing maximum safety and visibility during nighttime hours.
The SL-7001 comes with an adjustable sensitivity setting, allowing users to customize the detection parameters to suit their environment. Homeowners can fine-tune the sensor to avoid false alarms caused by small animals or passing cars, ensuring that it only activates when necessary. Additionally, the adjustable time setting can be configured for anywhere between 5 seconds to 10 minutes, allowing the light to remain illuminated for a predetermined time after activation, which is ideal for various outdoor scenarios.
Another technological innovation integrated into the Heath Zenith SL-7001 is its dual-light design. This model features two separate heads, each of which can pivot independently, allowing users to direct the light exactly where it is needed. This versatility maximizes illumination in key areas around the home, enhancing security and visibility.
The SL-7001 also boasts weatherproof construction, ensuring durability and performance in a range of outdoor conditions. Its sturdy housing protects the internal components from rain, snow, and extreme temperatures, making it suitable for year-round use.
Moreover, the Heath Zenith SL-7001 is equipped with energy-efficient LED bulbs. These bulbs consume significantly less energy compared to traditional incandescent options, leading to reduced energy bills and a lower environmental footprint. The long lifespan of LED technology also means less frequent bulb replacements, adding to the product's overall convenience and cost-effectiveness.
Installation of the SL-7001 is straightforward, with comprehensive instructions included for a hassle-free setup. The unit can be mounted on a variety of surfaces, making it a versatile choice for different locations around the home.
In conclusion, the Heath Zenith SL-7001 is an exemplary model of modern outdoor lighting, combining advanced motion-sensing technology, durability, and energy efficiency. Its user-friendly features make it a valuable addition to any home, enhancing safety and providing peace of mind.