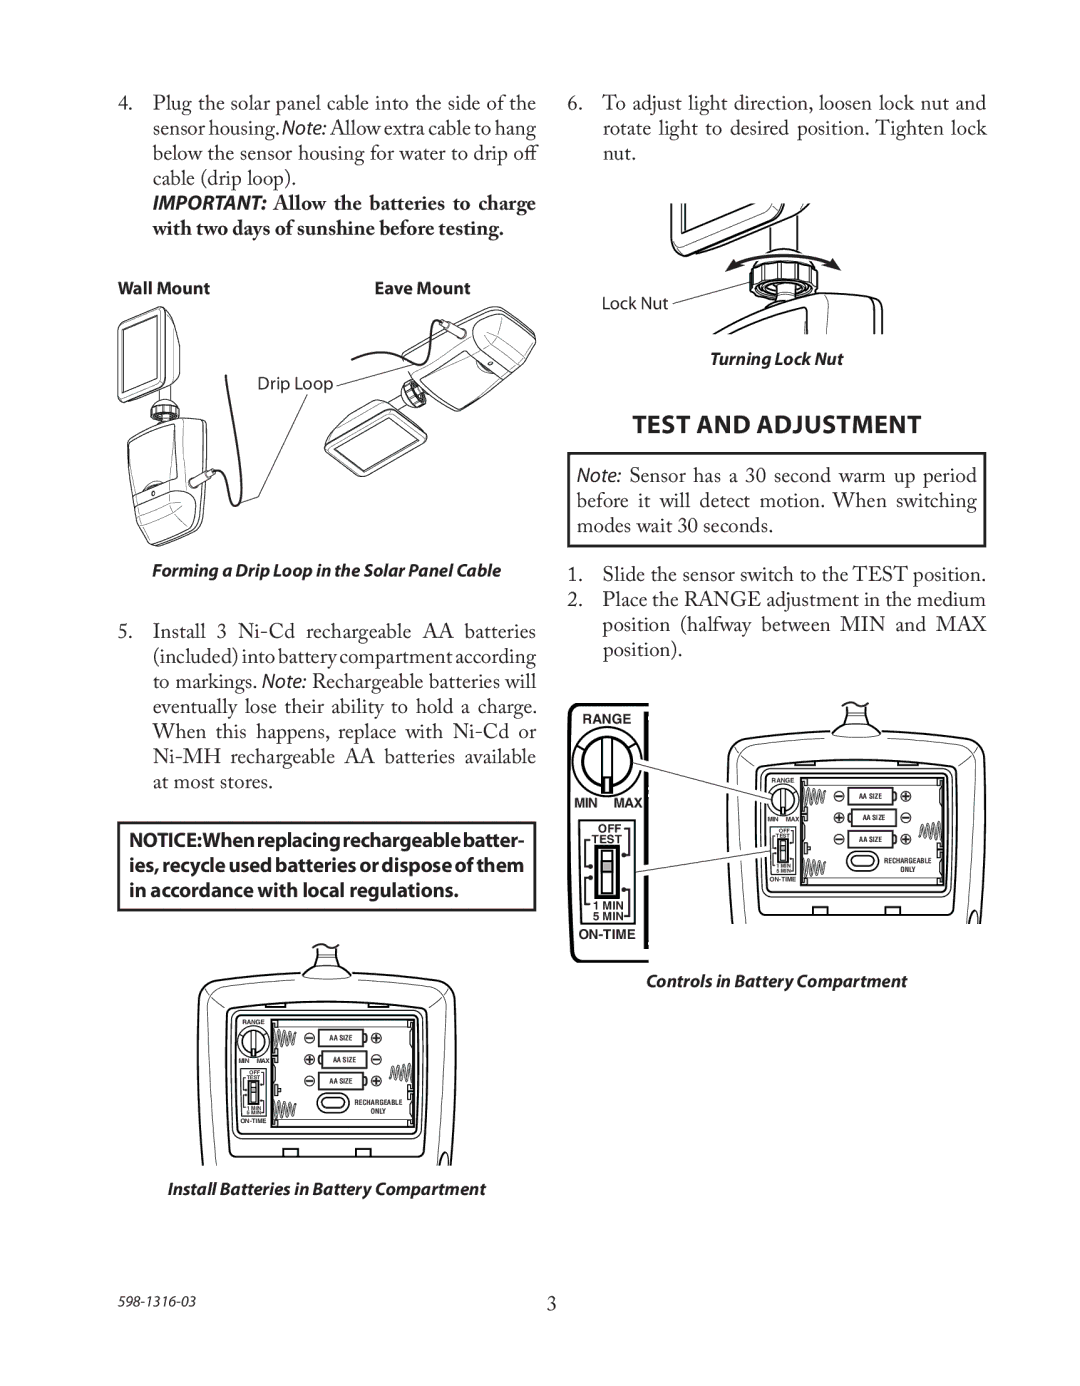
4.Plug the solar panel cable into the side of the sensor housing.Note: Allow extra cable to hang below the sensor housing for water to drip off cable (drip loop).
IMPORTANT: Allow the batteries to charge with two days of sunshine before testing.
Wall Mount | eave Mount |
Drip Loop ![]()
![]()
Forming a Drip Loop in the Solar Panel Cable
5. Install 3 |
(included) into battery compartment according |
to markings. Note: Rechargeable batteries will |
eventually lose their ability to hold a charge. |
6.To adjust light direction, loosen lock nut and rotate light to desired position. Tighten lock nut.
Lock Nut
Turning Lock Nut
TEST AND ADJUSTMENT
Note: Sensor has a 30 second warm up period before it will detect motion. When switching modes wait 30 seconds.
1.Slide the sensor switch to the TEST position.
2.Place the RANGE adjustment in the medium position (halfway between MIN and MAX position).
When this happens, replace with |
at most stores. |
NOTICE:Whenreplacingrechargeablebatter- ies, recycle used batteries or dispose of them in accordance with local regulations.
RANGE
MIN MAX
OFF
TEST
![]() 1 MIN 5 MIN
1 MIN 5 MIN
RANGE | |
MIN | MAX |
| OFF |
TEST | |
1 MIN | |
5 MIN | |
AA SIZE
AA SIZE
AA SIZE
RECHARGEABLE
ONLY
RANGE | |
MIN | MAX |
| OFF |
TEST | |
1 MIN | |
5 MIN | |
Controls in Battery Compartment
AA SIZE
AA SIZE
AA SIZE
RECHARGEABLE
ONLY
Install Batteries in Battery Compartment