42PD8800TA 55PD8800TA
PREPARATION (continued)
Safety Precaution on Main Unit Installation
Read SAFETY PRECAUTIONS ( 3 to 6 ) carefully besides this page.
*When installing the unit, use the optional Desktop Stand (SD8G4237 for 42PD8800TA, SD8G5500 for 55PD8800TA). Please refer to the user manual of the stand. The Desktop Stand (Option) has been used for the illustration in this manual.
When installing the main unit, be sure to use the specifi ed mount units in order to obtain maximum performance and maintain the safety.
We assume no responsibility or liability for personal injuries or property damages caused by use of other mount units or improper installation.
As for the installation instruction, please read each user manual of the mount units: for Desktop Setup, Wall Mounting, and Ceiling Mounting.
In case of using Wall or Ceiling Mounting unit, by contacting your local dealer, ask the specifi ed installation specialist to set up. Never attempt to install it by yourself. It could cause injuries or damages.
ENGLISH
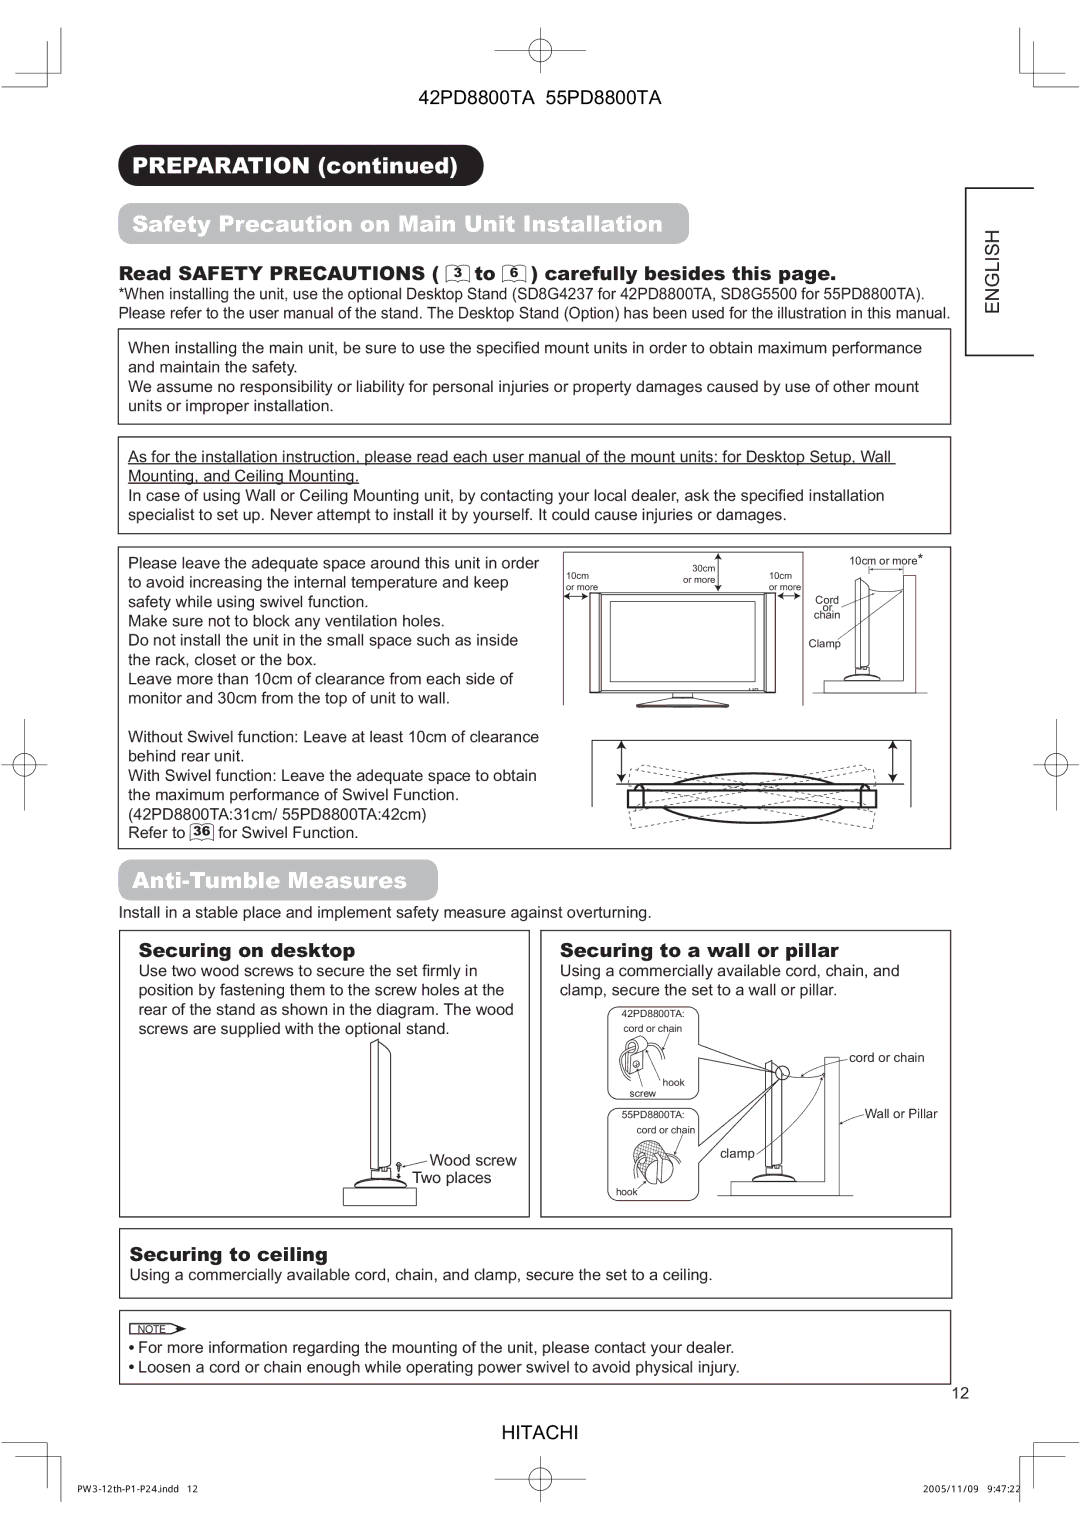
Please leave the adequate space around this unit in order to avoid increasing the internal temperature and keep safety while using swivel function.
Make sure not to block any ventilation holes.
Do not install the unit in the small space such as inside the rack, closet or the box.
Leave more than 10cm of clearance from each side of monitor and 30cm from the top of unit to wall.
Without Swivel function: Leave at least 10cm of clearance behind rear unit.
With Swivel function: Leave the adequate space to obtain the maximum performance of Swivel Function. (42PD8800TA:31cm/ 55PD8800TA:42cm)
Refer to 36 for Swivel Function.
10cm | 30cm | 10cm | |
or more | |||
or more | or more | ||
|
10cm or more*
Cord
or
chain
Clamp
Anti-Tumble Measures
Install in a stable place and implement safety measure against overturning.
Securing on desktop
Use two wood screws to secure the set fi rmly in position by fastening them to the screw holes at the rear of the stand as shown in the diagram. The wood screws are supplied with the optional stand.
Wood screw
![]() Two places
Two places
Securing to a wall or pillar
Using a commercially available cord, chain, and clamp, secure the set to a wall or pillar.
42PD8800TA: cord or chain
| cord or chain |
hook |
|
screw |
|
55PD8800TA: | Wall or Pillar |
cord or chain |
|
| clamp |
hook |
|
Securing to ceiling
Using a commercially available cord, chain, and clamp, secure the set to a ceiling.
NOTE
![]() For more information regarding the mounting of the unit, please contact your dealer.
For more information regarding the mounting of the unit, please contact your dealer.
![]() Loosen a cord or chain enough while operating power swivel to avoid physical injury.
Loosen a cord or chain enough while operating power swivel to avoid physical injury.
12
HITACHI
2005/11/09 9:47:22 |
|
|
| |
|
|
| ||
|
|
| ||
|
|
|
|
|
