English
When you find it difficult to inspect the blade tip, or in case of inclined cutting, or when you use the guide for cutting, loosen the screw, move the slide cover upward and make necessary adjustment before use. (For inclined cutting, fix the slide cover in the uppermost position.) Make sure that the screw is tightened securely after adjustment.
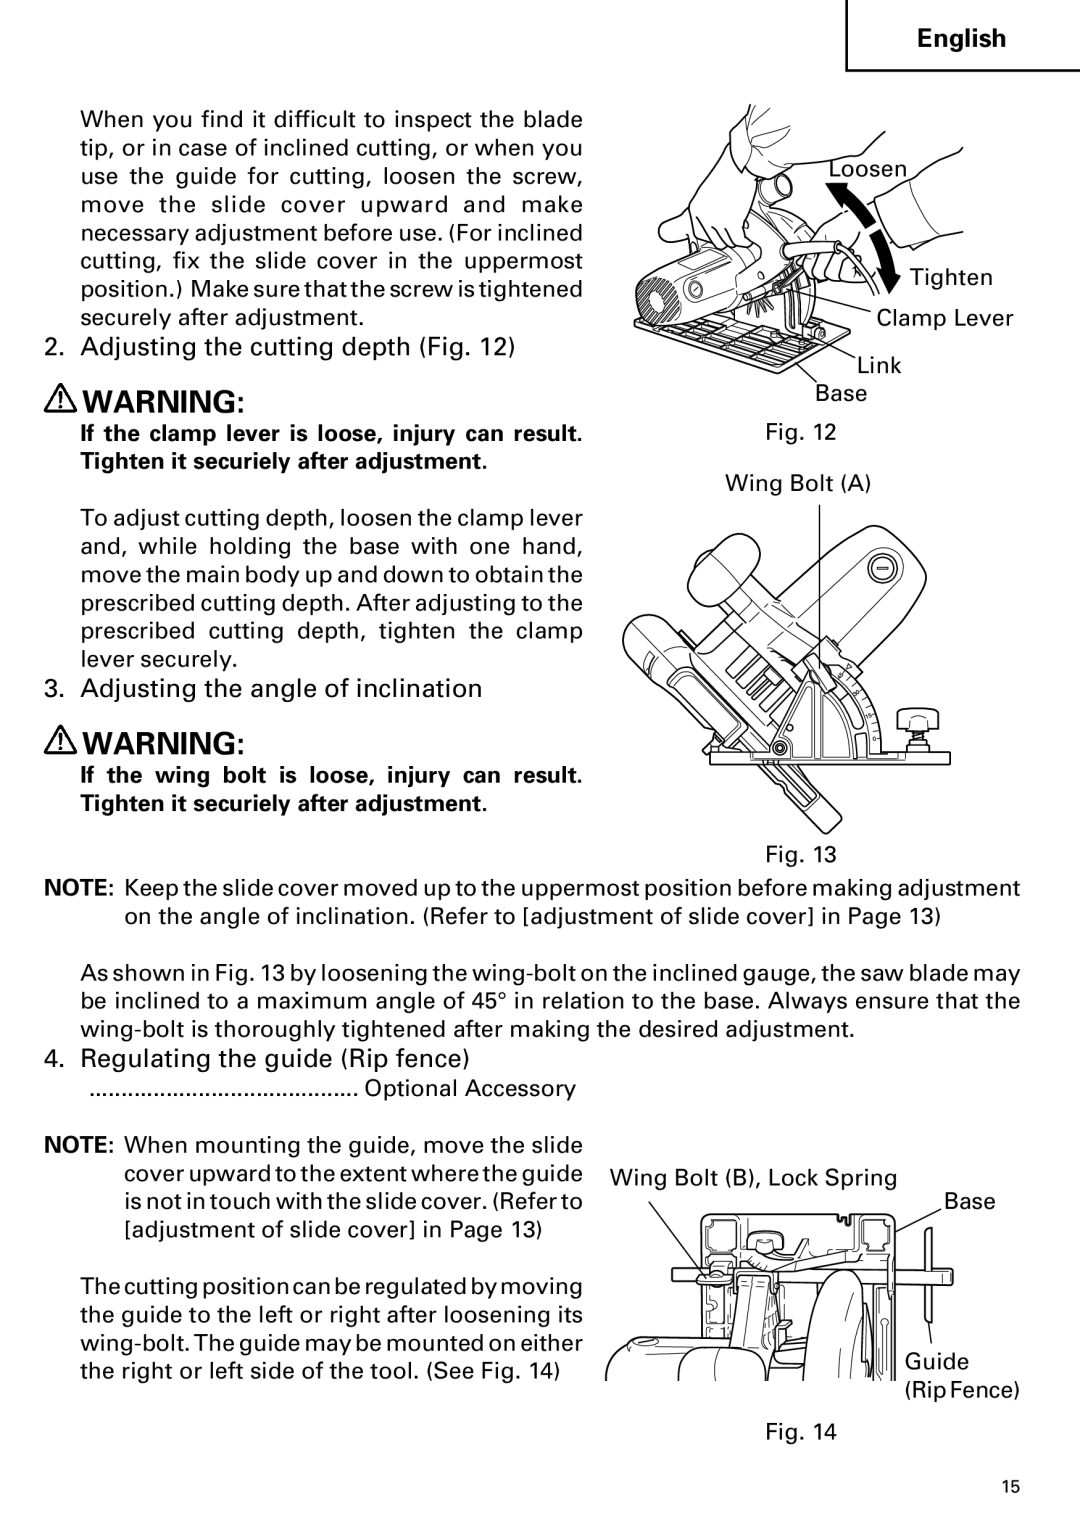
2. Adjusting the cutting depth (Fig. 12)
![]() WARNING:
WARNING:
If the clamp lever is loose, injury can result. Tighten it securiely after adjustment.
To adjust cutting depth, loosen the clamp lever and, while holding the base with one hand, move the main body up and down to obtain the prescribed cutting depth. After adjusting to the prescribed cutting depth, tighten the clamp lever securely.
3. Adjusting the angle of inclination
![]() WARNING:
WARNING:
If the wing bolt is loose, injury can result. Tighten it securiely after adjustment.
Loosen
Tighten
Clamp Lever
Link
Base
Fig. 12
Wing Bolt (A)
Fig. 13
NOTE: Keep the slide cover moved up to the uppermost position before making adjustment
on the angle of inclination. (Refer to [adjustment of slide cover] in Page 13)
As shown in Fig. 13 by loosening the
4. Regulating the guide (Rip fence)
.......................................... Optional Accessory
NOTE: When mounting the guide, move the slide cover upward to the extent where the guide is not in touch with the slide cover. (Refer to [adjustment of slide cover] in Page 13)
The cutting position can be regulated by moving the guide to the left or right after loosening its
Wing Bolt (B), Lock Spring
Base
Guide
(Rip Fence)
Fig. 14
15