RS-232CCommunication
Connecting The Cable
1 | Turn off the projector and the computer power supplies. | |
| Connect the CONTROL port of the projector with a | |
2 | ||
a | ||
| page. | |
| Turn on the computer power supply and after the computer has started up, turn on | |
3 | ||
the projector power supply. | ||
|
|
Communications Setting
19200bps, 8N1
1. Protocol
Consist of header (7 bytes) + command data (6 bytes).
2. Header
BE + EF + 03 + 06 + 00 + CRC_low + CRC_high
CRC_low : Lower byte of CRC flag for command data
CRC_high : Upper byte of CRC flag for command data
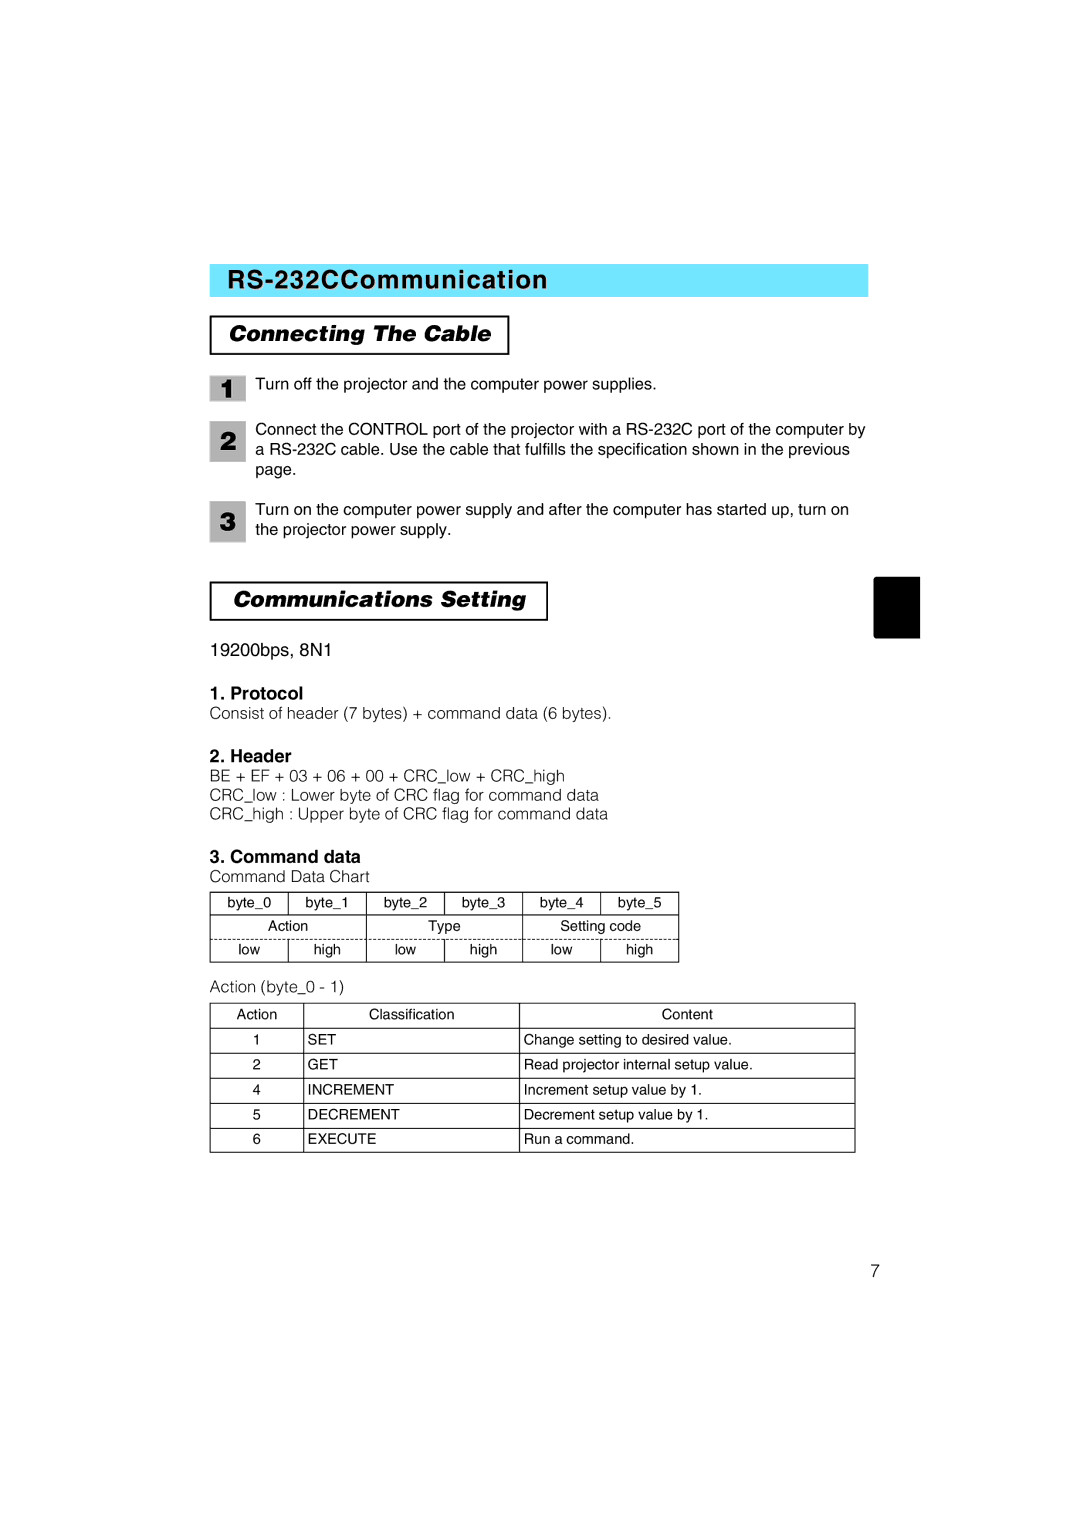
3.Command data
Command Data Chart
byte_0 |
| byte_1 | byte_2 |
| byte_3 | byte_4 |
| byte_5 |
|
|
|
|
|
|
|
|
|
Action |
| Type | Setting code | |||||
low |
| high | low |
| high | low |
| high |
|
|
| ||||||
|
|
|
|
|
|
|
|
|
Action (byte_0 - 1)
Action | Classification | Content |
|
|
|
1 | SET | Change setting to desired value. |
|
|
|
2 | GET | Read projector internal setup value. |
|
|
|
4 | INCREMENT | Increment setup value by 1. |
|
|
|
5 | DECREMENT | Decrement setup value by 1. |
|
|
|
6 | EXECUTE | Run a command. |
|
|
|
7