
CP-X809W specifications
The Hitachi CP-X809W is a versatile and powerful projector designed for educational and professional environments. Renowned for its exceptional image quality and user-friendly features, this projector is a preferred choice for classrooms, boardrooms, and conference facilities.One of the standout features of the CP-X809W is its impressive brightness capability, boasting an output of up to 3,500 ANSI lumens. This ensures that presentations are vivid and clear, even in well-lit rooms. Coupled with a high contrast ratio, it delivers deep blacks and vibrant colors, making visual content more engaging. The native WXGA resolution (1280 x 800) enhances the clarity of images and text, making it ideal for showcasing detailed graphics and videos.
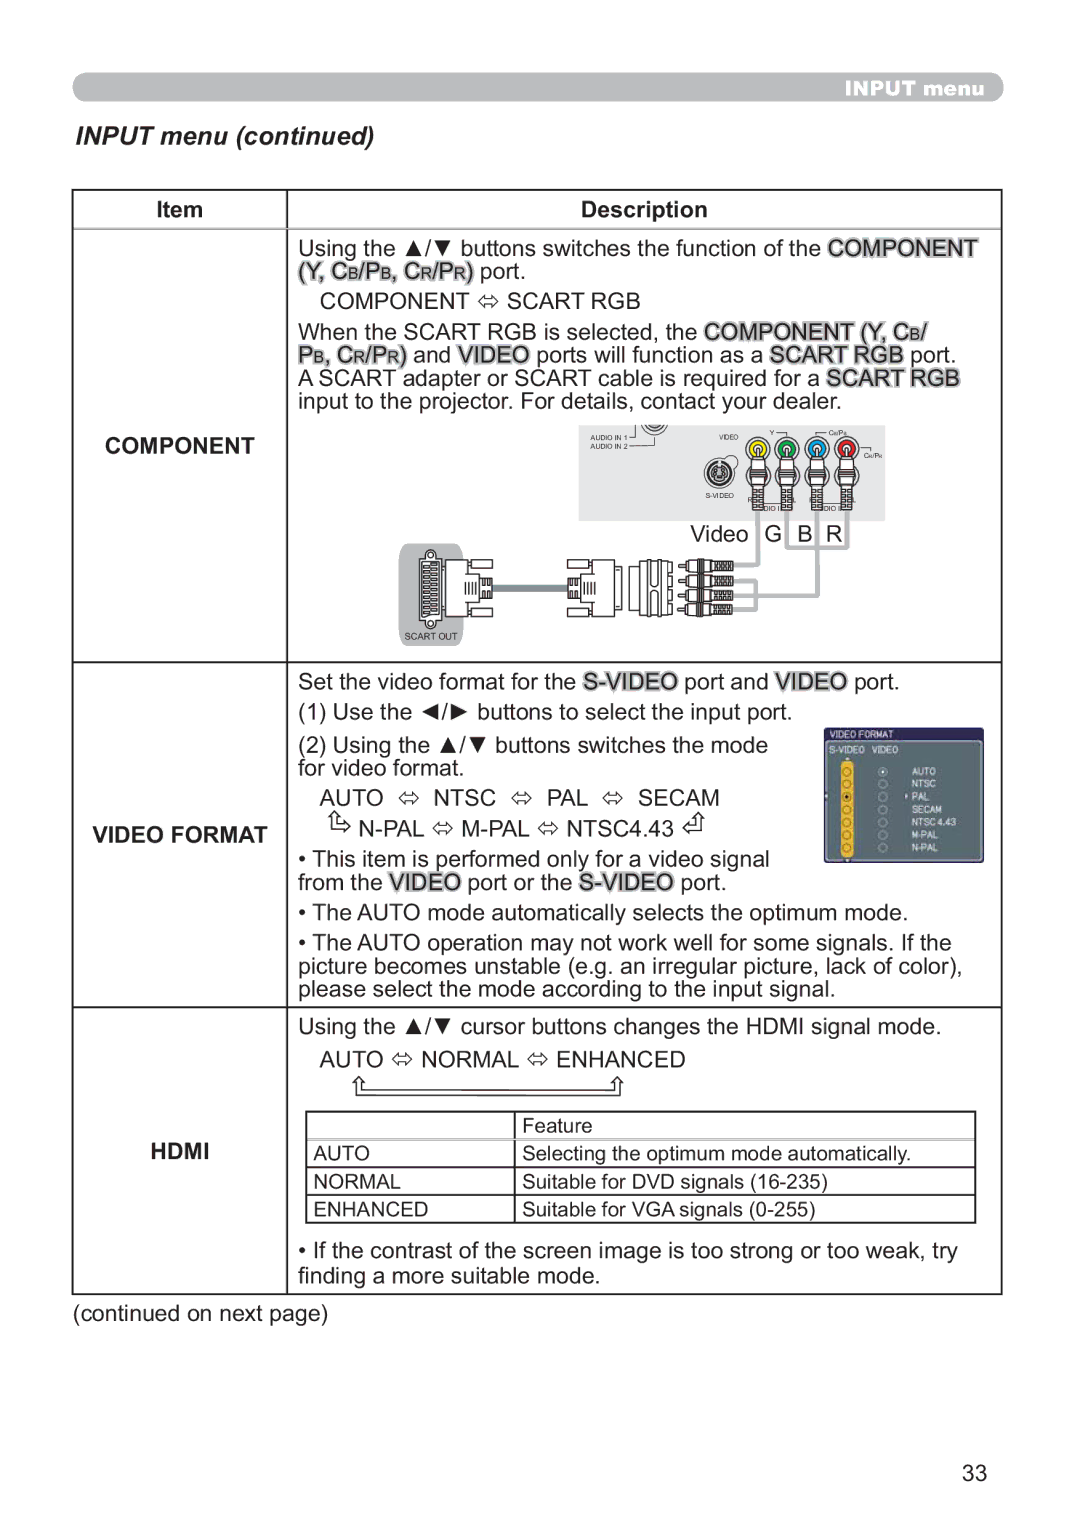
The projector includes various connectivity options, allowing seamless integration with multiple devices. It comes equipped with HDMI, VGA, and USB ports, ensuring compatibility with laptops, tablets, and other multimedia devices. Additionally, the CP-X809W supports both wired and wireless connections, providing users with flexibility in how they present their material.
Another notable technology incorporated in the CP-X809W is 3LCD, which enhances color accuracy and produces a wider color gamut. This technology minimizes the risk of color shading, ensuring that images remain consistent and true to life, a vital aspect for any professional presentation.
The CP-X809W also features a robust lamp life of up to 5,000 hours in eco mode. This longevity helps reduce maintenance costs and downtime, making it a cost-effective solution for institutions that rely heavily on projector use. The projector’s eco-friendly design includes energy-saving features, further reducing its overall environmental impact.
User-friendly functionality is another strong point of the CP-X809W. Its intuitive interface and remote control make navigating settings and features easy, while the keystone correction feature ensures that images are perfectly aligned, regardless of the projector's placement.
In summary, the Hitachi CP-X809W stands out with its high brightness, versatile connectivity options, advanced 3LCD technology, and user-friendly design. This projector successfully combines quality and practicality, making it an excellent choice for anyone in need of a reliable presentation tool.