Manuel dutilisation résumé
Projector
User’s Manual concise
Bedienungsanleitung Kurzform
DXWRULDFLyQHSUHVDSRUHVFULWR
Typical Symbols
Projector
Thank you for purchasing this projector
Do not insert liquids or foreign object
Never use the projector if a problem should occur
Use special caution for children and pets
Never disassemble and modify
Be cautious of the power cord connection
Be cautious of High temperatures of the projector
Never look through the lens or openings when the lamp is on
Be sure to connect with ground wire
Be careful in handling the battery of the remote control
Be careful in handling the light source lamp
Do not put anything on top of the projector
Avoid a high temperature environment
Be careful in moving the projector
Avoid a smoky, humid or dusty place
Take care of the cabinet and the remote control
Remove the power cord for complete separation
Do not give the remote control any physical impact
Take care of the lens
Connecting with notebook computer
About displaying characteristic
Turn the power on/off in right order
About consumables
Projector vents, or get it in your eyes or mouth
Clean the projector or replace the lamp yourself
Contact your local dealer or a service representative
Damaging the lamp
FCC Statement Warning
For the Customers in Canada
Thank you for purchasing this projector
Trademark acknowledgment
Setup menu
About this manual Contents Projector features Preparations
Setting up
Maintenance
Contents of package
Fastening the lens cover
HOT
SURMHFWRUPD\GURSGRZQ SHULRGLFDOO\
LQVLGH KDXVWYHQWV
HOT
FRROLQJLWGRZQ
Control panel
Rear panel
SRUWV
Remote control
DFNRI
PDOIXQFWLRQRIWKHSURMHFWRU
XVHGLQ VKRFN
FHLOLQJ
REMHFWVVXFKDVZDOOV
Suspended from the ceiling
Arrangement
On a horizontal surface
D FXS
HOHYDWRUIHHWWRSODFHWKHSURMHFWRUKRULRQWDOO\
Adjusting the projectors elevator
Using the security bar and slot
RUGHWDLOVVHHWKHPDQXDORIWKHVHFXULW\WRRO
Connecting your devices
SUHSDUHWKHFDEOHVUHTXLUHGWRFRQQHFW
DPSOL¿HU
Connecting your devices
About Plug-and-Play capability
Using the slot cover lock for security
Using a USB storage
Using an SD card
Inserting the SD card
Connecting power supply
$&,1
RQQHFWRURIWKHSRZHUFRUG WRWKHRXWOHW
$OLJQDQGLQVHUWWKHWZR$$EDWWHULHV
Installing the batteries
Laser pointer
Hitachi MAXELL, Part No.LR6
About the remote control signal
Changing the frequency of remote control signal
Back sensor
Using as a wired remote control
Using as a simple PC mouse & keyboard
Turning on the power
Turning off the power
Adjusting the volume
Selecting an input signal
Temporarily muting the sound
For no signal
Searching an input signal
Selecting an input signal
Selecting an aspect ratio
Using the automatic adjustment feature
Adjusting the zoom and focus
Adjusting the lens shift
RUDYLGHRVLJQDODQGVYLGHRVLJQDO
IXQFWLRQPD\QRWZRUNZHOO
Adjusting the position
Correcting the keystone distortions
DXWRPDWLFDOO\GLVDSSHDUDIWHUDIHZVHFRQGV
EXWWRQVDUHSUHVVHG
Using the magnify feature
Freezing the screen
PRGHIRUWRRORQJ
VFUHHQSUHVVWKH%/$1.EXWWRQDJDLQ
Temporarily blanking the screen
PHQX 39
3UHVVWKH%/$1.EXWWRQRQWKHUHPRWHFRQWURO
ZKHQDFHUWDLQLQSXWVLJQDOLVGLVSOD\HG
Using the menu function
WKH$GYDQFHG018
018EXWWRQ
6HOHFWDQLWHPXVLQJWKHŸźFXUVRUEXWWRQVRQWKH
WKHIROORZLQJWDEOH
Easy Menu
+7166
SURMHFWRURUUHPRWHFRQWURODQGSUHVVWKHŹFXUVRU
SHUIRUPLWDFFRUGLQJWRWKHIROORZLQJWDEOH
$00$
Picture menu
Color Temp
MY Memory
Active Iris
$/2$/2$/2$
$96$96$96$9
DFFRUGLQJWRWKHIROORZLQJWDEOH
Over Scan
Position
Image menu
&6
Video NR
GHJUDGDWLRQRIWKHSLFWXUH
VWLOORQHVOLNHVOLGHV
Video Format
Input menu
Component
13$/Ù03$/Ù176&
Frame Lock
%,1
SUHVVWKHŹEXWWRQ 7KH562/87,21PHQXZLOOEHGLVSOD\HG
Resolution
WKLVSURMHFWRU
7RVHWDFXVWRPUHVROXWLRQXVHWKH
SURMHFWRURUUHPRWHFRQWURODQGSUHVVWKHŹFXUVRUEXWWRQ
Setup menu
Monitor OUT
Bass
Volume
Treble
Speaker
Blank
FRQWURO
\6FUHHQÙ25,*,1$/Ù%/8Ù+,7Ù%/$
\6FUHHQ
\6FUHHQÙ25,*,1$/Ù78512
Screen menu
XQVXLWDEOHVLJQDOLVGHWHFWHG
41
DSSHDU
MyScreen IUDPHPD\QRWEHDEOHWREHPRYHGIRU
³0\6FUHHQUHJLVWUDWLRQLV¿QLVKHG´
PHQXLVEODQNXQWLODQDPHLVVSHFL¿HG
066$
SUHVVLQJWKH5=EXWWRQ
Source Name
8VLQJŸźEXWWRQVVZLWFKHVWKHPRGHIRUWKH
27/,1Ù27/,1Ù27/,1 7673$7751Ù27/,1
WHPSODWHVFUHHQ7KHVHOHFWHGWHPSODWHSDWWHUQ
NH\VWRQHGLVWRUWLRQFRUUHFWLRQ
Auto Search
DQGGLVSOD\WKHLPDJH
Auto on
ODPSZLOOEHWXUQHGRII
Option menu
Auto OFF
Lamp Time
MY Source
Service
MY Button
VLJQDO
+267
5217Ù723Ù5$5
Service RURQO\DVGHVFULEHGLQ5HPRWH&RQWURO
KEY Lock
Remote Freq
,QSXWWLQJWKH3$6625
Using Security Features
Security
&KDQJLQJWKH3$6625
6HWWLQJWKH3$6625
8VLQJWKH0\6FUHHQ3$6625XQFWLRQ
Turning on the MyScreen 3$6625 Function
7XUQLQJWKH3$6625RII
Turning Off the PIN Lock Function
Using the PIN Lock Function
Registering the PIN Code
,I\RXKDYHIRUJRWWHQ\RXU3,1&RGH
Setting the Transition Detector off
Using the Transition Detector Function
Setting the Transition Detector3$6625
Turning On the Transition Detector Function
ULWLQJWKH077
8VLQJWKH0773$6625IXQFWLRQ
,I\RXKDYHIRUJRWWHQ\RXU3$6625
Displaying the MY Text
DJDLQ
XVLQJWKHSURFHGXUHLQ
GLVSOD\HG
GXULQJWKLVWLPH
6HOHFWLQJWKLVLWHPGLVSOD\VWKH/,902
Live Mode
VXSSRUWWKH1HWZRUNIHDWXUHVDQG3&/663UHVHQWDWLRQ
WKHŹRU175EXWWRQWRSHUIRUPWKHLWHP
MIU menu
Presentation
Thumbnail
Directory
Display Size
Dhcp
Setup
Default
IP Address
Difference
Setup Mode
Time
Date and Time
Setup FRQWLQXHG Ssid
Custom
Speed
1725.
Projector
To return to the menu
To switch the image displayed
,0$*
Memory card or USB memory
Information
WRKDYH176&IRUPDWYLGHRRUL#IRUPDWFRPSRQHQW
7KHFORVHGFDSWLRQVHWWLQJFDQEHFKDQJHGWKURXJK&&
ZLOOFKDQJHXVLQJŸźFXUVRUEXWWRQV
SOHDVHWXUQRIIWKH&ORVHG&DSWLRQ
Case of replacement by yourself
Lamp
Type number = DT00873 Replacing the lamp
Lamp warning
Lamp
8VHRQO\WKHODPSRIWKHVSHFL¿HGW\SH
Type number = MU05661
RQRWVKRUWFLUFXLWRUVROGHUDEDWWHU\
Internal clock battery
3XWDQHZEDWWHU\LQ
2EH\WKHORFDOODZVRQGLVSRVLQJWKHEDWWHU\
Inside of the projector
Caring for the cabinet and remote control
Other care
Caring for the lens
Internal temperature is rising
Message Description There is no input signal
An improper signal is input
Related messages
Regarding the indicator lamps
LVWLPHWRFOHDQWKHDLU¿OWHU
KDVEHFRPHRYHUFRROHG
RIWKHVHKDVQRWEHHQSURSHUO\¿HG
Phenomena that may be easily mistaken for machine defects
7KHOHQVFRYHULVDWWDFKHG
HWUHPHO\ORZOHYHO
7KH+,635IXQFWLRQLVZRUNLQJ
$LU¿OWHU08
LVDSSOLHG
6SHFL¿FDWLRQV
LUHOHVVQHWZRUNFDUG9$
319 418 139 154
XQLWPP@
Network Guide
Troubleshooting 117
Content
Using the Live Mode
Main functions
QRWEHLQJDFFHVVHG
UHODQG/XHPERXUJ,FHODQG
0560
DQGRWKHUUHOHYDQWSURYLVLRQVRILUHFWLYH&
LVUHTXLUHGWRLQVWDOOLQWR\RXU3&LJD
Live Mode Project images from PC
FKRRVLQJ/LYH0RGH
LYH9LHZHU
&RQQHFWLRQE\WKHSUR¿OHIRUWKHQHWZRUN
Quick connection to your network
Quick connection by the Passcode
Connection by the history record for the network
WKDWLVFRQQHFWHGWRWKHVDPHQHWZRUN
LJHE5HPRWH&RQWURO
PC-LESS Presentation
Supported storage media
Main functions
&RPPRQ7KHSURMHFWRUXQLW3&VHW*1
Required equipment preparation
Quick connection
HSHQGLQJRQKRZ\RXZDQWWRFRQQHFW
Manual network connection setting Wired LAN
Network settings
Equipments connection
6HW,3DGGUHVVVXEQHWPDVNDQGGHIDXOWJDWHZD\IRU3&
Manual network connection setting Wired LAN
ZLQGRZ
LJF³/RFDO$UHD&RQQHFWLRQ3URSHUWLHV´ZLQGRZ
6HWWLQJDXWRPDWLFDOO\
RUHDPSOH 7KHSURMHFWRU¶VLQLWLDOVHWWLQJVDUHDVIROORZV
1HWZRUNDGGUHVVLQWKLVFDVH
SURMHFWRUDQG3&DXWRPDWLFDOO\
LJD³1HWZRUNDQG,QWHUQHW&RQQHFWLRQV´ZLQGRZ
Internet Option setting
Click
LJE³,QWHUQHW3URSHUWLHV´ZLQGRZ
85/KWWS
Check connection
85/KWWS3URMHFWRU,3DGGUHVV
,ILJDSSHDUVLWVXFFHHGV
PRGHLVHI¿FLHQW
Manual network connection setting -Wireless LAN
Preparation for wireless LAN connection
LJDLWKRXWDQDFFHVVSRLQWFRPPXQLFDWLRQ$G+RF
RQQHFWLRQ&RQWURO $G+RF
Manual network connection setting -Wireless LAN
Wireless LAN connection set up
66,ZLUHOHVV Channel 1ch
2SHQ³LUHOHVV1HWZRUNV´WDELJF
LJG³LUHOHVVQHWZRUNSURSHUWLHV´ZLQGRZ
6HWHDFKLWHPDVIROORZV 1HWZRUNQDPH66,ZLUHOHVV
Install Live Viewer 3 Quick Connection to the network
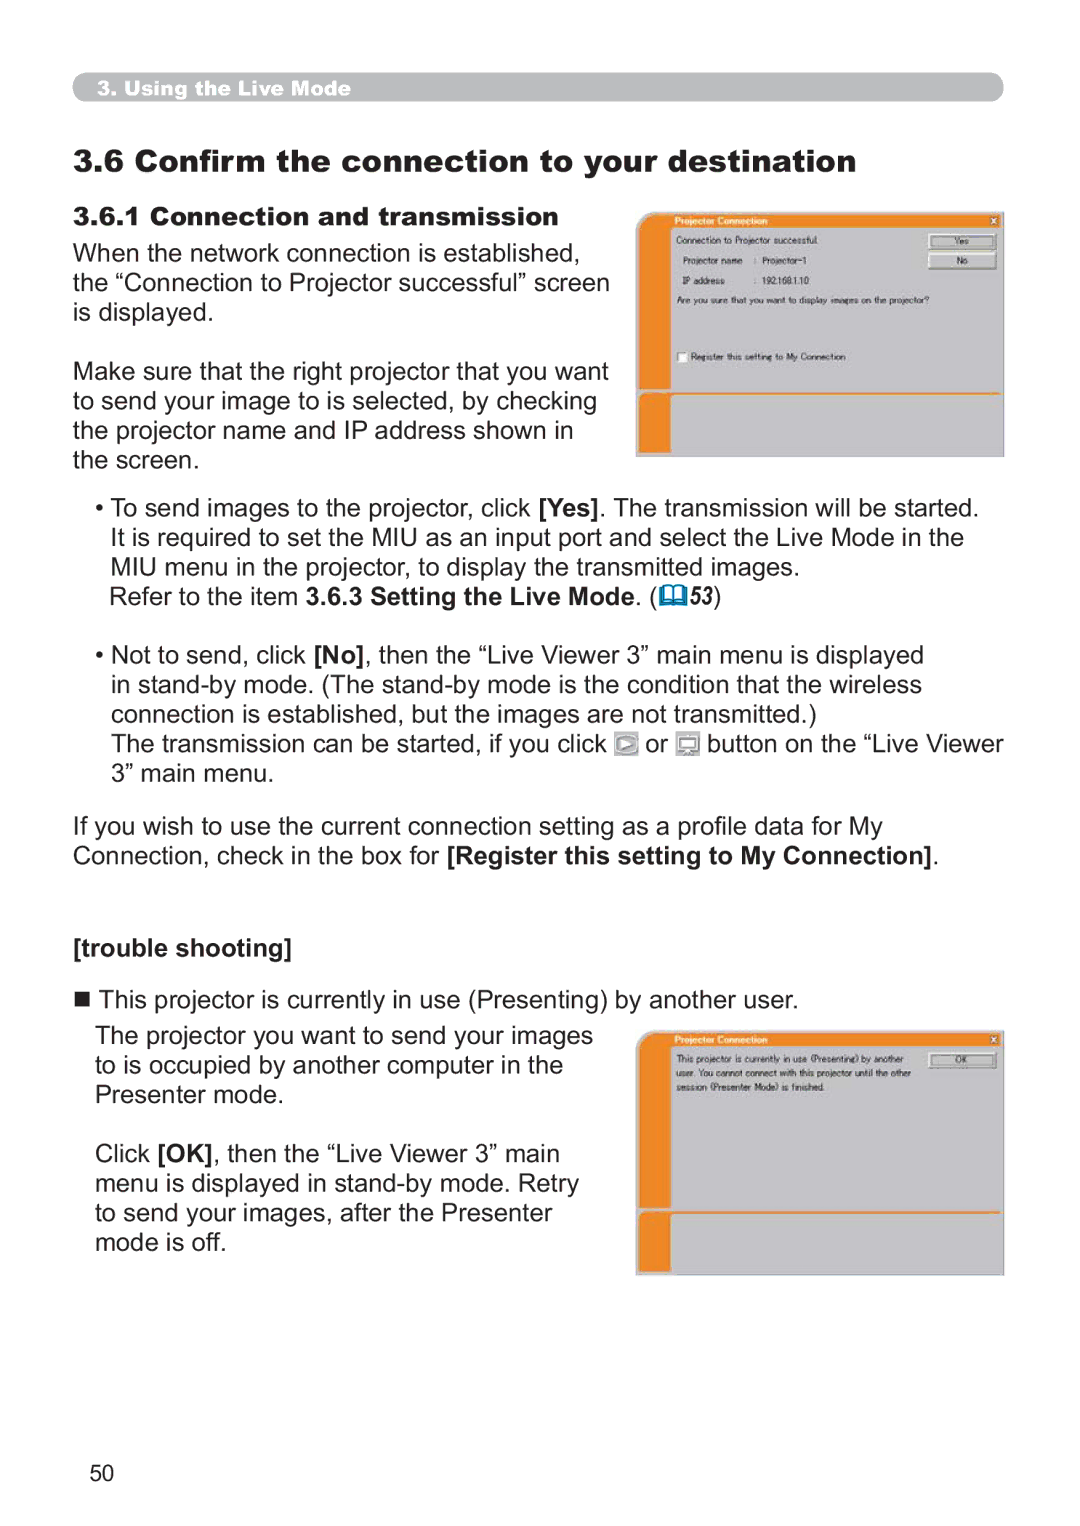
&RQ¿UPWKHFRQQHFWLRQWR\RXUGHVWLQDWLRQ
Start the Live Viewer 3
Outline of the Live Mode
Display mode
0XOWL3&PRGH
9LHZHU´
Outline of the Live Mode
Presenter mode
LVXQHSHFWHGO\VZLWFKHGWRDQLPDJHVHQWE\DQRWKHU3&
Install Live Viewer
Minimum PC hardware and software requirement
7XUQRQWKH3&
Install Live Viewer
Software Installation Procedure
6KXWGRZQDOODSSOLFDWLRQV
Version of the Live Viewer software
If the installation was successful
7KH³/LYH9LHZHU´ZLOODSSHDULQWKDWIROGHU
³´LQWKHYHUVLRQPHDQVRUJUHDWHU
Starting the Live Viewer
Trouble shooting
Quick connection to the network
LQGRZV3PHQX
To the network Trouble shooting
Selecting the network connection mode
Selecting either the wireless LAN or wired LAN
Quick connection to the network
3URFHHGWRWKHLWHP3.3.3 Connecting to the network
$QHWZRUNFRQQHFWLRQZDVQRWHVWDEOLVKHG
Authority Click OK to return to the screen to select
Changes
RXPD\ORJLQWKHLQGRZVXQGHU8VHU
WKHQHWZRUNFRQQHFWLRQPRGH 27
&RQ¿UPWKHFRQQHFWLRQWR\RXU
Destination
RQ¿JXUH0DQXDOO\
Connecting to the network
Enter PassCode
3UR¿OH3URFHHGWRWKH3UR¿OHFRQQHFWLRQ 41
Passcode connection
Getting the Passcode
Method
Passcode connection
ZLOOEHFKDQJHG
Click Back to return to the Please enter
Entering the Passcode
GLVWLQJXLVKHG
WKH3DVV&RGH´VFUHHQ
Authority Click OKWKHQWKH³/LYH9LHZHU´PDLQ
Go back to the item 3.3.3 Connecting to the network
\RXZDQWWRHUDVHWKHLQIRUPDWLRQ\RXLQSXWFOLFNReset
Following the instruction by the network
7RFRQQHFWFOLFNYes3URFHHGWRWKH
$1HWZRUN&RQ¿JXUDWLRQ&RQÀLFWHLVWV
7KHPHVVDJHLVDSSHDUHGZKHQWKHZLUHOHVV
9LHZHU´PDLQPHQXLVGLVSOD\HGHYHQ
Wireless LAN
&RQÀJXULQJ DQXDOO\
HDPSOH
Projector connected to an access point by a LAN cable
6XEQHWPDVN*4 255.255.255.128 HDPSOH &OLFNConnect
Projector connected to an access point by the wireless LAN
QFU\SWLRQNH\*3 **********HDPSOH
,I\RXXVH6XEQHWPDVNHFHSW&ODVV$%&SOHDVHVHWLW
Wired LAN
QWHUWKHIROORZLQJLQIRUPDWLRQIRUWKH
Projector
3URÀOHFRQQHFWLRQ
&KRRVHDSUR¿OHGDWDOLVWHGLQWKHZLQGRZ
PRXVHWRGLVSOD\DSRSXSPHQX
Projector 6HOHFWHistory
History connection
UHFRUGFDQTXLFNO\FRQQHFWWKHQHWZRUNZLWKWKH
&KRRVHDKLVWRU\UHFRUGOLVWHGLQWKHZLQGRZ
&RQÀJXULQJ DQXDOO\
66,ZLUHOHVVHDPSOH QFU\SWLRQ3ELWHDPSOH
&OLFNNext
QFU\SWLRQNH\*2 **********HDPSOH 0RGH,15$6758&785
Projector connected to an access point by the wireless LAN
Authority
$1HWZRUN&RQ¿JXUDWLRQ&RQÀLFWHLVWV
To the item 3.3.3 Connecting to the network
5HIHUWRWKHLWHP3.6.3 Setting the Live Mode
Connection and transmission
Input signal
Presentation
Connection error
LVGLVSOD\HGHYHQWKRXJKWKHQHWZRUNLVQRW
LVQRWHVWDEOLVKHG
Setting the Live Mode
From Web Remote Control on a web browser
From MY Button function
Easy Type Advanced Type
Start the Live Viewer
Main menu and Operating buttons Menu Type
Operating buttons Starting Capture button
Minimize button
Start the Live Viewer
$ Hold button
ConnectedLVFRQQHFWHG Not connected Hold
Images on the PC are being sent to
Displaying the status
Network connection to the projector is
Shown
Switching the display mode
&OLFNWKH button on the main menu
Optimize Performance
Transmission speed
Image quality
$ Presenter Mode
³/LYH9LHZHU´
LQYDOLG
QHWZRUNDGDSWHU
2XWOLQHRI3URÀOHGDWD
0DNLQJ3URÀOHGDWD
6HOHFW3UR¿OH@DQGFOLFNNew
GLWLQJ3URÀOHGDWD
&OLFNEdit
Registering My Connection
&OLFNMy Connection
3UR¿OHGDWDFRQWLQXHG
Mail Alerts
Projector Management using Snmp
Command Control via the Network
Event Scheduling
WKDWLVFRQQHFWHGWRWKHVDPHQHWZRUN
Hvfulswlrq
GLVSOD\HG
Password
Logon
WKHOHIWKDQGVLGHRIWKHVFUHHQ
Network Information
User’s Manual detailed Operating
Guide
LVSOD\VDQGFRQ¿JXUHVQHWZRUNVHWWLQJV
Click Apply button to save the settings
Port Settings
LVSOD\VDQGFRQ¿JXUHVFRPPXQLFDWLRQSRUWVHWWLQJV
DGPLQLVWUDWRUEHIRUHVHWWLQJVHUYHUDGGUHVVHV
Mail Settings
LVSOD\VDQGFRQ¿JXUHVHPDLODGGUHVVLQJVHWWLQJV
6HWWLQJV
Alert Settings
7KH$OHUW,WHPVDUHVKRZQEHORZ
Schedule Settings
LVSOD\VDQGFRQ¿JXUHVVFKHGXOHVHWWLQJV
RQ¿JXUHVWKHWLPHWRHHFXWHFRPPDQGV
7KHVFKHGXOHVHWWLQJVDUHVKRZQEHORZ
IXQFWLRQVDQGHYHQWVVHWWKHIROORZLQJLWHPV
RQ¿JXUHVWKHFRPPDQGVWREHHHFXWHG
Date/Time Settings
LVSOD\VDQGFRQ¿JXUHVWKHGDWHDQGWLPHVHWWLQJV
XUUHQWDWH
Sntp Server IP
Time difference
Sntp
Address
Security Settings
Click Apply@EXWWRQWRVDYHWKHVHWWLQJV
Snmp RQ¿JXUHVWKHFRPPXQLW\QDPHLI6103LVXVHG
FTP RQ¿JXUHVWKH73XVHUDQGSDVVZRUG
Projector Control
Controls the projector
$GMXVWVWKHYHUWLFDOSRVLWLRQ
6HOHFWVWKHDVSHFWVHWWLQJ
$GMXVWVWKHRYHUVFDQVHWWLQJ
$GMXVWVWKHKRULRQWDOSRVLWLRQ
$GMXVWVWKH%DVVVHWWLQJ
$GMXVWVWKHYROXPHVHWWLQJ
$GMXVWWKH7UHEOHVHWWLQJ
SRS WOW 6HOHFWVWKH6562VHWWLQJ
LVGHWHFWHG
RQRII
7XUQVWKHDXWRRQIXQFWLRQRQRII
LQFOXGHGUHPRWHFRQWURO
Service
Remote Control
PRGH´
Again
02
725
Projector Status
LVSOD\VDQGFRQ¿JXUHVWKHFXUUHQWSURMHFWRUVWDWXV
Logoff
Network Restart
5HVWDUWVWKHSURMHFWRU¶VQHWZRUNFRQQHFWLRQ
KHQLogoffLVFOLFNHGWKH/RJRQPHQXLVGLVSOD\HG 67
Mail Alerts
DWH
Mail Alerts
DLOXUHDUQLQJHPDLOVDUHIRUPDWWHGDVIROORZV
7LPH
DGPLQLVWUDWRU
Projector Management using Snmp
Snmp Settings
WKHSURMHFWRUYLD6103
Event Scheduling
SRZHURII,WHQDEOHVWREH³VHOIPDQDJHPHQW´SURMHFWRU
7KHUHDUHWKUHHW\SHVRIVFKHGXOLQJ
Event Scheduling
6FKHGXOHVHWWLQJVFDQEHFRQ¿JXUHGIURPDZHEEURZVHU
VSHFL¿HGGD\RIWKHZHHN
7KHDWH7LPHVHWWLQJFDQEHDGMXVWHGYLDDZHEEURZVHU
UHFRPPHQGHGWRPDLQWDLQDFFXUDWHWLPH
7UDQVIHULPDJH¿OH
MY Image Still Image Transfer Display
LVWUDQVIHUUHGYLDWKHQHWZRUNLJ
PHPRU\FDUG
FRPPDQGV
Command Control via the Network
Command Control Settings
Communication Port
Command Control via the Network
&OLFNSecurity Settings on the main menu
79
6HQGDWDIRUPDW
Command Format
HQDEOHG 5HSO\LQWKHHYHQWRIDQDXWKHQWLFDWLRQHUURU
+HDGHU
DWDUHSO\
Reply Data format
UURUUHSO\
$XWKHQWLFDWLRQHUURUUHSO\
FRPPXQLFDWLRQIRUVHFRQGVDIWHUEHLQJHVWDEOLVKHG
Authentication
Automatic Connection Break
FRPPDQGVWRVHQG
Thumbnail Mode Full Screen Slide Show
Outline of the PC-LESS Presentation
102
Outline of the PC-LESS Presentation
6XSSRUWHG¿OHIRUPDW@
103
\RXVHOHFWVRPHLPDJHVLQWKH7KXPEQDLOPRGH
Thumbnail mode
Starting the Thumbnail mode
IURPWKH26PHQX
From a web browser software
11 or 16 or
105
7KLV¿OHVHHPVWREHEURNHQRUQRWVXSSRUWHGIRUPDW
Operating by buttons or keys
ZKLOHWKHWKXPEQDLOLVGLVSOD\HG
Button operation
0RYHWKHFXUVRUWRWKH5/6+DQGSXVKWKHŹ
Operation on the Thumbnail menu
5/6+
WKHLPDJHVDUHEDFNWRWKHRULJLQDOFRQGLWLRQ
Button operation *1
Full Screen Mode
XOOVFUHHQGLVSOD\ LJXOO6FUHHQ0RGH
HE5HPRWH
3DWWHUQ$ 3DWWHUQ%
Full Screen Mode
6HOHFWWKH.&21,*SDWWHUQ
109
Slide Show Mode
LVSOD\VWKXPEQDLO
663OD\WKH6OLGHVKRZHQGOHVV
Slide Show Mode
217,03OD\WKH6OLGHVKRZRQHWLPH
111
WXUQVLQWRWKHWKXPEQDLOYLHZRIVHOHFWHGIROGHU
Directory Tree View
VXSSRUWHGIRUPDW¿OHLQWKHPHPRU\FDUGDVDWUHHYLHZ
GLUHFWRU\
ORVHVWKHIROGHU
Directory Tree View
GRZQZDUG
7KXPEQDLO0RGH
0RYLH¿OHPRWLRQSLFWXUH
File information display
3LFWXUH¿OHVWLOOSLFWXUH
7LPHVWDPSKHQ¿OHLVFUHDWHG
115
PC-LESS Presentation error message
PC-LESS Presentation error message list
0RGH
DQGURWKHQQRURWDWLRQQRWVSHFLI\RUVSHFLI\URW
Playlist
DPSOHRIDGGLQJLPDJH¿OH@
116
117
118
119
Specifications
120
ZDUUDQW\FRQGLWLRQLVDSSOLHG
121
Vesa Text
Vesa
DWD
RGB 2G/Y, B/CB/PB, R/CR/PR, H
RGB 1, B RGB OUT
$W5*%VLJQDO
Hdmi
CR3R &RPSRQHQWYLGHR&R3R9SSȍWHUPLQDWRU
Component Video E Y, F CB/PB, G CR/PR
Video
0LQL,1SLQMDFN 3LQ
Audio in 3 L R, M L, Audio in 4 N R, O L
Remote Control
Audio in 1, K Audio
Audio OUT
TX+ RX+
LAN
SD card slot
FDUGVORW
Command data
Connecting the cable
Communications setting
Protocol
Increasing the projector setting value Increment command
Requesting projector status Get command
Using the projector default settings Reset Command
Decreasing the projector setting value Decrement command
Port2 Port
Port1 Port
Control Port2 Port 9715 WRXVH7&3
Control Port1 Port 23 and Network
Execute Run a command
Command Format TCP #23
Content Set
RQVLVWRIKHDGHUE\WHVFRPPDQGGDWDE\WHV
Data Length
When authentication error occurred
TCP #9715
Check Sum
Reply Data
Authentication
Automatic Connection Break
LJHVWWKLVELQG³DIFSDVVZRUG´ZLWK0DOJRULWKP
56&&RPPXQLFDWLRQ1HWZRUNFRPPDQGWDEOH
Gamma
Color Temp
Progressive
Component
Active Iris
Volume Hdmi
Bass MIU
Audio RGB1
日本語
Blank
MY BUTTON-1
MY Source
Hitachi Home Electronics Canada, Inc
Hitachi Home & Life Solutions, Inc. Middle East Office
Hitachi Home Electronics America, Inc
Hitachi Europe