English
ASSEMBLY AND OPERATION
APPLICATIONS
◯By combined actions of ROTATION and HAMMER Boring holes in hard materials (concrete, brick, tiles, etc.)
◯By ROTATIONAL action:
Boring holes in steel, wood and plastic.
REMOVAL AND INSTALLATION METHOD OF BATTERY
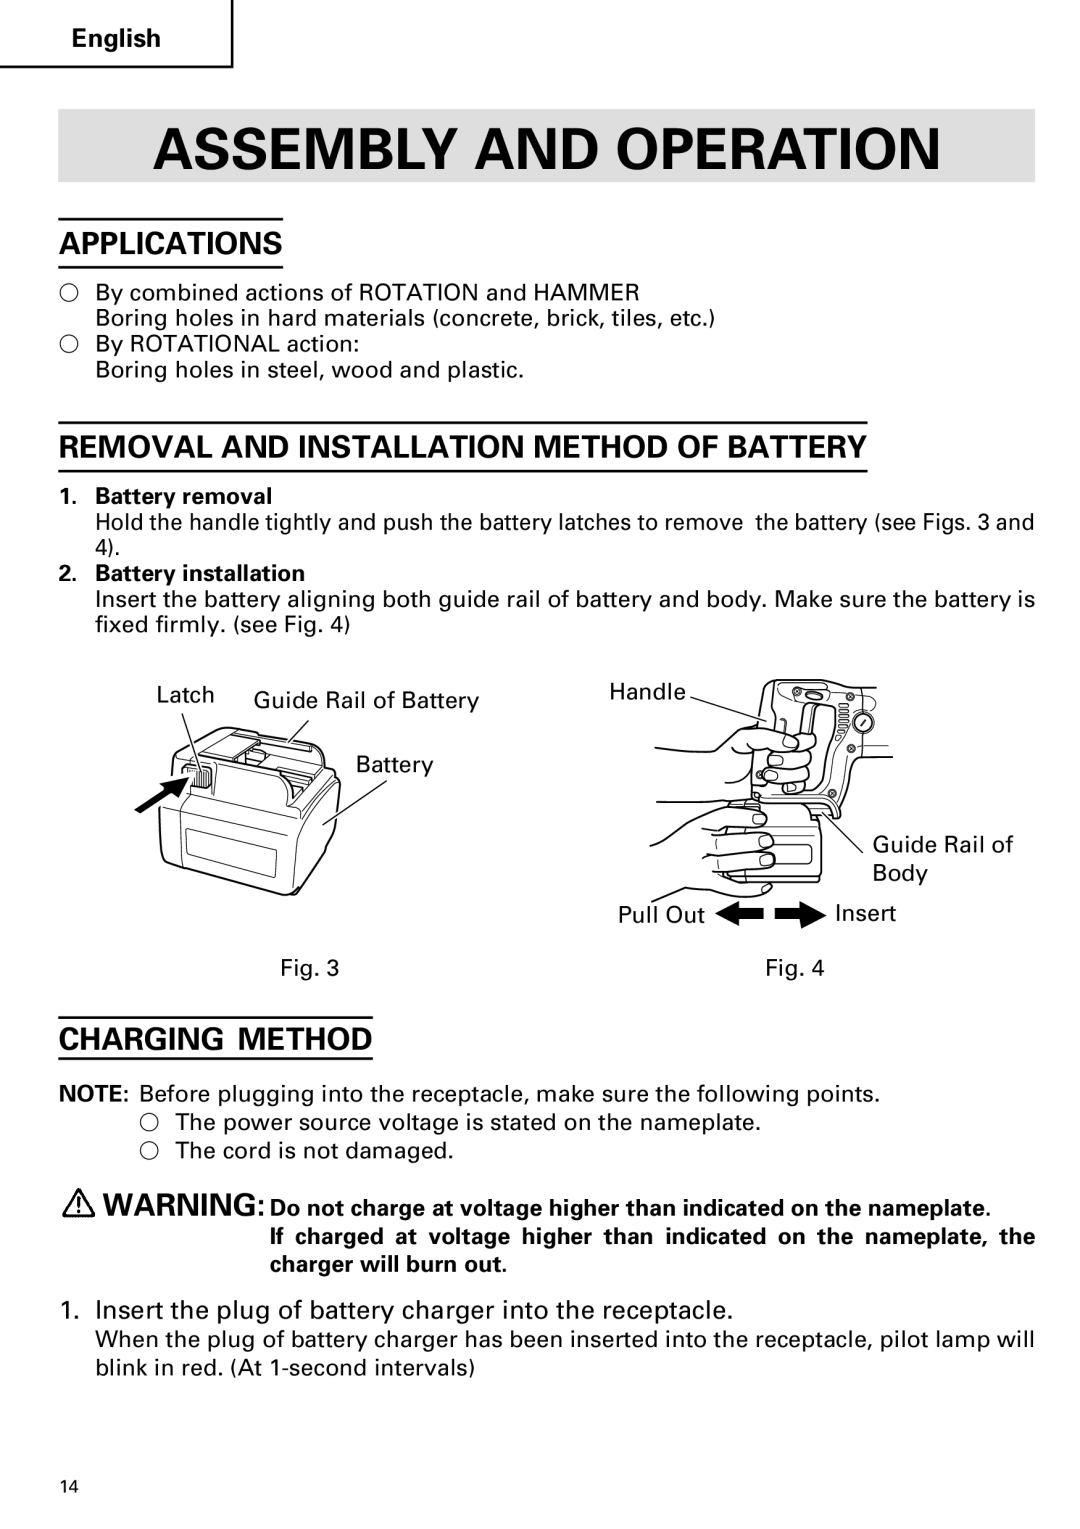
1.Battery removal
Hold the handle tightly and push the battery latches to remove the battery (see Figs. 3 and 4).
2.Battery installation
Insert the battery aligning both guide rail of battery and body. Make sure the battery is fixed firmly. (see Fig. 4)
Latch Guide Rail of Battery | Handle |
Battery |
|
Guide Rail of
Body
Pull Out ![]()
![]() Insert
Insert
Fig. 3 | Fig. 4 |
CHARGING METHOD
NOTE: Before plugging into the receptacle, make sure the following points.
◯The power source voltage is stated on the nameplate.
◯The cord is not damaged.
![]() WARNING: Do not charge at voltage higher than indicated on the nameplate.
WARNING: Do not charge at voltage higher than indicated on the nameplate.
If charged at voltage higher than indicated on the nameplate, the charger will burn out.
1.Insert the plug of battery charger into the receptacle.
When the plug of battery charger has been inserted into the receptacle, pilot lamp will blink in red. (At
14