ED-A111 specifications
The Hitachi ED-A111 is a versatile and innovative projector that has gained widespread recognition for its exceptional performance and advanced features. Designed primarily for educational and professional settings, the ED-A111 integrates a host of technologies that enhance visual presentations and user experience.One of the standout features of the Hitachi ED-A111 is its high brightness level, boasting up to 3,000 ANSI lumens. This makes it suitable for use in various lighting conditions, allowing for clear visuals even in well-lit environments. The projector's native XGA resolution (1024 x 768) ensures that images are rendered with high clarity, making it ideal for showcasing detailed presentations, graphs, and images.
The ED-A111 comes equipped with a range of connectivity options, including HDMI, VGA, and USB, enabling users to connect multiple devices seamlessly. This ensures compatibility with modern laptops, projectors, and other multimedia sources. Additionally, the projector features a built-in speaker, which enhances the overall presentation experience by providing quality audio without the need for external sound systems.
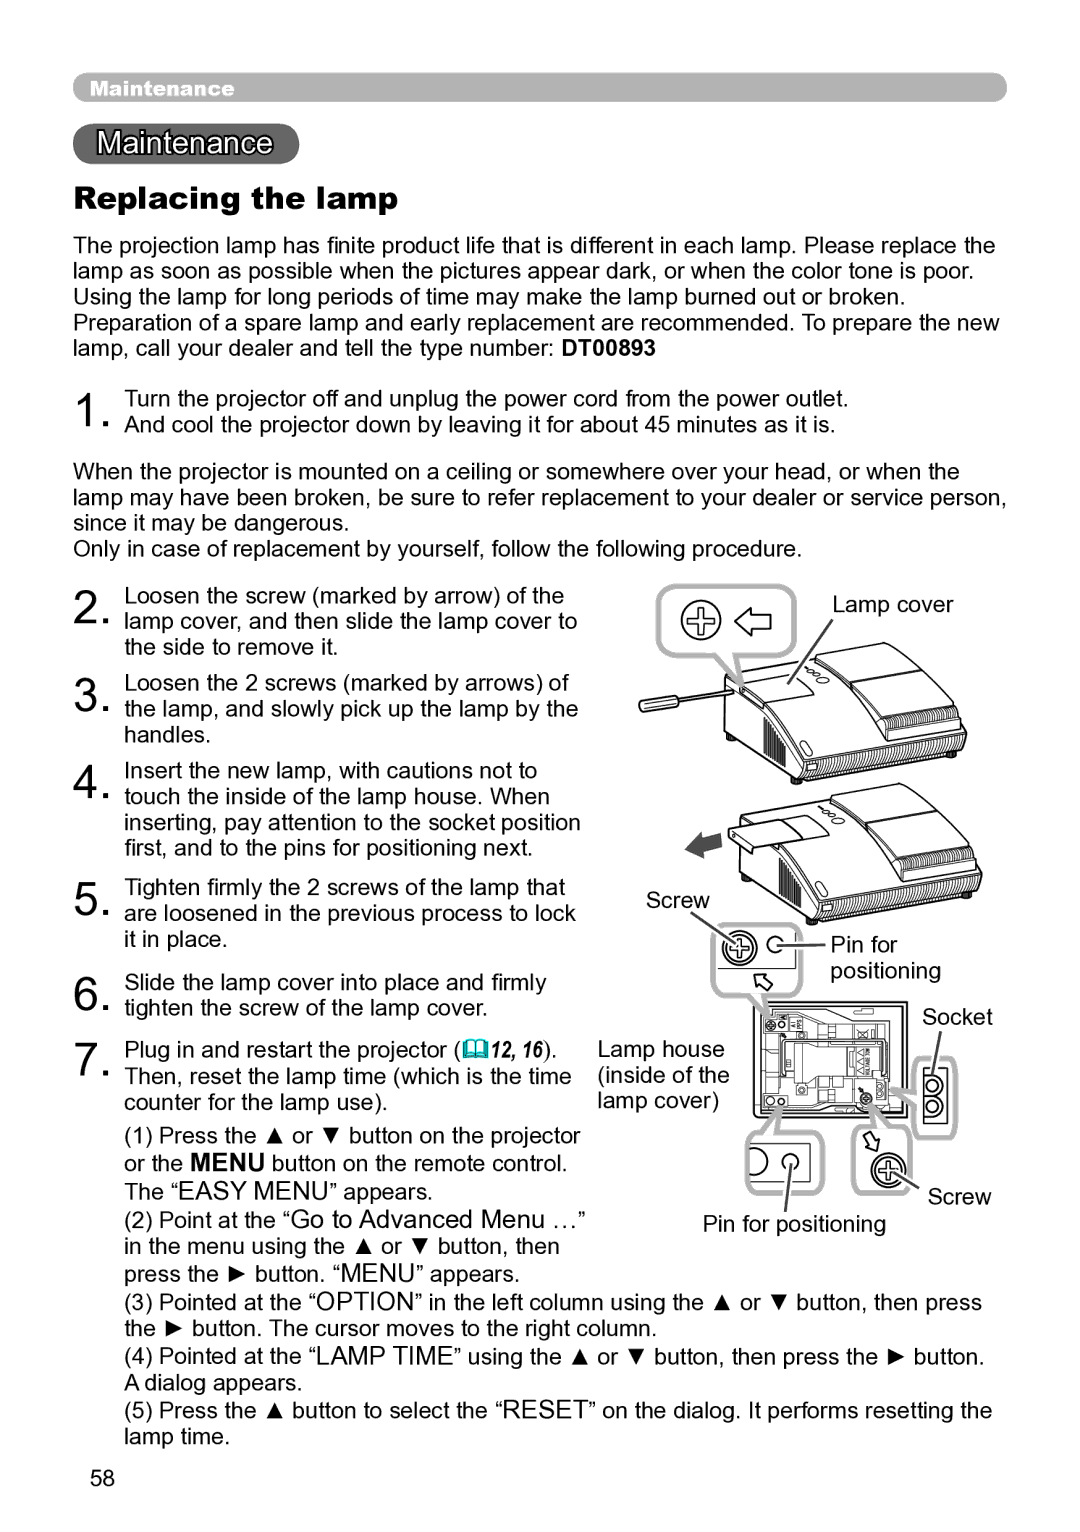
In terms of technology, the Hitachi ED-A111 utilizes 3LCD technology, which allows for vibrant colors and superior image quality. This approach also ensures that the projector maintains a consistent color balance, reducing the risk of color distortion and providing a lifelike viewing experience. The long-lasting lamp life of up to 5,000 hours further enhances the productivity of the ED-A111, minimizing the need for frequent replacements and reducing overall operational costs.
Another notable characteristic of the Hitachi ED-A111 is its portability. Weighing in at approximately 2.5 kg and featuring a compact design, this projector is easy to transport between different locations, making it a great choice for traveling professionals or educators who need to present in various settings.
Additionally, the ED-A111 offers a range of installation flexibility, with features like vertical keystone correction that helps to adjust the image for optimal viewing angles, ensuring that visuals are always displayed properly regardless of the projection surface.
Overall, the Hitachi ED-A111 stands out as a reliable and highly functional projector that combines advanced technology, user-friendly features, and exceptional portability, making it an excellent choice for educational institutions and businesses alike, looking to enhance their presentation capabilities.

