SAFETY PRECAUTIONS (continued)
Wall Mount Setup
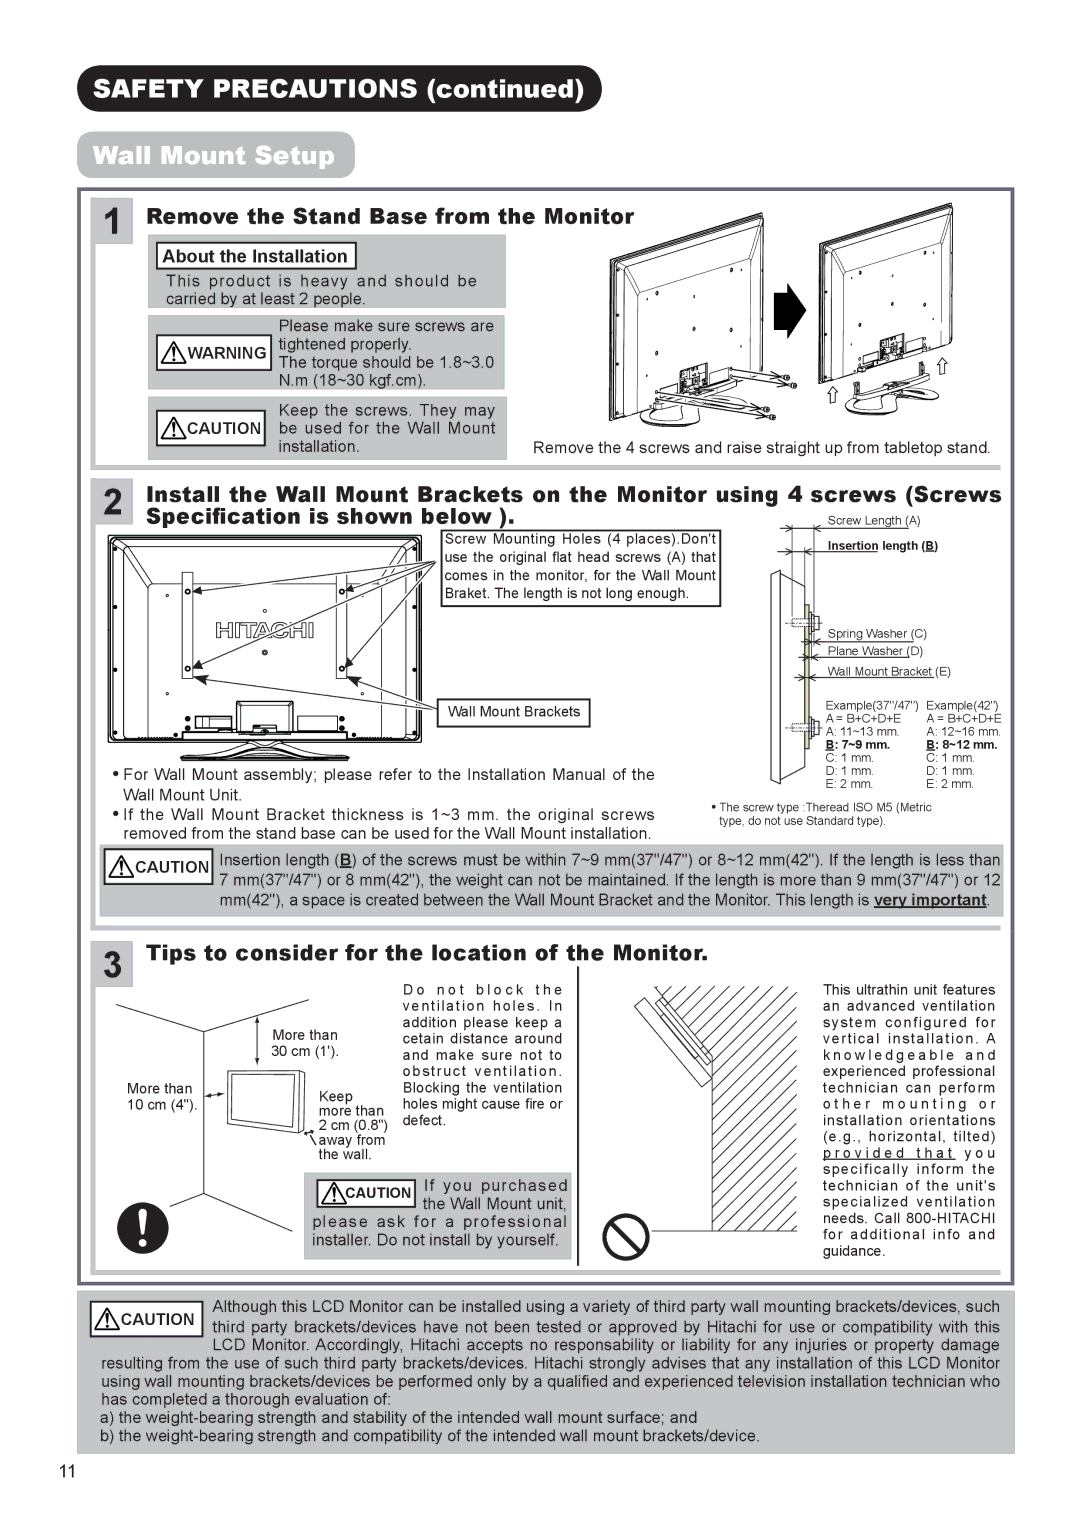
1 Remove the Stand Base from the Monitor
About the Installation
This product is heavy and should be carried by at least 2 people.
|
| Please make sure screws are |
| WARNING | tightened properly. |
| The torque should be 1.8~3.0 | |
|
| N.m (18~30 kgf.cm). |
Keep the screws. They may CAUTION be used for the Wall Mount
installation.
Remove the 4 screws and raise straight up from tabletop stand.
2 | Install the Wall Mount Brackets on the Monitor using 4 screws (Screws | |
Specification is shown below ). | Screw Length (A) | |
| Screw Mounting Holes (4 places).Don't | Insertion length (B) |
| use the original flat head screws (A) that | |
|
| |
| comes in the monitor, for the Wall Mount |
|
| Braket. The length is not long enough. |
|
|
| Spring Washer (C) |
|
| Plane Washer (D) |
|
| Wall Mount Bracket (E) |
Wall Mount Brackets
![]() For Wall Mount assembly; please refer to the Installation Manual of the Wall Mount Unit.
For Wall Mount assembly; please refer to the Installation Manual of the Wall Mount Unit.
![]() If the Wall Mount Bracket thickness is 1~3 mm. the original screws removed from the stand base can be used for the Wall Mount installation.
If the Wall Mount Bracket thickness is 1~3 mm. the original screws removed from the stand base can be used for the Wall Mount installation.
![]()
![]() CAUTION
CAUTION
Insertion length (B) of the screws must be within 7~9 mm(37"/47") or 8~12 mm(42"). If the length is less than 7 mm(37"/47") or 8 mm(42"), the weight can not be maintained. If the length is more than 9 mm(37"/47") or 12 mm(42"), a space is created between the Wall Mount Bracket and the Monitor. This length is very important.
| Tips to consider for the location of the Monitor. | |||
3 | ||||
|
|
| D o n o t b l o c k t h e | |
|
|
| ventilation holes . In | |
|
| More than | addition please keep a | |
|
| |||
|
| cetain distance around | ||
|
| 30 cm (1'). | and make sure not to | |
|
| |||
|
|
| obstruct ventilation . | |
More than | Keep | Blocking the ventilation | ||
10 cm (4"). | holes might cause fire or | |||
more than | ||||
|
| defect. | ||
|
| 2 cm (0.8") | ||
|
| away from |
| |
|
| the wall. |
| |
CAUTION If you purchased ![]() the Wall Mount unit, please ask for a professional installer. Do not install by yourself.
the Wall Mount unit, please ask for a professional installer. Do not install by yourself.
This ultrathin unit features an advanced ventilation system configured for vertical installation. A k n o w l e d g e a b l e a n d experienced professional technician can perform o t h e r m o u n t i n g o r installation orientations (e.g., horizontal, tilted) p r o v i d e d t h a t y o u specifically inform the technician of the unit's specialized ventilation needs. Call
| Although this LCD Monitor can be installed using a variety of third party wall mounting brackets/devices, such | |
CAUTION | ||
third party brackets/devices have not been tested or approved by Hitachi for use or compatibility with this | ||
| LCD Monitor. Accordingly, Hitachi accepts no responsability or liability for any injuries or property damage |
resulting from the use of such third party brackets/devices. Hitachi strongly advises that any installation of this LCD Monitor using wall mounting brackets/devices be performed only by a qualified and experienced television installation technician who has completed a thorough evaluation of:
a)the
b)the
11