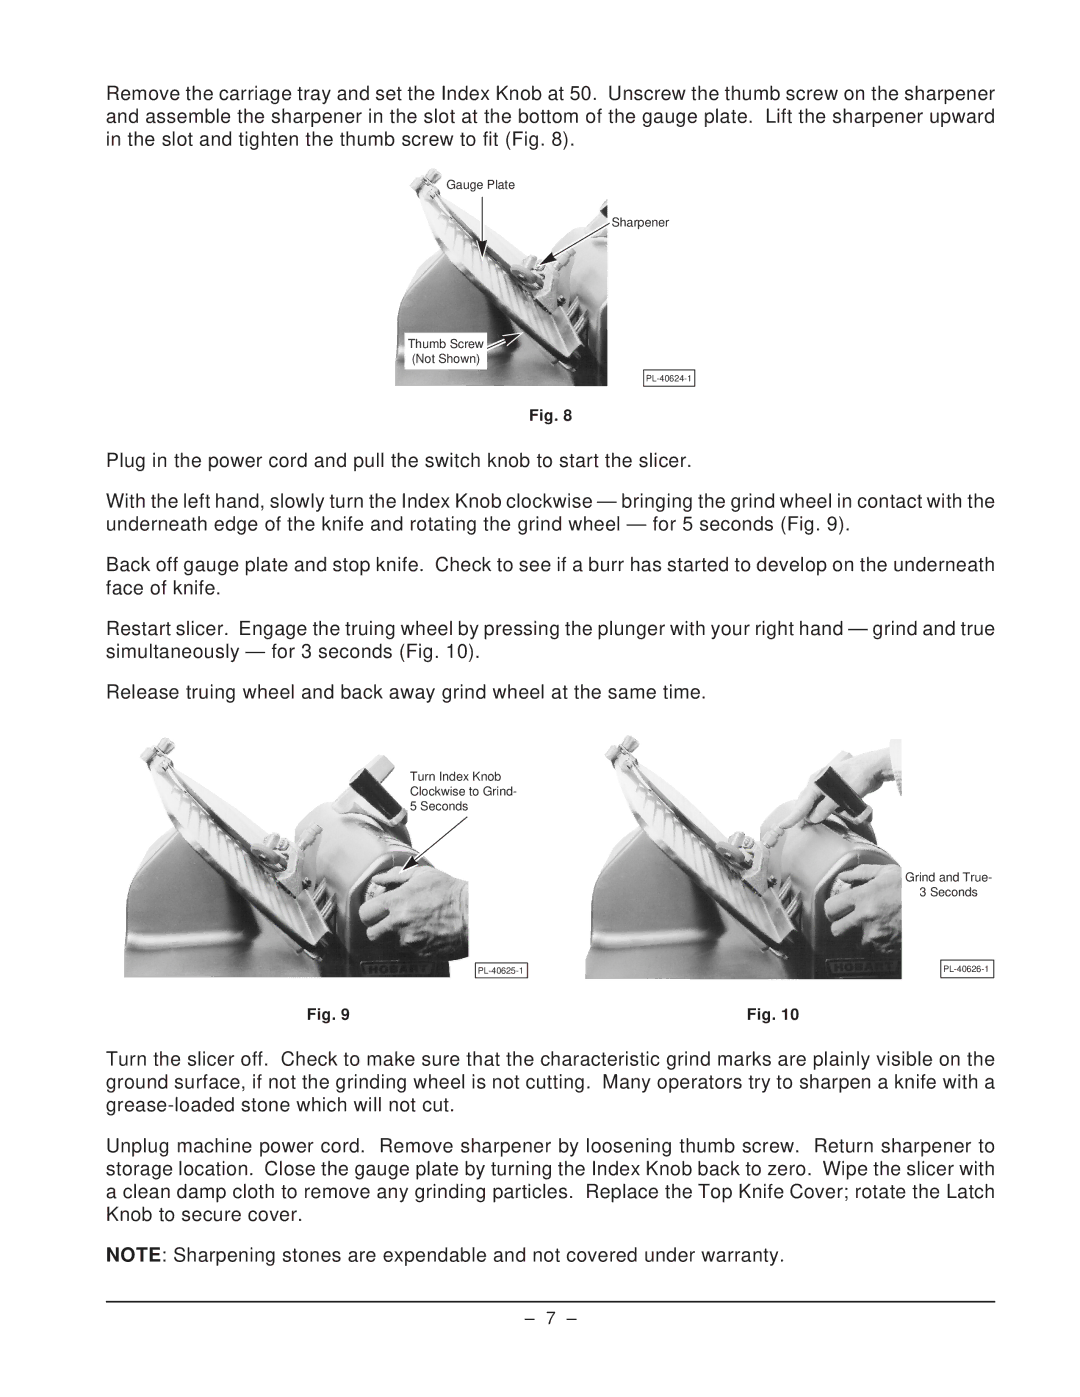
Remove the carriage tray and set the Index Knob at 50. Unscrew the thumb screw on the sharpener and assemble the sharpener in the slot at the bottom of the gauge plate. Lift the sharpener upward in the slot and tighten the thumb screw to fit (Fig. 8).
Gauge Plate
Sharpener
Thumb Screw
(Not Shown)
Fig. 8
Plug in the power cord and pull the switch knob to start the slicer.
With the left hand, slowly turn the Index Knob clockwise — bringing the grind wheel in contact with the underneath edge of the knife and rotating the grind wheel — for 5 seconds (Fig. 9).
Back off gauge plate and stop knife. Check to see if a burr has started to develop on the underneath face of knife.
Restart slicer. Engage the truing wheel by pressing the plunger with your right hand — grind and true simultaneously — for 3 seconds (Fig. 10).
Release truing wheel and back away grind wheel at the same time.
Turn Index Knob Clockwise to Grind- 5 Seconds
Grind and True-
3 Seconds
Fig. 9 | Fig. 10 |
Turn the slicer off. Check to make sure that the characteristic grind marks are plainly visible on the ground surface, if not the grinding wheel is not cutting. Many operators try to sharpen a knife with a
Unplug machine power cord. Remove sharpener by loosening thumb screw. Return sharpener to storage location. Close the gauge plate by turning the Index Knob back to zero. Wipe the slicer with a clean damp cloth to remove any grinding particles. Replace the Top Knife Cover; rotate the Latch Knob to secure cover.
NOTE: Sharpening stones are expendable and not covered under warranty.
– 7 –