
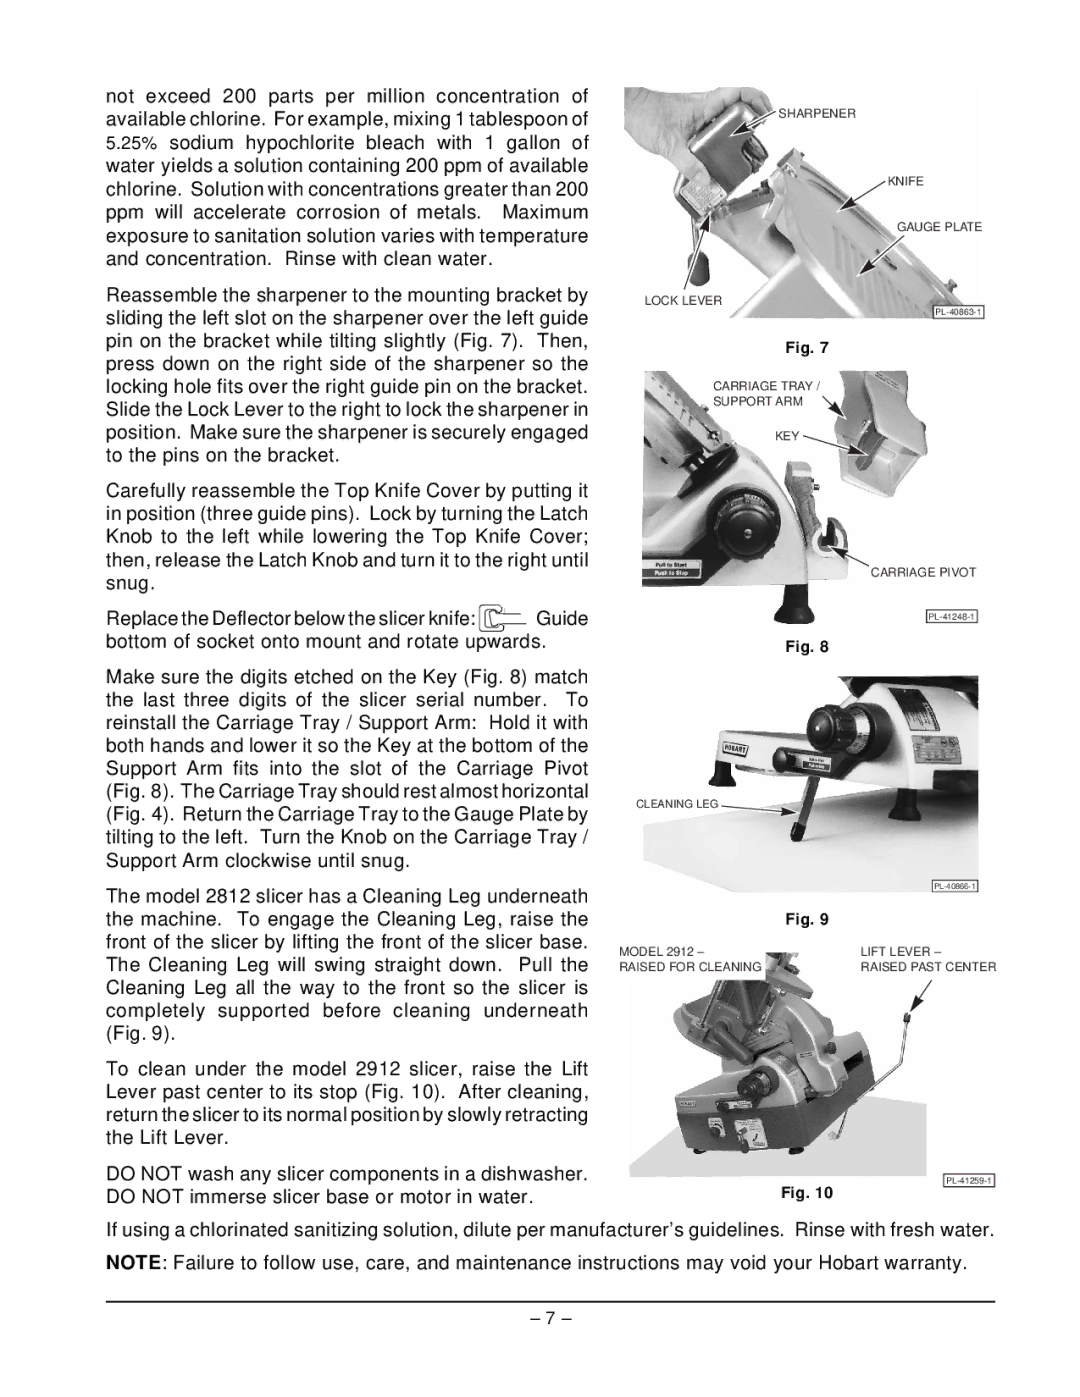
2912 specifications
Hobart 2912 is a renowned model within the Hobart line of commercial kitchen equipment, particularly known for its reliability, efficiency, and performance in the foodservice industry. Designed for high-volume operations, the Hobart 2912 employs advanced technologies and features that make it a powerhouse in meat processing and food preparation.One of the defining characteristics of the Hobart 2912 is its robust construction. Built with high-quality stainless steel, this machine is not only resistant to rust and corrosion, but also ensures durability under daily use in bustling environments. The design promotes easy cleaning, enhancing hygiene compliance in commercial kitchens.
The 2912 features a powerful motor, providing high cutting speeds essential for efficient meat processing. This capability allows chefs and kitchen staff to manage large quantities of meat quickly, which can significantly increase productivity during peak service times. The machine's slicing efficiency ensures consistent portion sizes, promoting even cooking and minimized waste.
Another noteworthy aspect of the Hobart 2912 is its user-friendly interface. The controls are intuitive, allowing operators to quickly adjust settings according to their specific needs. This ease of use minimizes training time for new staff and contributes to overall operational efficiency.
In terms of safety, the 2912 is equipped with several safety features, including safety interlocks and guards to prevent accidental injury during operation. This focus on safety is critical in preventing workplace accidents in busy kitchen environments.
The Hobart 2912 also integrates advanced slicing technologies, such as adjustable slicing thickness, enabling users to customize their cuts according to dish requirements. This versatility makes it suitable for a variety of applications beyond meat, including cheese and vegetables, broadening its utility in the kitchen.
In summary, Hobart 2912 stands out for its combination of durability, efficiency, ease of use, and safety, making it a vital tool in commercial kitchens. Its advanced features meet the demanding needs of foodservice professionals, ensuring consistent quality and operational success. The Hobart 2912 continues to be a trusted choice for chefs, butchers, and food industry leaders looking to enhance their meat processing and food preparation capabilities.