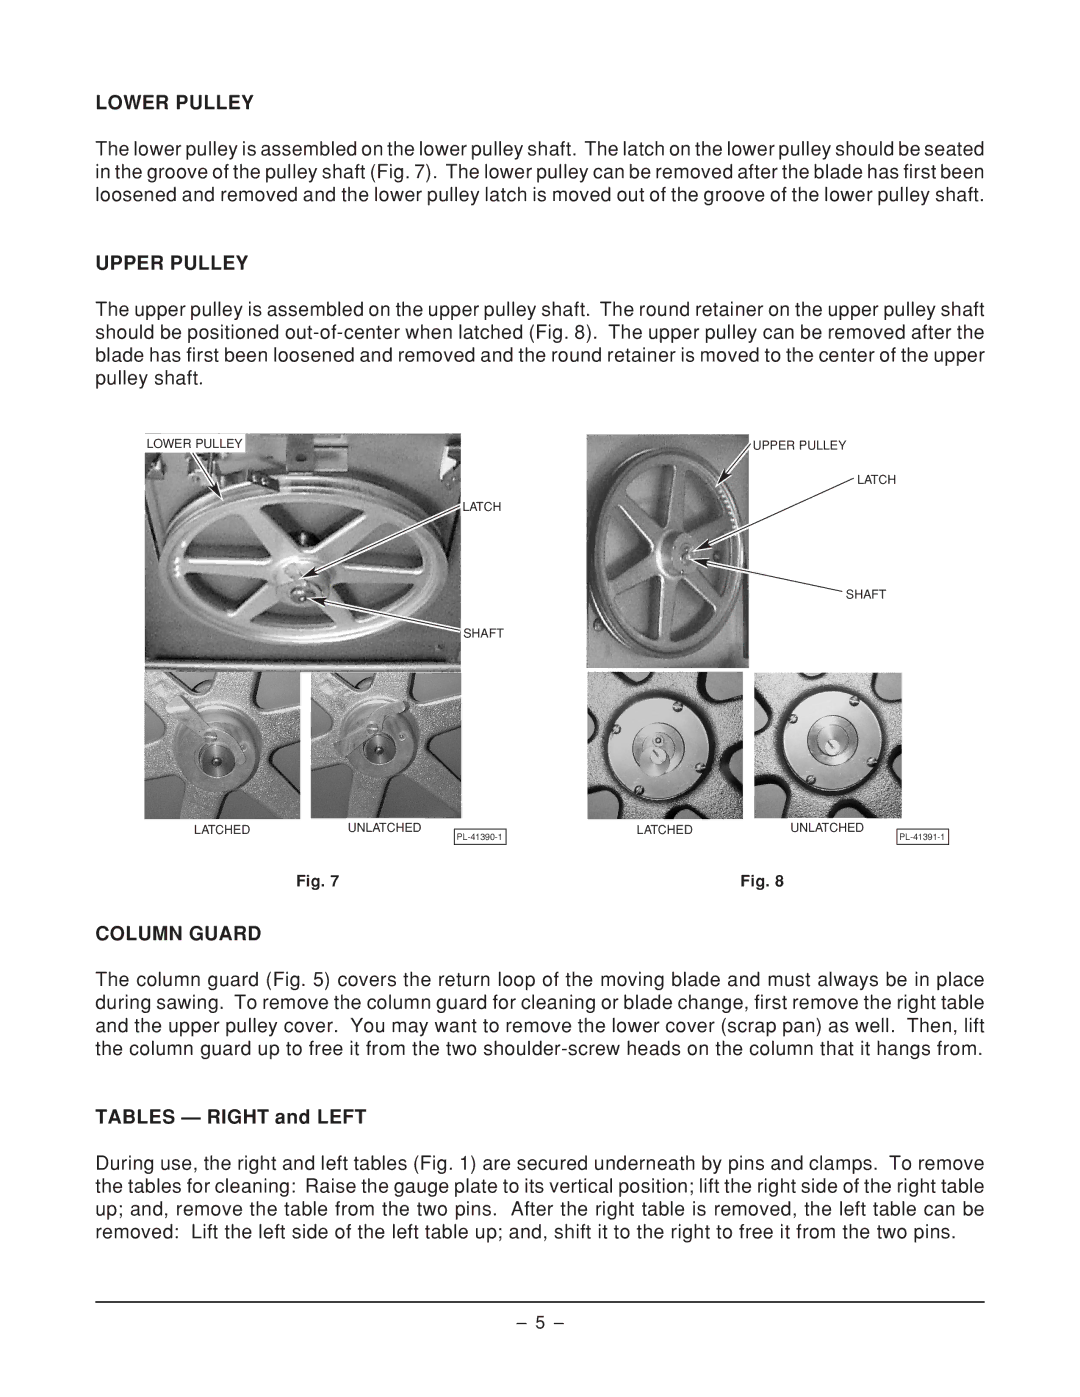
LOWER PULLEY
The lower pulley is assembled on the lower pulley shaft. The latch on the lower pulley should be seated in the groove of the pulley shaft (Fig. 7). The lower pulley can be removed after the blade has first been loosened and removed and the lower pulley latch is moved out of the groove of the lower pulley shaft.
UPPER PULLEY
The upper pulley is assembled on the upper pulley shaft. The round retainer on the upper pulley shaft should be positioned
LOWER PULLEY
LATCH
SHAFT
UPPER PULLEY
LATCH
SHAFT
LATCHEDUNLATCHED
Fig. 7
LATCHEDUNLATCHED
Fig. 8
COLUMN GUARD
The column guard (Fig. 5) covers the return loop of the moving blade and must always be in place during sawing. To remove the column guard for cleaning or blade change, first remove the right table and the upper pulley cover. You may want to remove the lower cover (scrap pan) as well. Then, lift the column guard up to free it from the two
TABLES — RIGHT and LEFT
During use, the right and left tables (Fig. 1) are secured underneath by pins and clamps. To remove the tables for cleaning: Raise the gauge plate to its vertical position; lift the right side of the right table up; and, remove the table from the two pins. After the right table is removed, the left table can be removed: Lift the left side of the left table up; and, shift it to the right to free it from the two pins.
– 5 –