Holmes HM3640 warranty F E At U R E S - O P E R At I O N, Pre-Operatinginstructions

Models: HM3640

1 6
Download 6 pages 23.87 Kb
Page 3
Image 3
F E AT U R E S - O P E R AT I O N

F E AT U R E S - O P E R AT I O N

PRE-OPERATING INSTRUCTIONS

1.Push the 1 Touch™ (MODE/OFF) button for 2 seconds to turn the unit OFF, and disconnect from the electrical outlet.

2.Remove housing, filter and tanks (see figures 1 and 4).

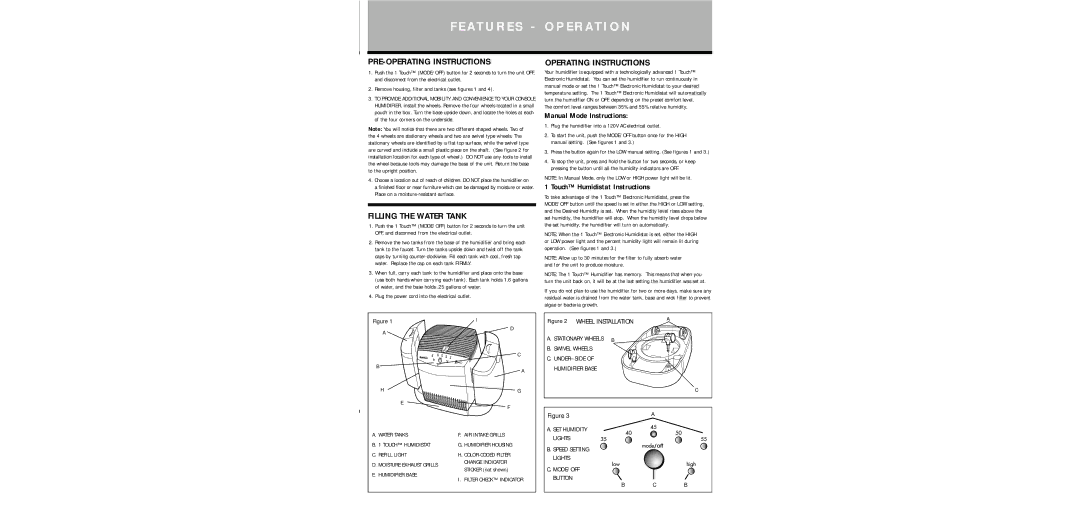
3.TO PROVIDE ADDITIONAL MOBILITY AND CONVENIENCE TO YOUR CONSOLE HUMIDIFIER, install the wheels. Remove the four wheels located in a small pouch in the box. Turn the base upside down, and locate the holes at each of the four corners on the underside.

Note: You will notice that there are two different shaped wheels. Two of the 4 wheels are stationary wheels and two are swivel type wheels. The stationary wheels are identified by a flat top surface, while the swivel type are curved and include a small plastic piece on the shaft. (See figure 2 for installation location for each type of wheel.) DO NOT use any tools to install the wheel because tools may damage the base of the unit. Return the base to the upright position.

4.Choose a location out of reach of children. DO NOT place the humidifier on

a finished floor or near furniture which can be damaged by moisture or water. Place on a moisture-resistant surface.

FILLING THE WATER TANK

1.Push the 1 Touch™ (MODE/OFF) button for 2 seconds to turn the unit OFF, and disconnect from the electrical outlet.

2.Remove the two tanks from the base of the humidifier and bring each tank to the faucet. Turn the tanks upside down and twist off the tank caps by turning counter-clockwise. Fill each tank with cool, fresh tap water. Replace the cap on each tank FIRMLY.

3.When full, carry each tank to the humidifier and place onto the base (use both hands when carrying each tank). Each tank holds 1.6 gallons of water, and the base holds .25 gallons of water.

4.Plug the power cord into the electrical outlet.

Figure 1


I

D

A


C

B


A


H


G

E


F


A. WATER TANKS


F. AIR INTAKE GRILLS

B. 1 TOUCH™ HUMIDISTAT

G. HUMIDIFIER HOUSING

C. REFILL LIGHT

HM-3640 xplodedH. COLORview -CODED5/01

FILTER

D. MOISTURE EXHAUST GRILLS

CHANGE INDICATOR

STICKER (not shown)

E. HUMIDIFIER BASE


I. FILTER CHECK™ INDICATOR


OPERATING INSTRUCTIONS

Your humidifier is equipped with a technologically advanced 1 Touch™ Electronic Humidistat. You can set the humidifier to run continuously in manual mode or set the 1 Touch™ Electronic Humidistat to your desired temperature setting. The 1 Touch™ Electronic Humidistat will automatically turn the humidifier ON or OFF, depending on the preset comfort level.

The comfort level ranges between 35% and 55% relative humidity.

Manual Mode Instructions:

1.Plug the humidifier into a 120V AC electrical outlet.

2.To start the unit, push the MODE/OFF button once for the HIGH manual setting. (See figures 1 and 3.)

3.Press the button again for the LOW manual setting. (See figures 1 and 3.)

4.To stop the unit, press and hold the button for two seconds, or keep pressing the button until all the humidity indicators are OFF.

NOTE: In Manual Mode, only the LOW or HIGH power light will be lit.

1 Touch™ Humidistat Instructions

To take advantage of the 1 Touch™ Electronic Humidistat, press the MODE/OFF button until the speed is set in either the HIGH or LOW setting, and the Desired Humidity is set. When the humidity level rises above the set humidity, the humidifier will stop. When the humidity level drops below the set humidity, the humidifier will turn on automatically.

NOTE: When the 1 Touch™ Electronic Humidistat is set, either the HIGH or LOW power light and the percent humidity light will remain lit during operation. (See figures 1 and 3.)

NOTE: Allow up to 30 minutes for the filter to fully absorb water and for the unit to produce moisture.

NOTE: The 1 Touch™ Humidifier has memory. This means that when you turn the unit back on, it will be at the last setting the humidifier was set at.

If you do not plan to use the humidifier for two or more days, make sure any residual water is drained from the water tank, base and wick filter to prevent algae or bacteria growth.

Figure 2 WHEEL INSTALLATION

A

A. STATIONARY WHEELS B


B. SWIVEL WHEELS


C. UNDER–SIDE OF


HUMIDIFIER BASE


C


Figure 3

A


A. SET HUMIDITY


LIGHTS


B. SPEED SETTING


LIGHTS


C. MODE/OFF


BUTTON


B

C

B


Page 3
Image 3
Holmes HM3640 F E At U R E S - O P E R At I O N, Pre-Operatinginstructions, Filling The Water Tank, Operating Instructions