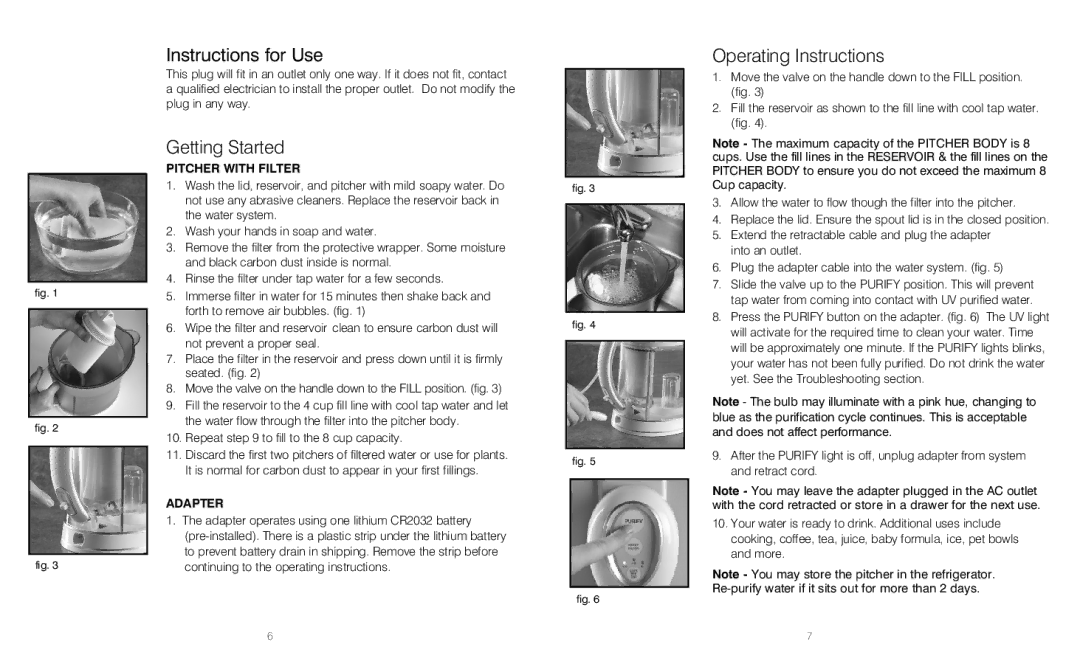
fig. 1

fig. 2

fig. 3

Instructions for Use

This plug will fit in an outlet only one way. If it does not fit, contact a qualified electrician to install the proper outlet. Do not modify the plug in any way.

Getting Started

PITCHER WITH FILTER

1.Wash the lid, reservoir, and pitcher with mild soapy water. Do not use any abrasive cleaners. Replace the reservoir back in the water system.

2.Wash your hands in soap and water.

3.Remove the filter from the protective wrapper. Some moisture and black carbon dust inside is normal.

4.Rinse the filter under tap water for a few seconds.

5.Immerse filter in water for 15 minutes then shake back and forth to remove air bubbles. (fig. 1)

6.Wipe the filter and reservoir clean to ensure carbon dust will not prevent a proper seal.

7.Place the filter in the reservoir and press down until it is firmly seated. (fig. 2)

8.Move the valve on the handle down to the FILL position. (fig. 3)

9.Fill the reservoir to the 4 cup fill line with cool tap water and let the water flow through the filter into the pitcher body.

10.Repeat step 9 to fill to the 8 cup capacity.

11.Discard the first two pitchers of filtered water or use for plants. It is normal for carbon dust to appear in your first fillings.

ADAPTER

1. The adapter operates using one lithium CR2032 battery (pre-installed). There is a plastic strip under the lithium battery to prevent battery drain in shipping. Remove the strip before continuing to the operating instructions.

fig. 3

fig. 4

fig. 5

fig. 6

Operating Instructions

1.Move the valve on the handle down to the FILL position. (fig. 3)

2.Fill the reservoir as shown to the fill line with cool tap water. (fig. 4).

Note - The maximum capacity of the PITCHER BODY is 8 cups. Use the fill lines in the RESERVOIR & the fill lines on the PITCHER BODY to ensure you do not exceed the maximum 8 Cup capacity.

3.Allow the water to flow though the filter into the pitcher.

4.Replace the lid. Ensure the spout lid is in the closed position.

5.Extend the retractable cable and plug the adapter into an outlet.

6.Plug the adapter cable into the water system. (fig. 5)

7.Slide the valve up to the PURIFY position. This will prevent tap water from coming into contact with UV purified water.

8.Press the PURIFY button on the adapter. (fig. 6)  The UV light will activate for the required time to clean your water. Time will be approximately one minute. If the PURIFY lights blinks, your water has not been fully purified. Do not drink the water yet. See the Troubleshooting section.

Note - The bulb may illuminate with a pink hue, changing to blue as the purification cycle continues. This is acceptable and does not affect performance.

9.After the PURIFY light is off, unplug adapter from system and retract cord.

Note - You may leave the adapter plugged in the AC outlet with the cord retracted or store in a drawer for the next use.

10.Your water is ready to drink. Additional uses include cooking, coffee, tea, juice, baby formula, ice, pet bowls and more.

Note - You may store the pitcher in the refrigerator. Re-purify water if it sits out for more than 2 days.

6

7

Page 4
Image 4
HoMedics RWS-1FL, RWS-100, IB-RWS100A instruction manual Instructions for Use, Getting Started, Operating Instructions

RWS-100, RWS-1FL, IB-RWS100A specifications

HoMedics has made a significant impact in the wellness industry with its innovative range of devices that focus on delivering relaxation and comfort. Among its popular offerings are the HoMedics RWS-100, RWS-1FL, and IB-RWS100A. Each of these products is engineered to enhance user experience through advanced technologies and thoughtful design.

The HoMedics RWS-100 is an exceptional product that combines warmth and massage for ultimate relaxation. It features a heated function that soothes tired muscles and promotes circulation. The RWS-100 comes with multiple massage settings, allowing users to customize their experience according to their preferences. Built with a lightweight and portable design, it can be easily used in various settings, from home to the office.

In terms of technology, the RWS-100 incorporates advanced vibration technology that targets specific muscle groups, providing a comprehensive massage experience. The ergonomic design ensures that users can comfortably use the device for extended periods. The material used is soft to the touch, adding to the overall comfort of the user. Its easy-to-use control panel lets users swiftly adjust settings without any hassle.

The RWS-1FL is another remarkable addition from HoMedics that focuses on foot wellness. This device offers a deep kneading foot massage that alleviates tension and stress, making it perfect for those who spend long hours on their feet. It features a built-in heat function to enhance relaxation and improve blood circulation. The RWS-1FL is designed with a user-friendly interface, allowing users to choose the intensity and type of massage, whether it’s a gentle roll or a deeper kneading action.

Last but not least, the IB-RWS100A stands out for its versatility and functionality. This model combines the benefits of multiple wellness technologies, including vibrating massage and heat therapy, to provide an all-encompassing relaxation experience. The IB-RWS100A is perfect for targeting various body parts, ensuring that every tension point is addressed. It features adjustable settings for frequency and intensity, which can be easily controlled through a straightforward interface.

In summary, the HoMedics RWS-100, RWS-1FL, and IB-RWS100A are exceptional wellness devices that prioritize user comfort and relaxation. Through innovative technologies, ergonomic designs, and customizable features, these products stand out in the wellness market, providing users with the ultimate relaxation experience tailored to their needs.