Installation
Mounting a Lens
1.Remove the protective cap in front of the camera.
2.Confirm the mount ring whether it is for C or CS. * Caution1
3.Attach the lens to the lens mount ring.
4.If the lens has an Auto Iris mechanism, connect the iris cable to the Lens connector (EE/VSD S/W must be set to VSD on the side of the camera)
A.In the case of having no iris amplifier : Set the slide switch to DC (Down side)
B.In the case of having iris amplifier : Set the slide switch VSD (Upper side)
C.Set the S/W on the side of the camera to DC or VSD, too.
☞If using lens that has iris amplifier, “LEVEL” and “ALC” volume of lens must be adjust carefully. It may cause any hunting.
☞When connecting Auto iris lens, be sure to use the connector to be recommended by manufacturer.
* Caution 1 : This appliance is set to CS mount default.
If you want to use C mount lens, fix a C adapter ring additionally packed in the box.
5
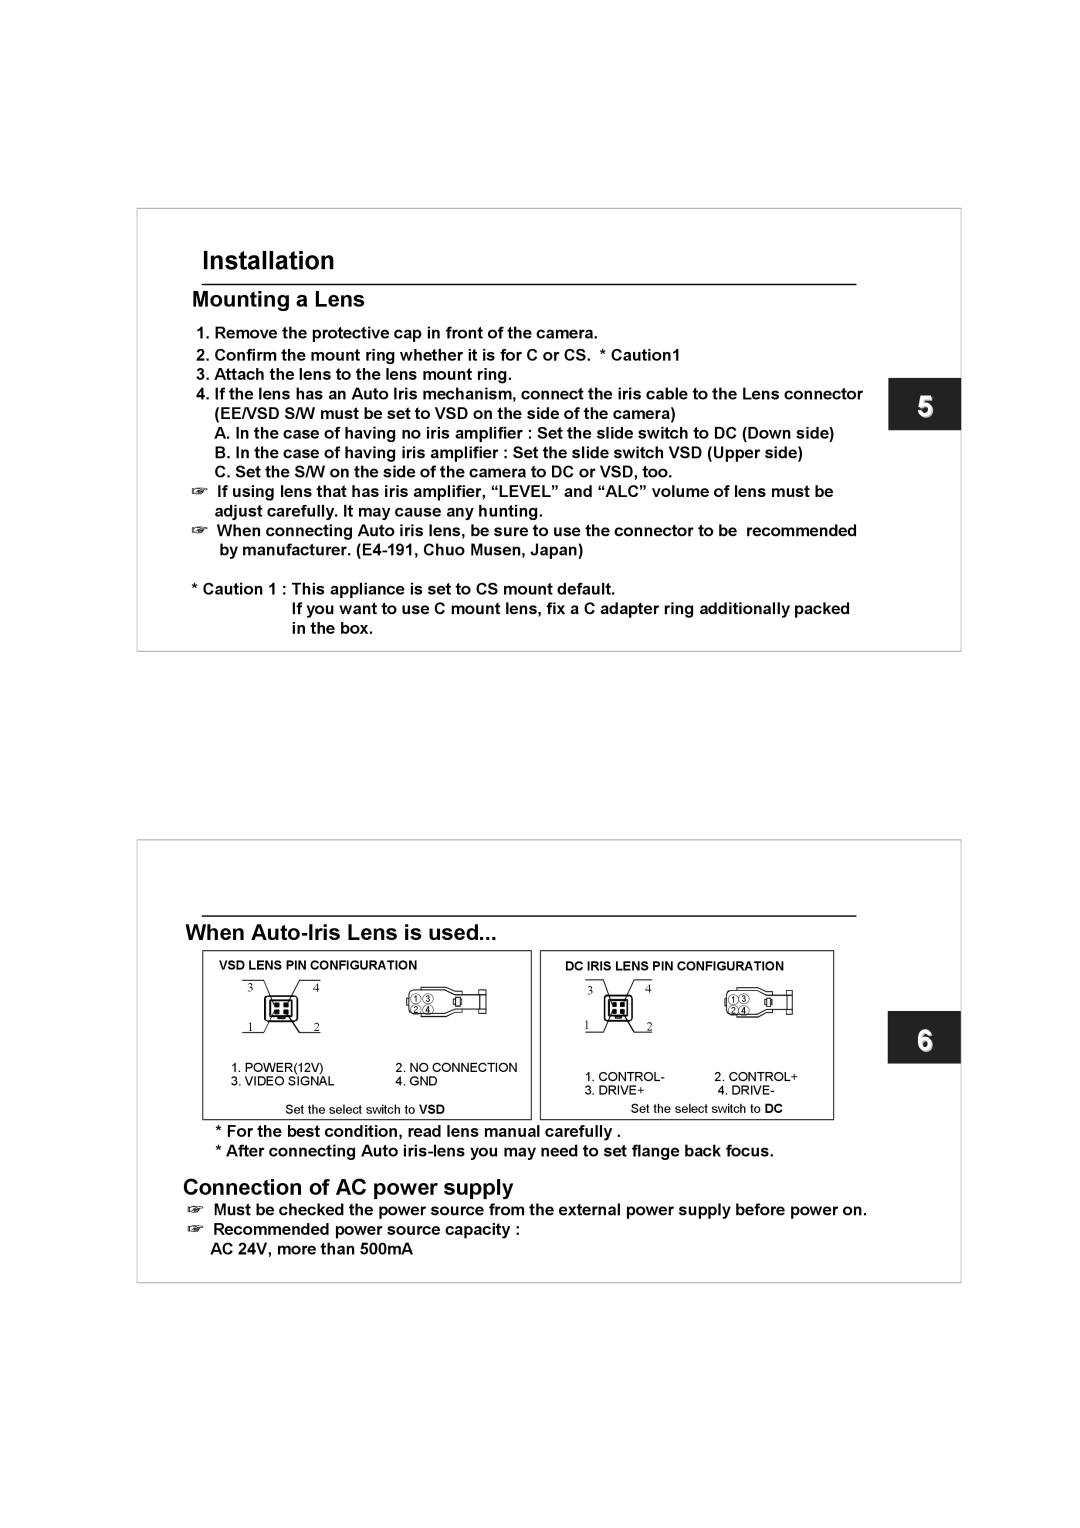
When Auto-Iris Lens is used...
VSD LENS PIN CONFIGURATION | DC IRIS LENS PIN CONFIGURATION |
3 | 4 | ①③ | 3 | 4 | ①③ | |
|
|
|
| |||
|
| ②④ | 1 |
| ②④ | |
1 | 2 |
| 2 |
| ||
1. POWER(12V) | 2. NO CONNECTION | 1. CONTROL- | 2. CONTROL+ | |||
3. VIDEO SIGNAL | 4. GND | |||||
3. DRIVE+ |
| 4. DRIVE- | ||||
|
|
|
| |||
| Set the select switch to VSD | Set the select switch to DC | ||||
*For the best condition, read lens manual carefully .
*After connecting Auto
Connection of AC power supply
6
☞Must be checked the power source from the external power supply before power on.
☞Recommended power source capacity :
AC 24V, more than 500mA