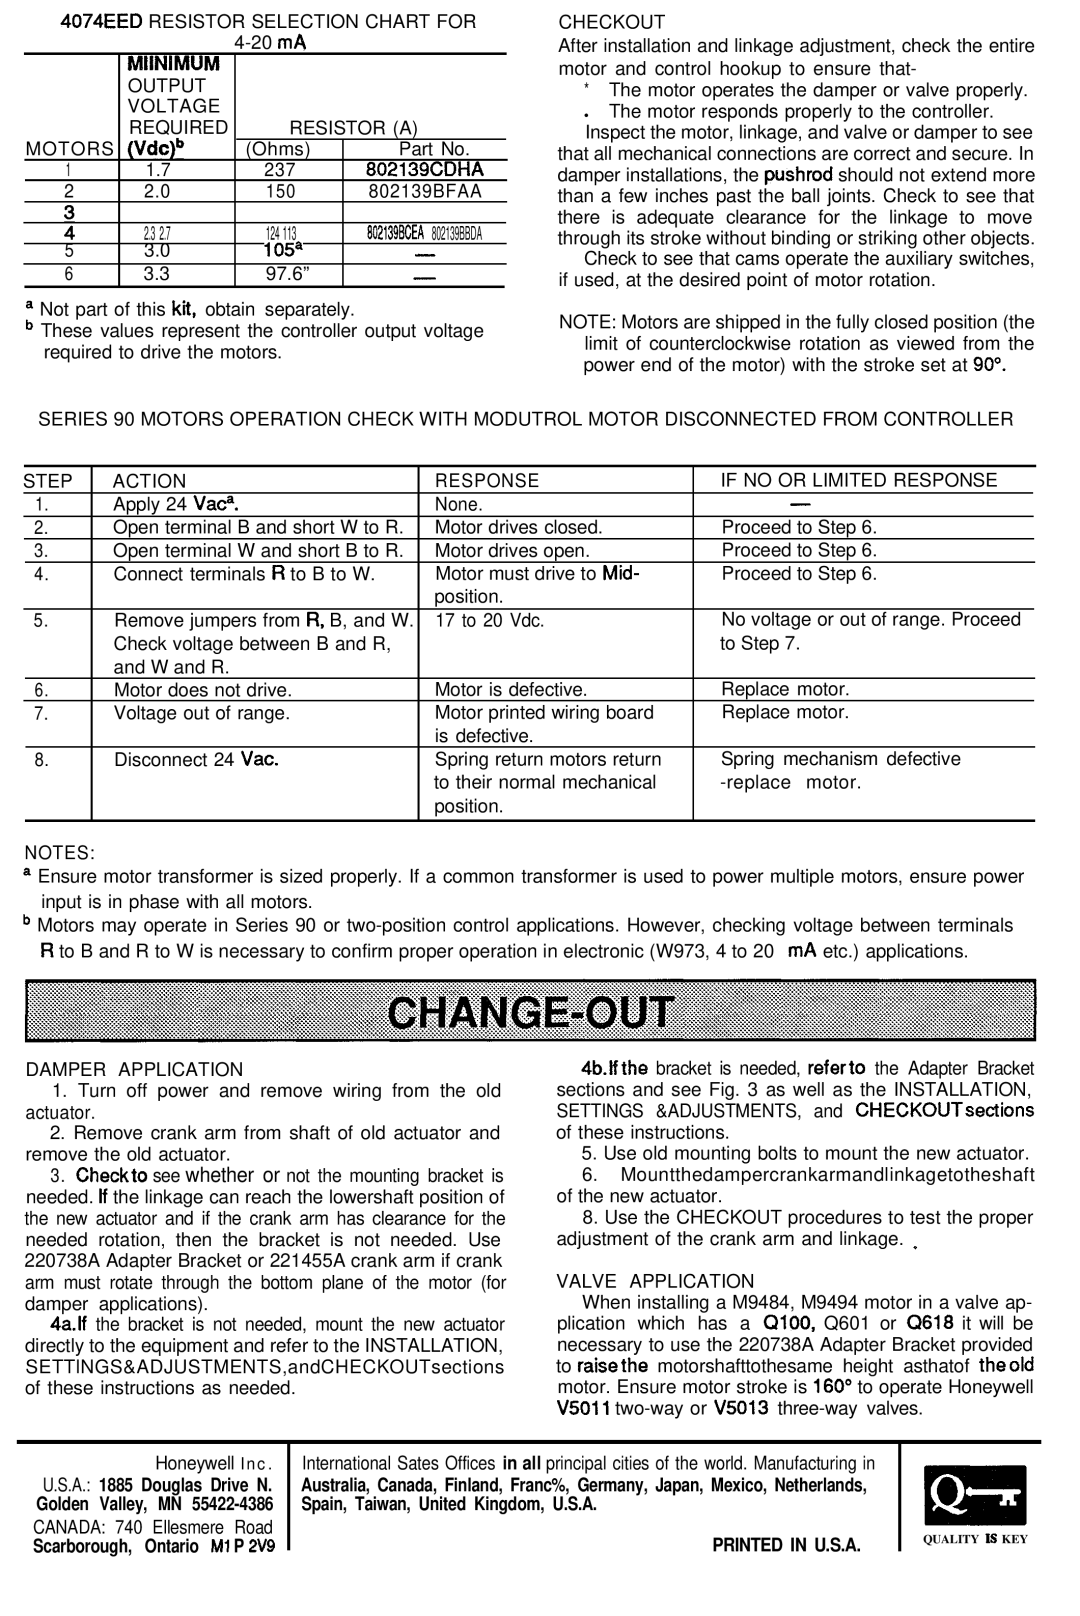
4074EED RESISTOR SELECTION CHART FOR
|
|
| MIINIMUM |
|
|
|
|
| OUTPUT |
|
|
|
|
| VOLTAGE |
|
|
|
| MOTORS | REQUIRED | RESISTOR (A) | |
|
| (Vdc)b | (Ohms) | Part No. | |
| 1 | 1.7 | 237 | 80213QCDHA | |
|
| 2 | 2.0 | 150 | 802139BFAA |
|
|
|
| ||
: | 2.3 2.7 | 124 113 | 802139BCEA 802139BBDA | ||
5 | 3.0 | 105a | - | ||
| 6 | 3.3 | 97.6” | - | |
a Not part of this kit, obtain separately.
b These values represent the controller output voltage required to drive the motors.
CHECKOUT
After installation and linkage adjustment, check the entire motor and control hookup to ensure that-
*The motor operates the damper or valve properly. • The motor responds properly to the controller. Inspect the motor, linkage, and valve or damper to see
that all mechanical connections are correct and secure. In damper installations, the pushrod should not extend more than a few inches past the ball joints. Check to see that there is adequate clearance for the linkage to move through its stroke without binding or striking other objects.
Check to see that cams operate the auxiliary switches, if used, at the desired point of motor rotation.
NOTE: Motors are shipped in the fully closed position (the limit of counterclockwise rotation as viewed from the power end of the motor) with the stroke set at 90”.
SERIES 90 MOTORS OPERATION CHECK WITH MODUTROL MOTOR DISCONNECTED FROM CONTROLLER
|
|
|
|
|
|
|
STEP | ACTION | RESPONSE | IF NO OR LIMITED RESPONSE |
| ||
| 1. | Apply 24 Vaca. | None. | - |
| |
| 2. | Open terminal B and short W to R. | Motor drives closed. | Proceed to Step 6. |
| |
| 3. | Open terminal W and short B to R. | Motor drives open. | Proceed to Step 6. |
| |
| 4. | Connect terminals R to B to W. | Motor must drive to Mid- | Proceed to Step 6. |
| |
|
|
|
| position. |
|
|
| 5. | Remove jumpers from R, B, and W. | 17 to 20 Vdc. | No voltage or out of range. Proceed |
| |
|
|
| Check voltage between B and R, |
| to Step 7. |
|
|
|
| and W and R. |
|
|
|
|
| 6. | Motor does not drive. | Motor is defective. | Replace motor. |
|
7. | Voltage out of range. | Motor printed wiring board | Replace motor. |
| ||
|
|
|
| is defective. |
|
|
8. | Disconnect 24 Vat. | Spring return motors return | Spring mechanism defective |
| ||
|
|
|
| to their normal mechanical |
| |
|
|
|
| position. |
|
|
|
|
|
|
|
|
|
NOTES:
a Ensure motor transformer is sized properly. If a common transformer is used to power multiple motors, ensure power input is in phase with all motors.
b Motors may operate in Series 90 or
DAMPER APPLICATION
1.Turn off power and remove wiring from the old actuator.
2.Remove crank arm from shaft of old actuator and remove the old actuator.
3.Checkto see whether or not the mounting bracket is needed. lf the linkage can reach the lowershaft position of the new actuator and if the crank arm has clearance for the needed rotation, then the bracket is not needed. Use 220738A Adapter Bracket or 221455A crank arm if crank arm must rotate through the bottom plane of the motor (for damper applications).
4a.If the bracket is not needed, mount the new actuator directly to the equipment and refer to the INSTALLATION, SETTlNGS&ADJUSTMENTS,andCHECKOUTsections of these instructions as needed.
4b.ffthe bracket is needed, referto the Adapter Bracket sections and see Fig. 3 as well as the INSTALLATION, SETTINGS &ADJUSTMENTS, and CHECKOUTsections of these instructions.
5.Use old mounting bolts to mount the new actuator.
6.Mountthedampercrankarmandlinkagetotheshaft of the new actuator.
8.Use the CHECKOUT procedures to test the proper adjustment of the crank arm and linkage. .
VALVE APPLICATION
When installing a M9484, M9494 motor in a valve ap- plication which has a QlOO, Q601 or 0618 it will be necessary to use the 220738A Adapter Bracket provided to raisethe motorshafttothesame height asthatof theold motor. Ensure motor stroke is 160” to operate Honeywell V5011
Honeywell Inc.
U.S.A.: 1885 Douglas Drive N.
Golden Valley, MN
CANADA: 740 Ellesmere Road
Scarborough, Ontario Ml P 2V9
International Sates Offices in all principal cities of the world. Manufacturing in
Australia, Canada, Finland, Franc%, Germany, Japan, Mexico, Netherlands, Spain, Taiwan, United Kingdom, U.S.A.
PRINTED IN U.S.A.
@
Lz3
QUALITY IS KEY
