Remove the mains plug from the wall socket when the temperature setting process shows error status.
Wait for the solepate to cool then plug the iron in again.
If the LCD panel still shows error status, return the entire appliance to the nearest service centre for examination and /or repair.
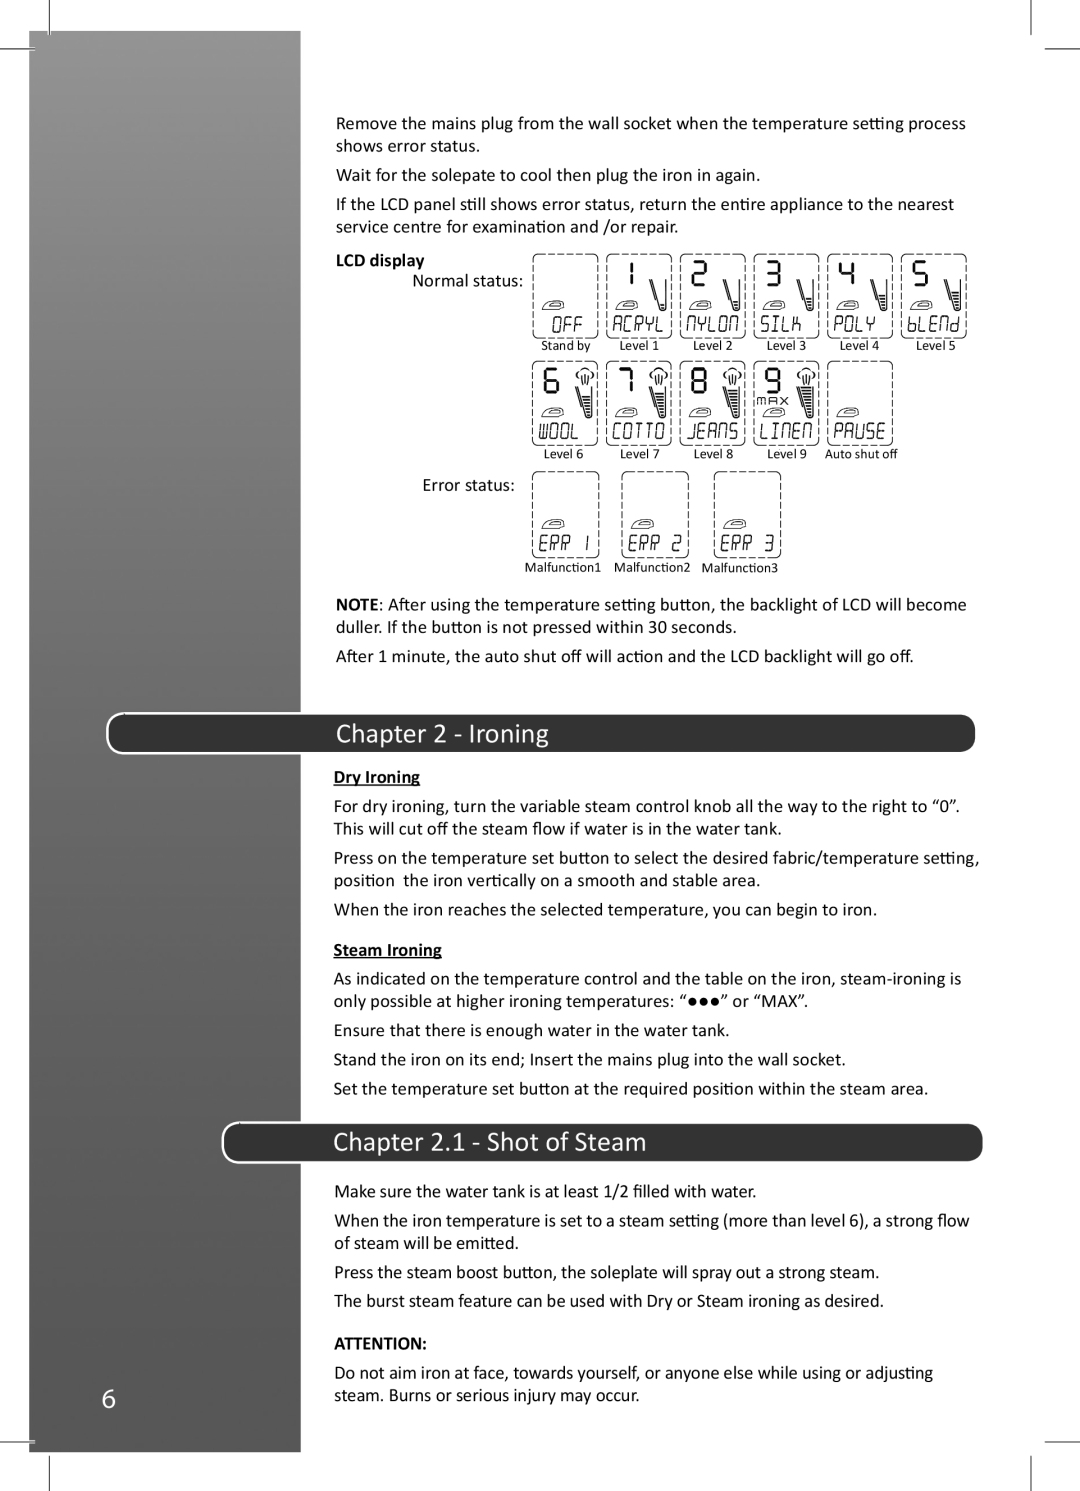
LCD display
Normal status:
Stand by | Level 1 | Level 2 | Level 3 | Level 4 | Level 5 |
Level 6 | Level 7 | Level 8 | Level 9 Auto shut off |
| |
Error status:
Malfunction1 Malfunction2 Malfunction3
NOTE: After using the temperature setting button, the backlight of LCD will become duller. If the button is not pressed within 30 seconds.
After 1 minute, the auto shut off will action and the LCD backlight will go off.
Chapter 2 - Ironing
Dry Ironing
For dry ironing, turn the variable steam control knob all the way to the right to “0”. This will cut off the steam flow if water is in the water tank.
Press on the temperature set button to select the desired fabric/temperature setting, position the iron vertically on a smooth and stable area.
When the iron reaches the selected temperature, you can begin to iron.
Steam Ironing
As indicated on the temperature control and the table on the iron,
Ensure that there is enough water in the water tank.
Stand the iron on its end; Insert the mains plug into the wall socket.
Set the temperature set button at the required position within the steam area.
| Chapter 2.1 - Shot of Steam |
| Make sure the water tank is at least 1/2 filled with water. |
| When the iron temperature is set to a steam setting (more than level 6), a strong flow |
| of steam will be emitted. |
| Press the steam boost button, the soleplate will spray out a strong steam. |
| The burst steam feature can be used with Dry or Steam ironing as desired. |
| ATTENTION: |
6 | Do not aim iron at face, towards yourself, or anyone else while using or adjusting |
steam. Burns or serious injury may occur. |