2. How to use
Description
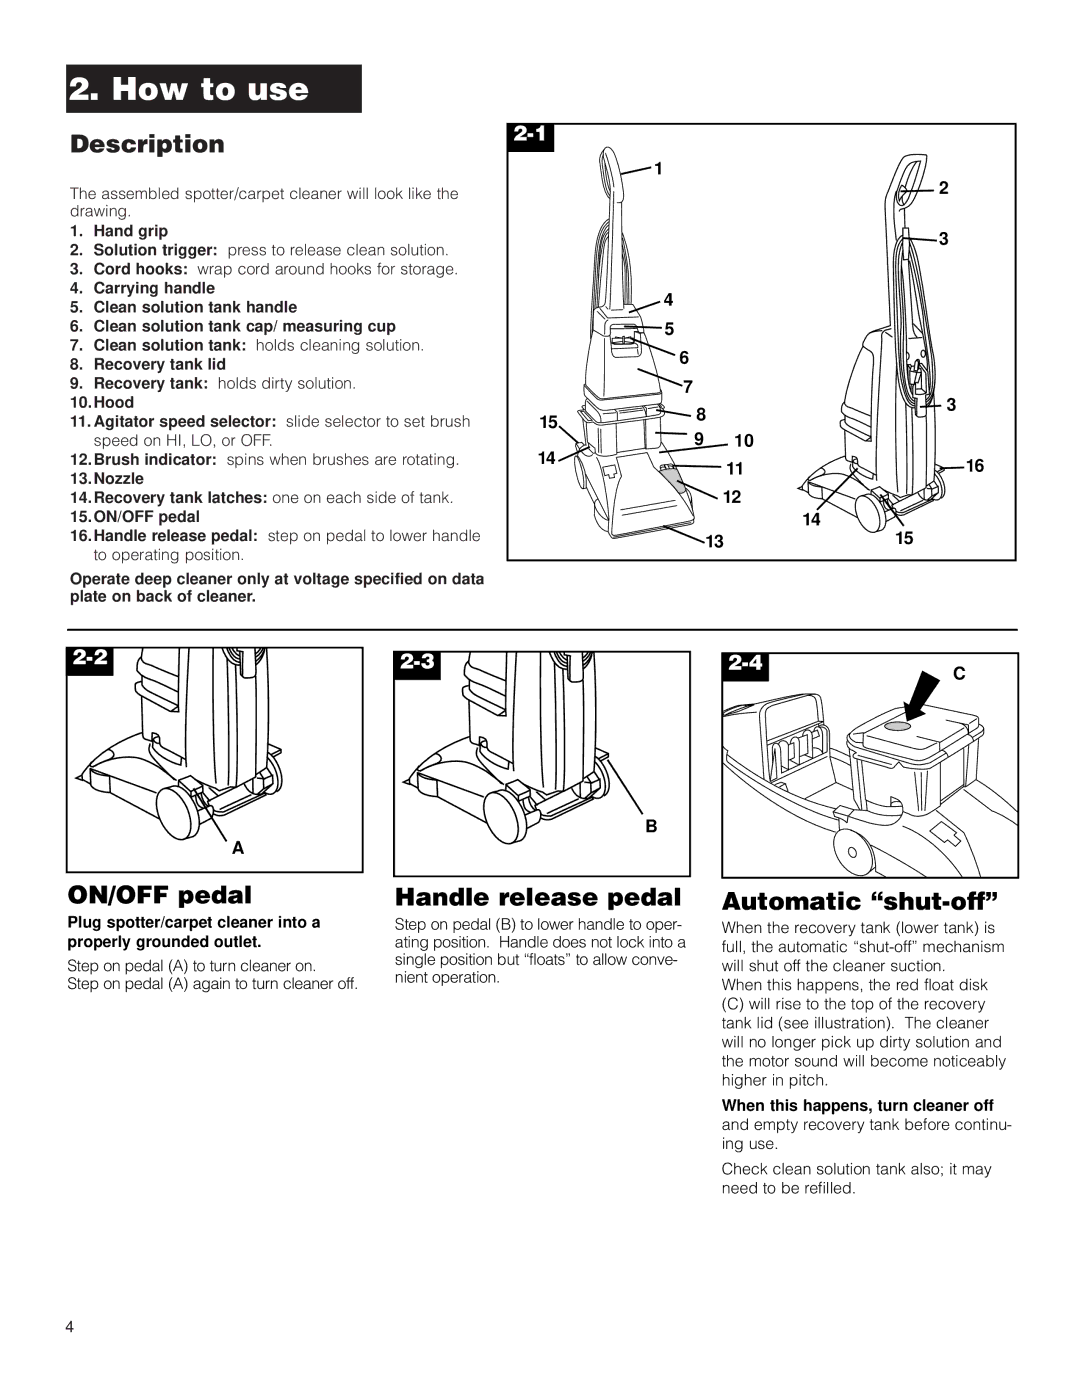
The assembled spotter/carpet cleaner will look like the drawing.
1.Hand grip
2.Solution trigger: press to release clean solution.
3.Cord hooks: wrap cord around hooks for storage.
4.Carrying handle
5.Clean solution tank handle
6.Clean solution tank cap/ measuring cup
7.Clean solution tank: holds cleaning solution.
8.Recovery tank lid
9.Recovery tank: holds dirty solution.
10.Hood
11.Agitator speed selector: slide selector to set brush speed on HI, LO, or OFF.
12.Brush indicator: spins when brushes are rotating.
13.Nozzle
14.Recovery tank latches: one on each side of tank.
15.ON/OFF pedal
16.Handle release pedal: step on pedal to lower handle to operating position.
Operate deep cleaner only at voltage specified on data plate on back of cleaner.
![]() 1
1
![]() 2
2
|
|
| 3 | |
| 4 |
|
| |
| 5 |
|
| |
| 6 |
|
| |
| 7 |
| 3 | |
15 | 8 | |||
| ||||
9 | 10 |
| ||
14 |
| |||
| 11 | 16 | ||
|
| |||
|
| 12 |
| |
|
|
| 14 | |
|
| 13 | 15 | |
| B |
A |
|
ON/OFF pedal | Handle release pedal |
Plug spotter/carpet cleaner into a | Step on pedal (B) to lower handle to oper- | |
properly grounded outlet. | ating position. Handle does not lock into a | |
Step on pedal (A) to turn cleaner on. | single position but “floats” to allow conve- | |
nient operation. | ||
Step on pedal (A) again to turn cleaner off. | ||
|
C | |
| |
Automatic | |
When the recovery tank (lower tank) is full, the automatic
When this happens, the red float disk
(C)will rise to the top of the recovery tank lid (see illustration). The cleaner will no longer pick up dirty solution and the motor sound will become noticeably higher in pitch.
When this happens, turn cleaner off and empty recovery tank before continu- ing use.
Check clean solution tank also; it may need to be refilled.
4
