2. How to use
1 |
|
| |
| 2 |
| |
|
|
| |
| 3 |
|
|
| 4 | 5 |
|
|
|
| |
|
| 6 | 18 |
|
|
| |
|
| 7 | 19 |
|
|
| |
| 9 | 8 |
|
| 17 | 10 |
|
|
| 17 | |
| 14 | 12 | |
| 13 | 11 |
|
| 14 |
| |
| 15 |
| |
| 13 | 20 | |
| 16 |
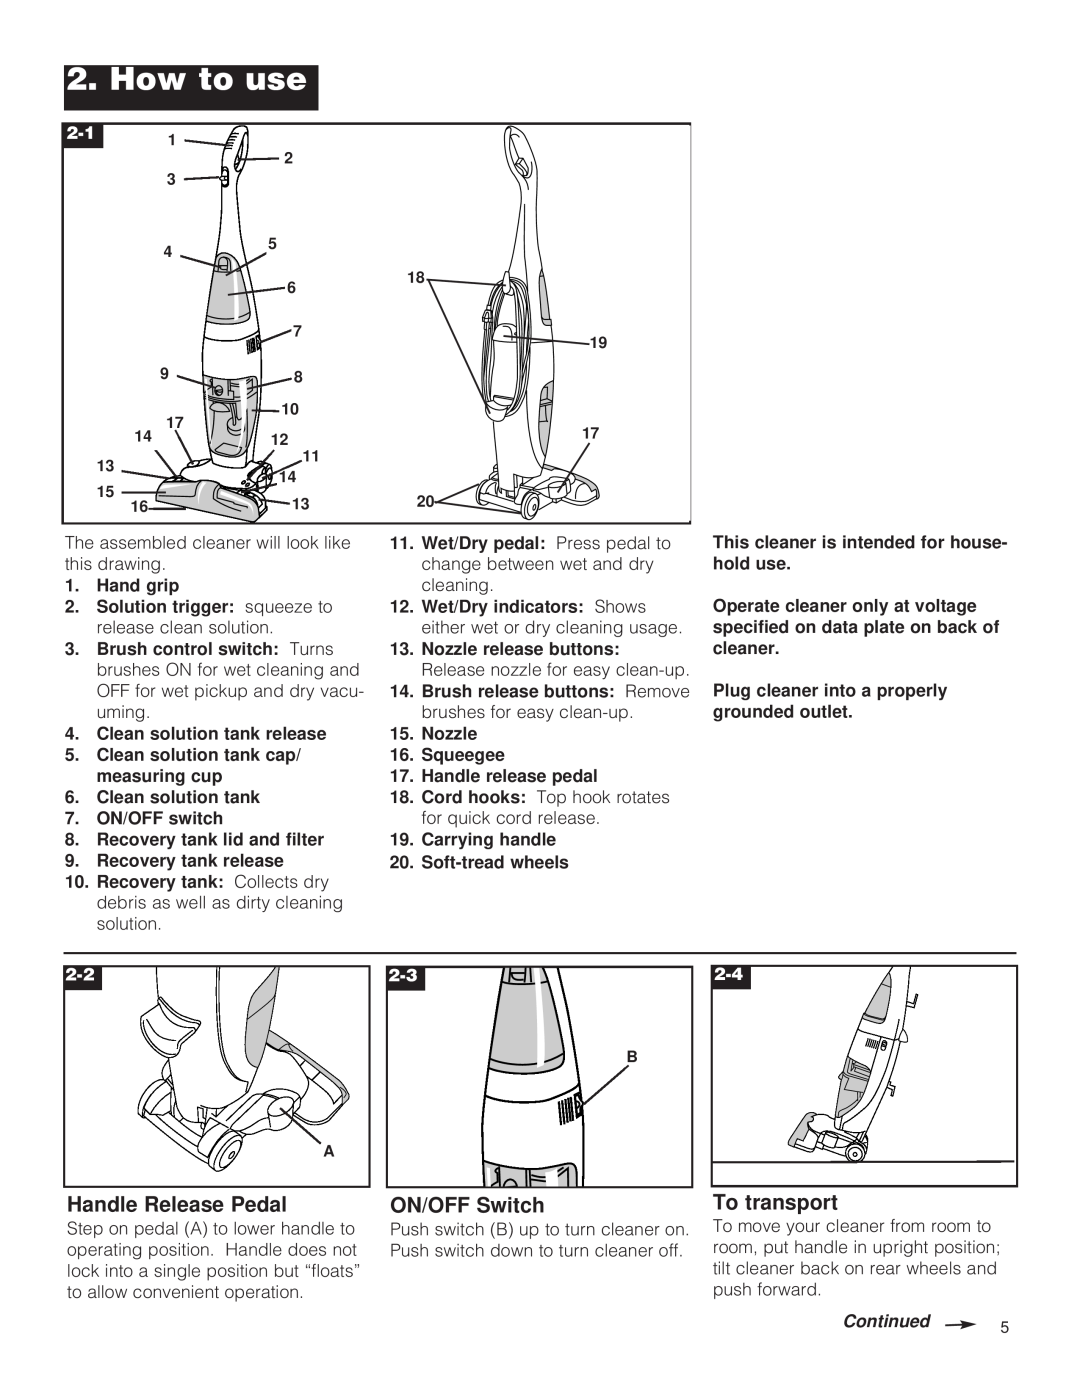
The assembled cleaner will look like this drawing.
1.Hand grip
2.Solution trigger: squeeze to release clean solution.
3.Brush control switch: Turns brushes ON for wet cleaning and OFF for wet pickup and dry vacu- uming.
4.Clean solution tank release
5.Clean solution tank cap/ measuring cup
6.Clean solution tank
7.ON/OFF switch
8.Recovery tank lid and filter
9.Recovery tank release
10.Recovery tank: Collects dry debris as well as dirty cleaning solution.
11.Wet/Dry pedal: Press pedal to change between wet and dry cleaning.
12.Wet/Dry indicators: Shows either wet or dry cleaning usage.
13.Nozzle release buttons: Release nozzle for easy
14.Brush release buttons: Remove brushes for easy
15.Nozzle
16.Squeegee
17.Handle release pedal
18.Cord hooks: Top hook rotates for quick cord release.
19.Carrying handle
20.
This cleaner is intended for house- hold use.
Operate cleaner only at voltage specified on data plate on back of cleaner.
Plug cleaner into a properly grounded outlet.
A |
Handle Release Pedal
Step on pedal (A) to lower handle to operating position. Handle does not lock into a single position but “floats” to allow convenient operation.
B |
ON/OFF Switch
Push switch (B) up to turn cleaner on. Push switch down to turn cleaner off.
To transport
To move your cleaner from room to room, put handle in upright position; tilt cleaner back on rear wheels and push forward.
Continued ![]() 5
5