Manuals
/
Hotpoint
/
Kitchen Appliance
/
Dishwasher
Hotpoint
DWF70, DWM75
manual
Installation, D Ishwasher, Levelling, Standpipe
Models:
DWF70
DWM75
1
5
20
20
Download
20 pages
38.96 Kb
1
2
3
4
5
6
7
8
Troubleshooting
Install
Programme Chart
I. Wash cycle symbols
Indicator lights
Warranty
Genuine Parts and Accessories
Thefilterassembly
CleanerDishes
How to
Page 5
Image 5
Page 4
Page 6
Page 5
Image 5
Page 4
Page 6
Contents
Ultima DWF70 & DWM75 60cm free standing Dishwasher
Instructions for Installation and Use
Contents
D ISHWASHER
Retention of this Instruction Book
Safety Information
Electrical Connection
Fuses
Changing the Plug
DONOTremovetheratingplate
For your Safety
Standpipe
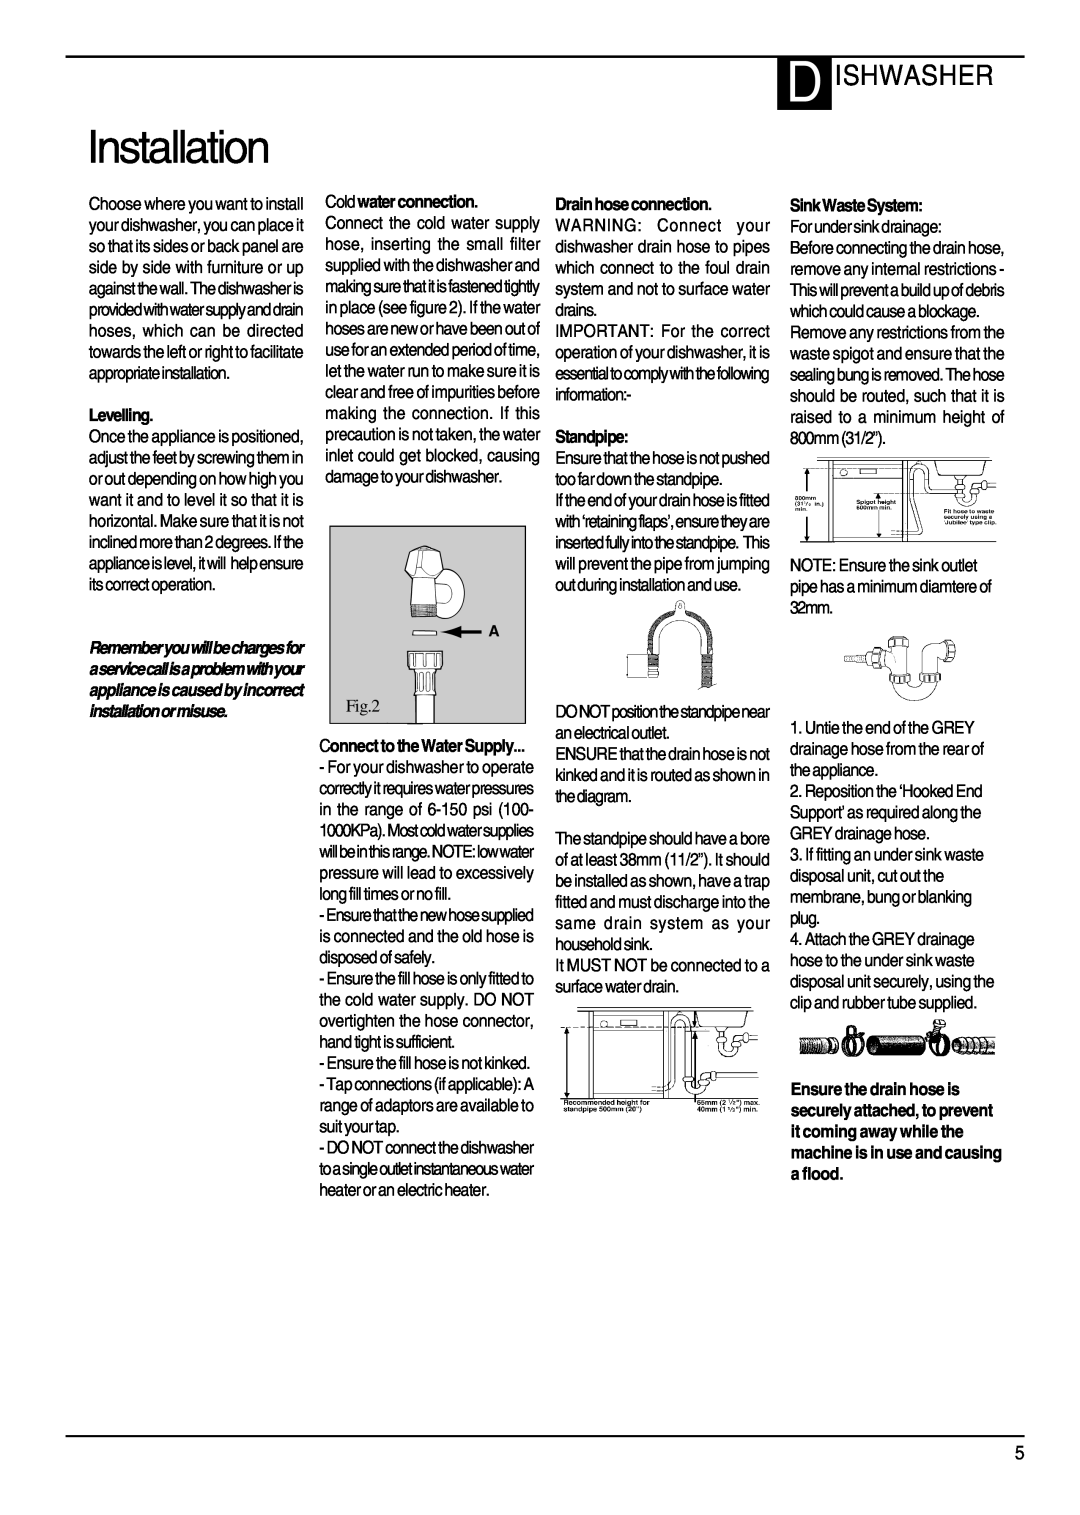
Installation
Levelling
The Controls
Getting to know your Dishwasher
D. Start/Reset button
H. Cycle phase indicator lights Pre-Wash, Wash, Rinses, Drying
Indicator lights
How to use your Dishwasher
thelowerbasket
If you want your dishes to be perfectlydry
‘Aquasensor’washcycles Thismeansthat your dishwasheris
Programme Chart
When to add salt
Before Using your Dishwasher
Salt
4. Screw the cap back in place carefully
The detergent
CleanerDishes
Rinse aid
Addingdetergent
How to adjust the upper basket
Loading your Dishwasher
What can I Wash Items not suitable for the dishwasher
Multisystem baskets
Load for 12 Standard Settings tests upper basket at top position
INFORMATION FOR TEST LABS
Cycle
Total detergent
User Quick Guide
Thefilterassembly
Care and Cleaning
For cleaning, use a non metallic brush
switch off at the electrical socket andunplug
Resolving minor problems yourself
Troubleshooting
D ISHWASHER
D ISHWASHER
No company is better positioned to offer an after sales service on a
After Sales Service
Repair Service and Information Help Desk
Genuine Parts and AccessoriesUK
Recycling & Disposal Information
Guarantee
Satisfaction guaranteed or your money back
Guarantee terms and conditions
Key Contacts
After Sales Service
Repair Service and Information Desk
Genuine Parts and Accessories
Top
Page
Image
Contents