Installation - Model E6002
These instructions are intended for the qualified technician installing the appliance in order to insure that the installation, adjustments and maintenance procedures are performed correctly and comply with the regulations currently in effect.
Important: the hob must be disconnected from the power supply before making any adjustments or performing any maintenance, etc.
Installing
The hob has a type X protection rating against overheating in compliance with regulation CEI
a)Hoods must be installed in compliance with the required specifications contained in the instruction manual for the hood itself.
b)The
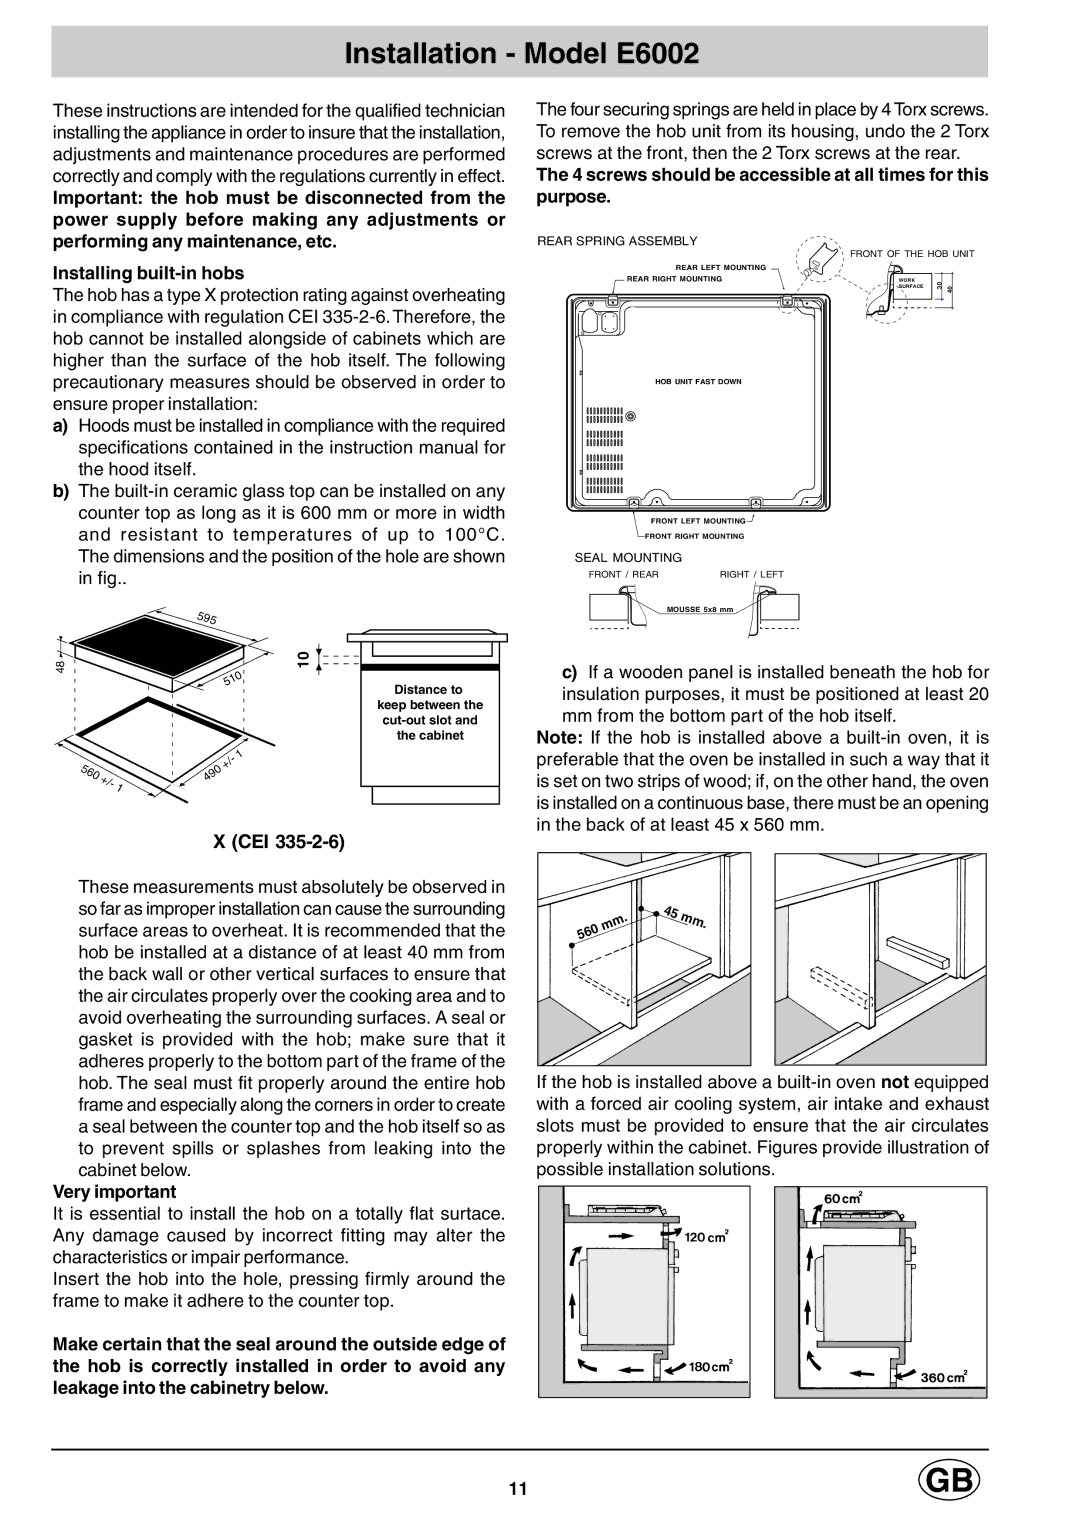
The four securing springs are held in place by 4 Torx screws. To remove the hob unit from its housing, undo the 2 Torx screws at the front, then the 2 Torx screws at the rear.
The 4 screws should be accessible at all times for this purpose.
REAR SPRING ASSEMBLY
FRONT OF THE HOB UNIT
REAR LEFT MOUNTING |
|
|
|
REAR RIGHT MOUNTING | WORK | 30 | 40 |
| SURFACE |
HOB UNIT FAST DOWN
FRONT LEFT MOUNTING![]()
FRONT RIGHT MOUNTING
SEAL MOUNTING
FRONT / REAR | RIGHT / LEFT |
48
560 | +/- |
| |
| 1 |
595
| 10 |
| 510 |
| 1 |
| - |
490 | +/ |
|
Distance to keep between the
the cabinet
MOUSSE 5x8 mm
c)If a wooden panel is installed beneath the hob for insulation purposes, it must be positioned at least 20 mm from the bottom part of the hob itself.
Note: If the hob is installed above a
X (CEI 335-2-6)
These measurements must absolutely be observed in so far as improper installation can cause the surrounding surface areas to overheat. It is recommended that the hob be installed at a distance of at least 40 mm from the back wall or other vertical surfaces to ensure that the air circulates properly over the cooking area and to avoid overheating the surrounding surfaces. A seal or gasket is provided with the hob; make sure that it adheres properly to the bottom part of the frame of the hob. The seal must fit properly around the entire hob frame and especially along the corners in order to create a seal between the counter top and the hob itself so as to prevent spills or splashes from leaking into the cabinet below.
Very important
It is essential to install the hob on a totally flat surtace. Any damage caused by incorrect fitting may alter the characteristics or impair performance.
Insert the hob into the hole, pressing firmly around the frame to make it adhere to the counter top.
Make certain that the seal around the outside edge of the hob is correctly installed in order to avoid any leakage into the cabinetry below.
. | 45 | mm. |
mm |
| |
560 |
|
|
If the hob is installed above a
11