Theelectronicprogrammer

GB


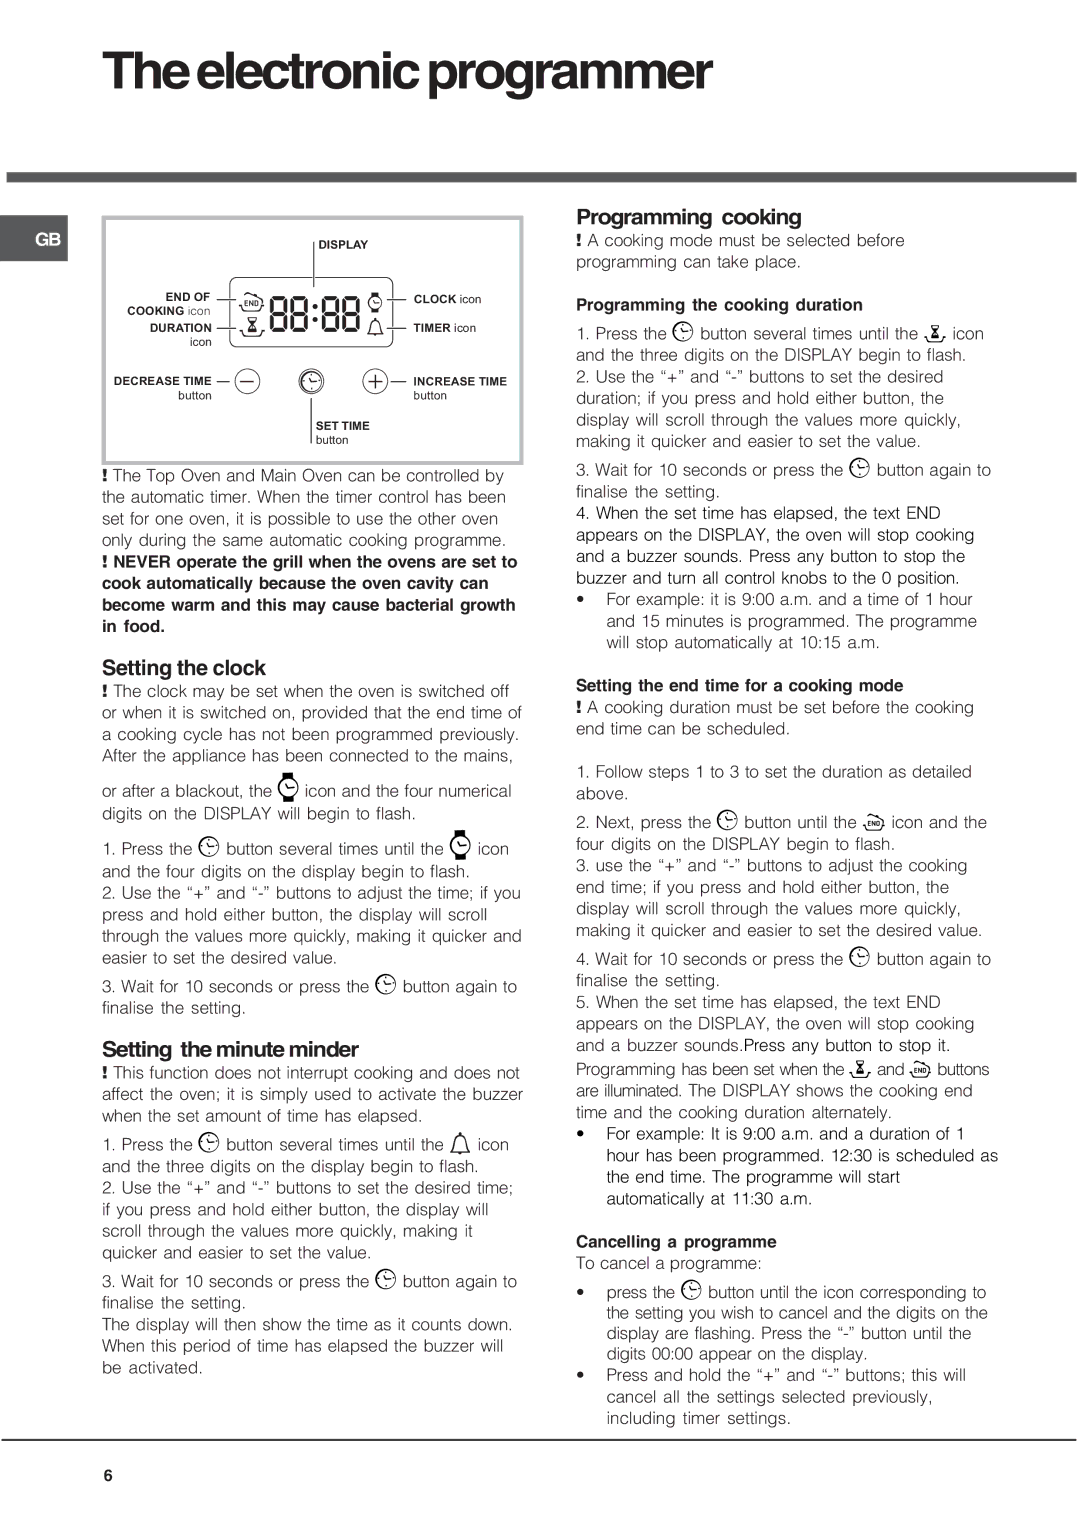
DISPLAY


END OF


•• ••


CLOCK icon

COOKING icon


DURATION


TIMER icon

icon


DECREASE TIME


INCREASE TIME


button


button

SET TIME

button

￿The Top Oven and Main Oven can be controlled by the automatic timer. When the timer control has been set for one oven, it is possible to use the other oven only during the same automatic cooking programme.

￿NEVER operate the grill when the ovens are set to cook automatically because the oven cavity can become warm and this may cause bacterial growth in food.

Setting the clock

￿The clock may be set when the oven is switched off or when it is switched on, provided that the end time of a cooking cycle has not been programmed previously. After the appliance has been connected to the mains,

or after a blackout, the icon and the four numerical digits on the DISPLAY will begin to flash.

1.Press the button several times until the icon and the four digits on the display begin to flash.

2.Use the “+” and “-” buttons to adjust the time; if you press and hold either button, the display will scroll through the values more quickly, making it quicker and easier to set the desired value.

3.Wait for 10 seconds or press the button again to finalise the setting.

Setting the minute minder

￿This function does not interrupt cooking and does not affect the oven; it is simply used to activate the buzzer when the set amount of time has elapsed.

1.Press the button several times until the icon and the three digits on the display begin to flash.

2.Use the “+” and “-” buttons to set the desired time; if you press and hold either button, the display will scroll through the values more quickly, making it quicker and easier to set the value.

3.Wait for 10 seconds or press the button again to finalise the setting.

The display will then show the time as it counts down. When this period of time has elapsed the buzzer will be activated.

Programming cooking

￿A cooking mode must be selected before programming can take place.

Programming the cooking duration

1.Press the button several times until the icon and the three digits on the DISPLAY begin to flash.

2.Use the “+” and “-” buttons to set the desired duration; if you press and hold either button, the display will scroll through the values more quickly, making it quicker and easier to set the value.

3.Wait for 10 seconds or press the button again to finalise the setting.

4.When the set time has elapsed, the text END appears on the DISPLAY, the oven will stop cooking and a buzzer sounds. Press any button to stop the buzzer and turn all control knobs to the 0 position.

• For example: it is 9:00 a.m. and a time of 1 hour and 15 minutes is programmed. The programme will stop automatically at 10:15 a.m.

Setting the end time for a cooking mode

￿A cooking duration must be set before the cooking end time can be scheduled.

1.Follow steps 1 to 3 to set the duration as detailed above.

2.Next, press the button until the icon and the four digits on the DISPLAY begin to flash.

3.use the “+” and “-” buttons to adjust the cooking end time; if you press and hold either button, the display will scroll through the values more quickly, making it quicker and easier to set the desired value.

4.Wait for 10 seconds or press the button again to finalise the setting.

5.When the set time has elapsed, the text END appears on the DISPLAY, the oven will stop cooking and a buzzer sounds.Press any button to stop it.

Programming has been set when the and buttons are illuminated. The DISPLAY shows the cooking end time and the cooking duration alternately.

• For example: It is 9:00 a.m. and a duration of 1 hour has been programmed. 12:30 is scheduled as the end time. The programme will start automatically at 11:30 a.m.

Cancelling a programme

To cancel a programme:

press the button until the icon corresponding to the setting you wish to cancel and the digits on the display are flashing. Press the “-” button until the digits 00:00 appear on the display.

Press and hold the “+” and “-” buttons; this will cancel all the settings selected previously, including timer settings.

6

Page 6
Image 6
Hotpoint UY46X/2 UH53 manual Theelectronicprogrammer, Setting the clock, Setting the minute minder, Programming cooking

UY46X/2 UH53 specifications

The Hotpoint UY46X/2 UH53 is a modern refrigerator designed to meet the needs of users looking for efficiency, style, and advanced technology. This model comes with a range of features that make it a standout in the competitive home appliance market, providing both reliability and convenience.

One of the most notable characteristics of the Hotpoint UY46X/2 UH53 is its spacious interior. With a significant storage capacity, it is designed to accommodate all types of food and beverages, making it ideal for families and individuals who prefer to shop in bulk. The adjustable shelving allows users to customize the interior layout, easily accommodating larger items like pitchers or tall bottles.

The appliance features a multi-air flow system, which ensures consistent and even cooling throughout the entire refrigerator. This technology helps maintain optimal temperatures for food preservation, effectively extending the freshness and shelf life of perishables. Additionally, the Hotpoint UY46X/2 UH53 is equipped with an energy-efficient compressor, which not only reduces electricity consumption but also minimizes noise, ensuring a quieter kitchen environment.

Another highlight of this model is its advanced cooling technologies, including the frost-free function. This eliminates the need for manual defrosting, making maintenance hassle-free and providing customers with more time to enjoy their kitchen space. The door-on-door design adds to the convenience, allowing users to access items quickly without disrupting the internal temperature of the refrigerator.

In terms of design, the Hotpoint UY46X/2 UH53 exudes a sleek and contemporary aesthetic, featuring a stainless steel finish that not only enhances its visual appeal but also offers durability and easy cleaning. The intuitive control panel allows for straightforward temperature adjustments, putting control at the user's fingertips.

Moreover, the Hotpoint UY46X/2 UH53 is designed with food storage safety in mind. The use of antibacterial materials in its construction helps reduce the risk of bacterial growth, ensuring that food remains safe for consumption. With its combination of spaciousness, advanced cooling technologies, and user-friendly design, the Hotpoint UY46X/2 UH53 is a reliable choice for anyone looking to enhance their kitchen experience.