Installation
Drainage Connection
!Although you may need to move the hooked end support along the grey drainage hose, DO NOT remove it.
!Whichever drainage method you use, make sure that the hooked end support is fixed level to, or above the ‘Plumbing Indicator Line’ (see Description page 2).
We recommend one of the following: |
|
|
| |
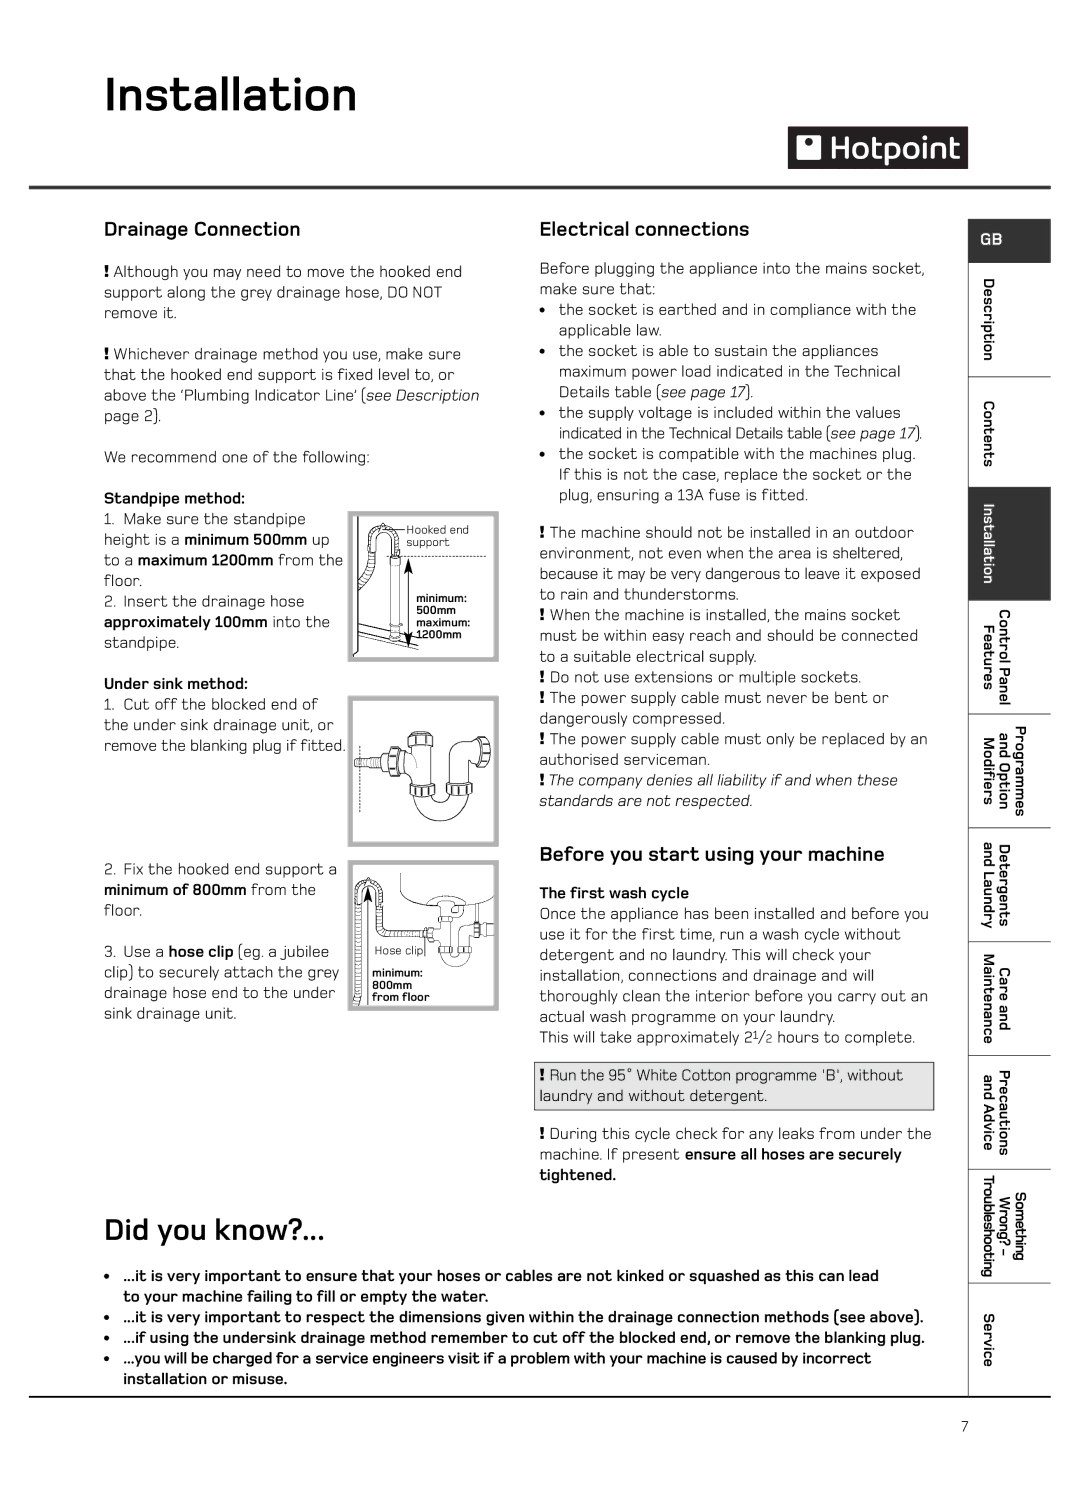
Standpipe method: |
|
|
| |
1. Make sure the standpipe |
|
|
|
|
|
| Hooked end | ||
height is a minimum 500mm up |
|
| ||
|
| |||
|
| support | ||
to a maximum 1200mm from the |
|
|
|
|
floor. |
|
|
|
|
|
|
|
| |
2. Insert the drainage hose |
|
|
| minimum: |
approximately 100mm into the |
|
|
| 500mm |
|
|
| maximum: | |
standpipe. |
|
|
| 1200mm |
|
|
| ||
|
|
|
| |
|
|
|
|
|
Under sink method:
1.Cut off the blocked end of the under sink drainage unit, or remove the blanking plug if fitted.
Electrical connections
Before plugging the appliance into the mains socket, make sure that:
●the socket is earthed and in compliance with the applicable law.
●the socket is able to sustain the appliances maximum power load indicated in the Technical Details table (see page 17).
●the supply voltage is included within the values indicated in the Technical Details table (see page 17).
●the socket is compatible with the machines plug. If this is not the case, replace the socket or the plug, ensuring a 13A fuse is fitted.
!The machine should not be installed in an outdoor environment, not even when the area is sheltered, because it may be very dangerous to leave it exposed to rain and thunderstorms.
!When the machine is installed, the mains socket must be within easy reach and should be connected to a suitable electrical supply.
!Do not use extensions or multiple sockets.
!The power supply cable must never be bent or dangerously compressed.
!The power supply cable must only be replaced by an authorised serviceman.
!The company denies all liability if and when these standards are not respected.
GB
Description |
|
|
|
|
|
Contents |
|
|
|
|
|
Installation |
|
|
|
|
|
Features | ControlPanel |
|
|
|
|
Modifiers | andOption | Programmes |
2.Fix the hooked end support a minimum of 800mm from the floor.
3.Use a hose clip (eg. a jubilee clip) to securely attach the grey drainage hose end to the under sink drainage unit.
Hose clip
minimum:
800mm from floor
Before you start using your machine
The first wash cycle
Once the appliance has been installed and before you use it for the first time, run a wash cycle without detergent and no laundry. This will check your installation, connections and drainage and will thoroughly clean the interior before you carry out an actual wash programme on your laundry.
This will take approximately 21/2 hours to complete.
!Run the 95˚ White Cotton programme 'B', without laundry and without detergent.
!During this cycle check for any leaks from under the machine. If present ensure all hoses are securely tightened.
andLaundry | Detergents |
|
|
Maintenance | Careand |
|
|
andAdvice | Precautions |
Did you know?...
●...it is very important to ensure that your hoses or cables are not kinked or squashed as this can lead to your machine failing to fill or empty the water.
●...it is very important to respect the dimensions given within the drainage connection methods (see above).
●...if using the undersink drainage method remember to cut off the blocked end, or remove the blanking plug.
●...you will be charged for a service engineers visit if a problem with your machine is caused by incorrect installation or misuse.
Troubleshooting | Wrong?- | Something |
Service |
|
|
7