1
2 |
|
|
| 3 | 1 |
|
|
|
|
| |
1 | 2 | 5 |
| 4 |
|
| 3 | 2 | |||
|
|
|
| ||
|
|
|
|
|
3
2
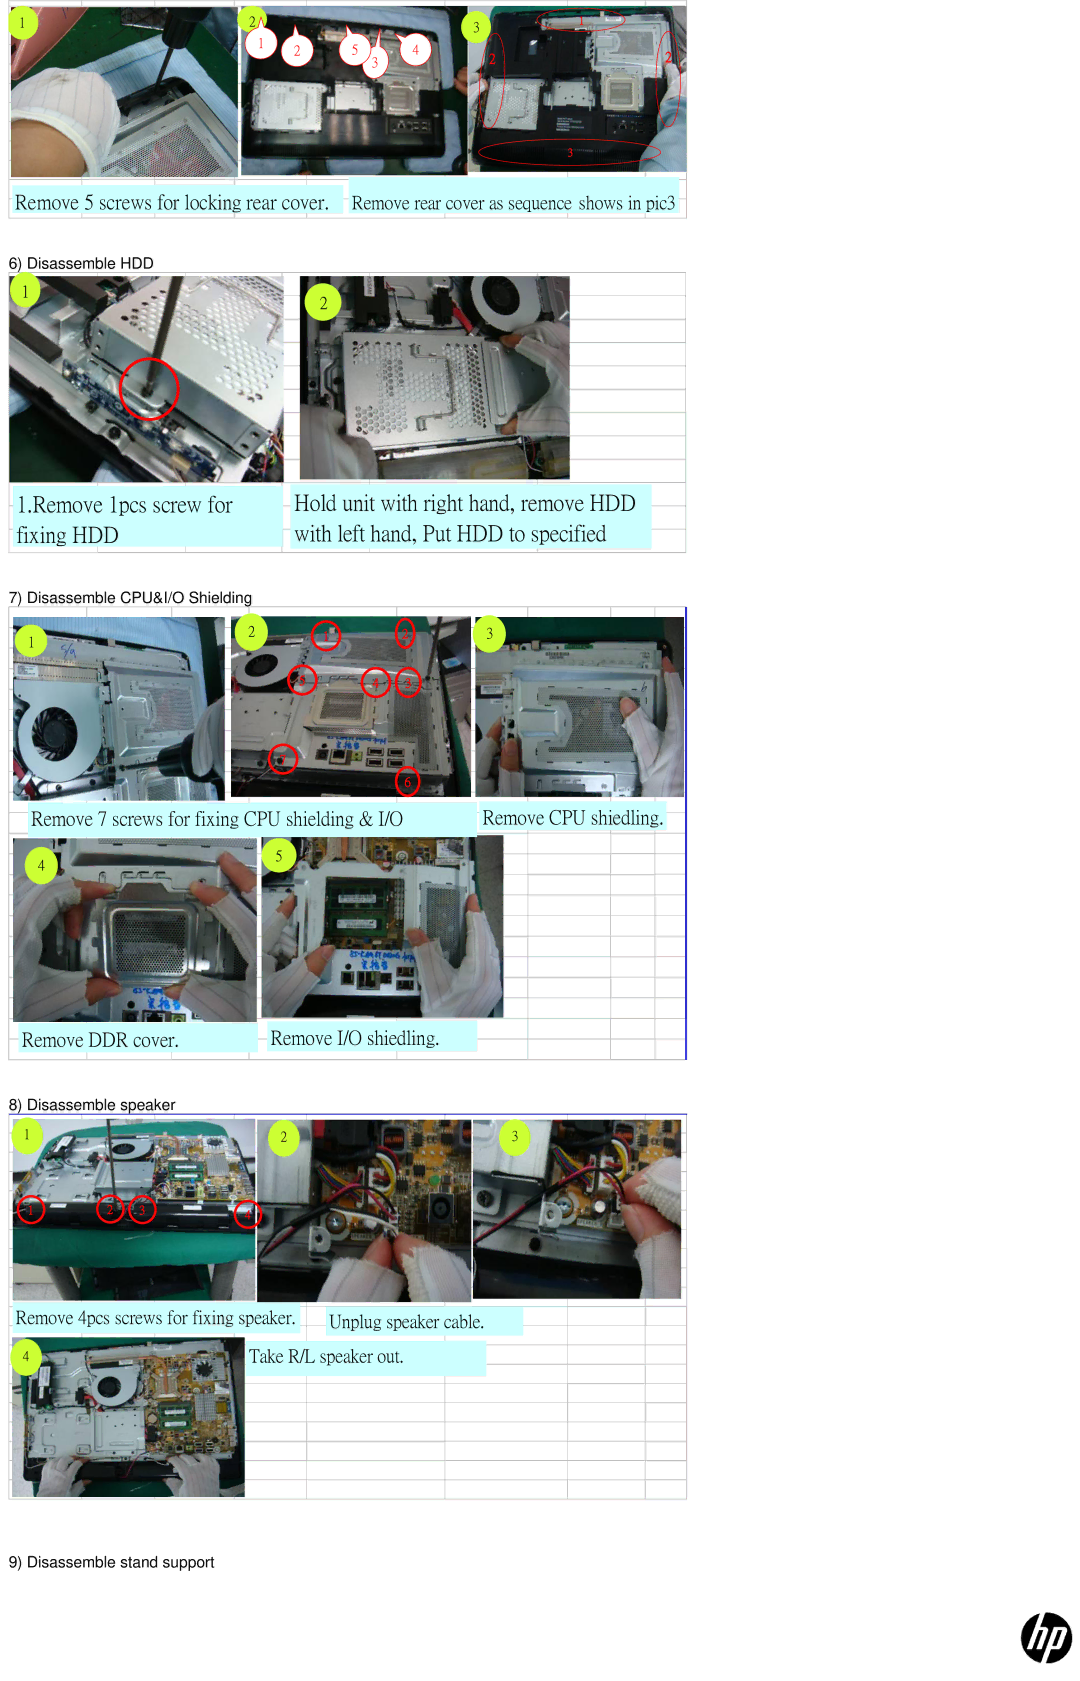
Remove 5 screws for locking rear cover. Remove rear cover as sequence shows in pic3
6) Disassemble HDD
1
2
1.Remove 1pcs screw for |
| Hold unit with right hand, remove HDD |
| ||
fixing HDD |
| with left hand, Put HDD to specified |
| ||
|
|
|
7) Disassemble CPU&I/O Shielding
1
21
23
54
3
7
6
Remove 7 screws for fixing CPU shielding & I/O |
| Remove CPU shiedling. |
|
|
|
4
5
Remove DDR cover. |
| Remove I/O shiedling. |
| ||
|
|
|
8) Disassemble speaker
1
2
3
1
2 3
4
Remove 4pcs screws for fixing speaker.
Unplug speaker cable.
4
Take R/L speaker out.
9) Disassemble stand support