dx7400 specifications
The HP dx7400 is a desktop computer designed primarily for business environments, providing a balance of performance, reliability, and scalability. Launched in the late 2000s, the dx7400 is tailored to meet the demanding needs of office tasks and professional applications while also being an economical option for enterprises.One of the standout features of the HP dx7400 is its customizable performance. It is equipped with a range of Intel processors, typically offering options from the Intel Core 2 Duo to more potent options depending on configuration. This flexibility allows businesses to select a processor that best fits their workload requirements, whether for basic office tasks, demanding data processing, or multitasking between applications.
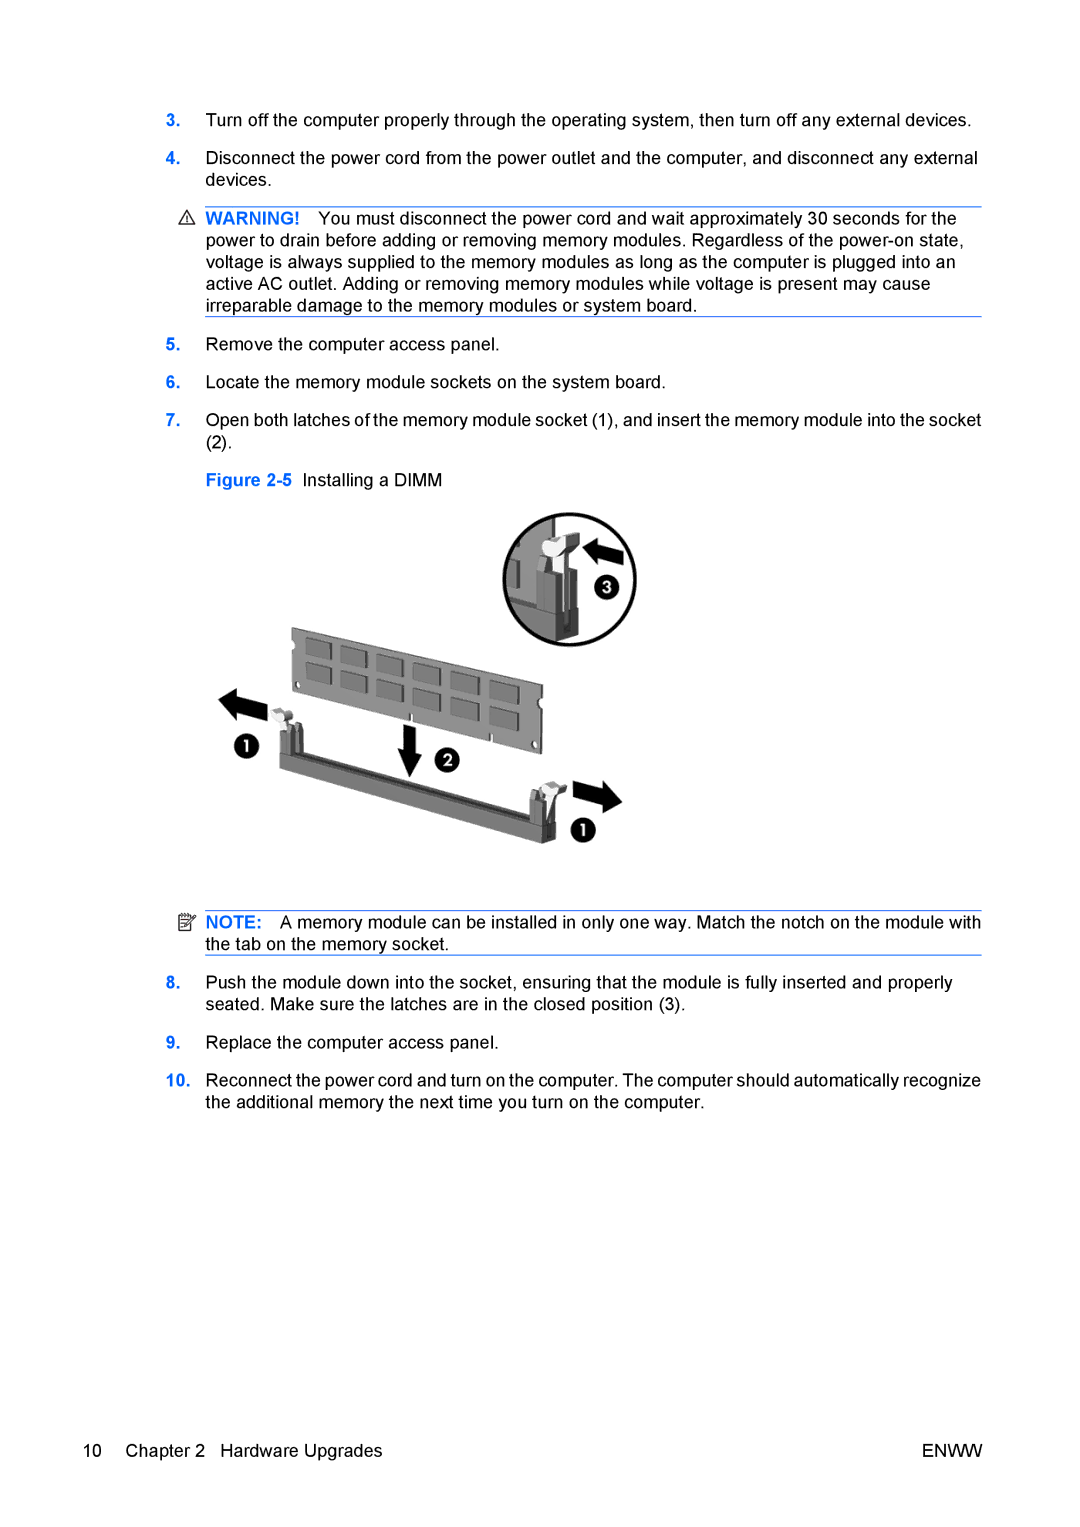
The HP dx7400 also emphasizes expandability. The system is designed with ample expansion slots that allow for additional memory, storage drives, and graphics cards. This expandability ensures that businesses can upgrade the machine as their needs grow without requiring a complete system overhaul. The desktop can support up to 8GB of DDR2 RAM, which is beneficial for running multiple applications simultaneously or handling memory-intensive tasks.
In terms of storage, the dx7400 provides various hard drive options, ranging from traditional HDDs to SATA drives, ensuring users have enough space for files, applications, and backups. The availability of different configurations means that organizations can select drives that offer a balance between speed and storage capacity.
The HP dx7400 is built with connectivity in mind. It provides multiple USB ports, including USB 2.0 and options for legacy connections like serial and parallel ports, catering to a broad array of peripherals and devices. The inclusion of audio and video outputs also makes it a suitable choice for presentations and multimedia projects.
Security is another crucial aspect of the HP dx7400. It often features tools like HP ProtectTools Security Suite, which helps safeguard sensitive data and provides secure access to systems. In addition to hardware security features, the dx7400 integrates various software solutions aimed at data protection.
Lastly, the compact design of the HP dx7400 enables it to fit well in a variety of office spaces. Its straightforward design ensures it can be easily integrated into an existing workplace setup without taking up too much space.
Overall, the HP dx7400 stands out as a versatile, reliable desktop solution that was engineered to cater to the needs of modern business operations, providing essential features for productivity and expandability for future growth.

