Back to Contents Page
Attaching the Cables: HP w19 LCD Monitor
Cable Connections On Back of Monitor and Computer
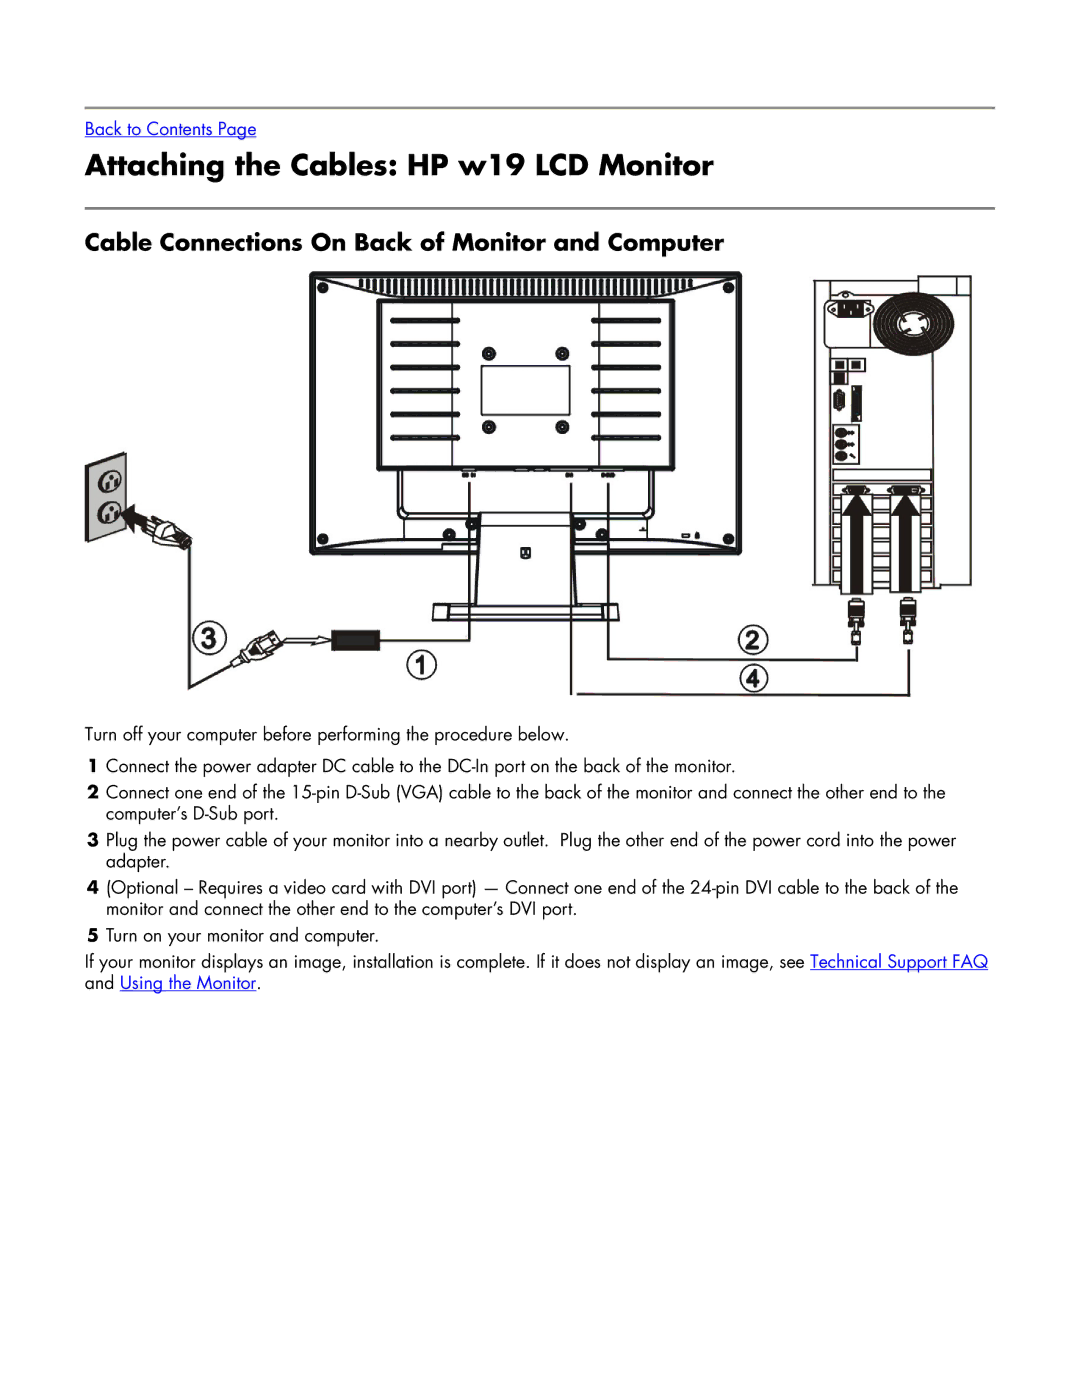
Turn off your computer before performing the procedure below.
1Connect the power adapter DC cable to the
2Connect one end of the
3Plug the power cable of your monitor into a nearby outlet. Plug the other end of the power cord into the power adapter.
4(Optional – Requires a video card with DVI port) — Connect one end of the
5Turn on your monitor and computer.
If your monitor displays an image, installation is complete. If it does not display an image, see Technical Support FAQ and Using the Monitor.
