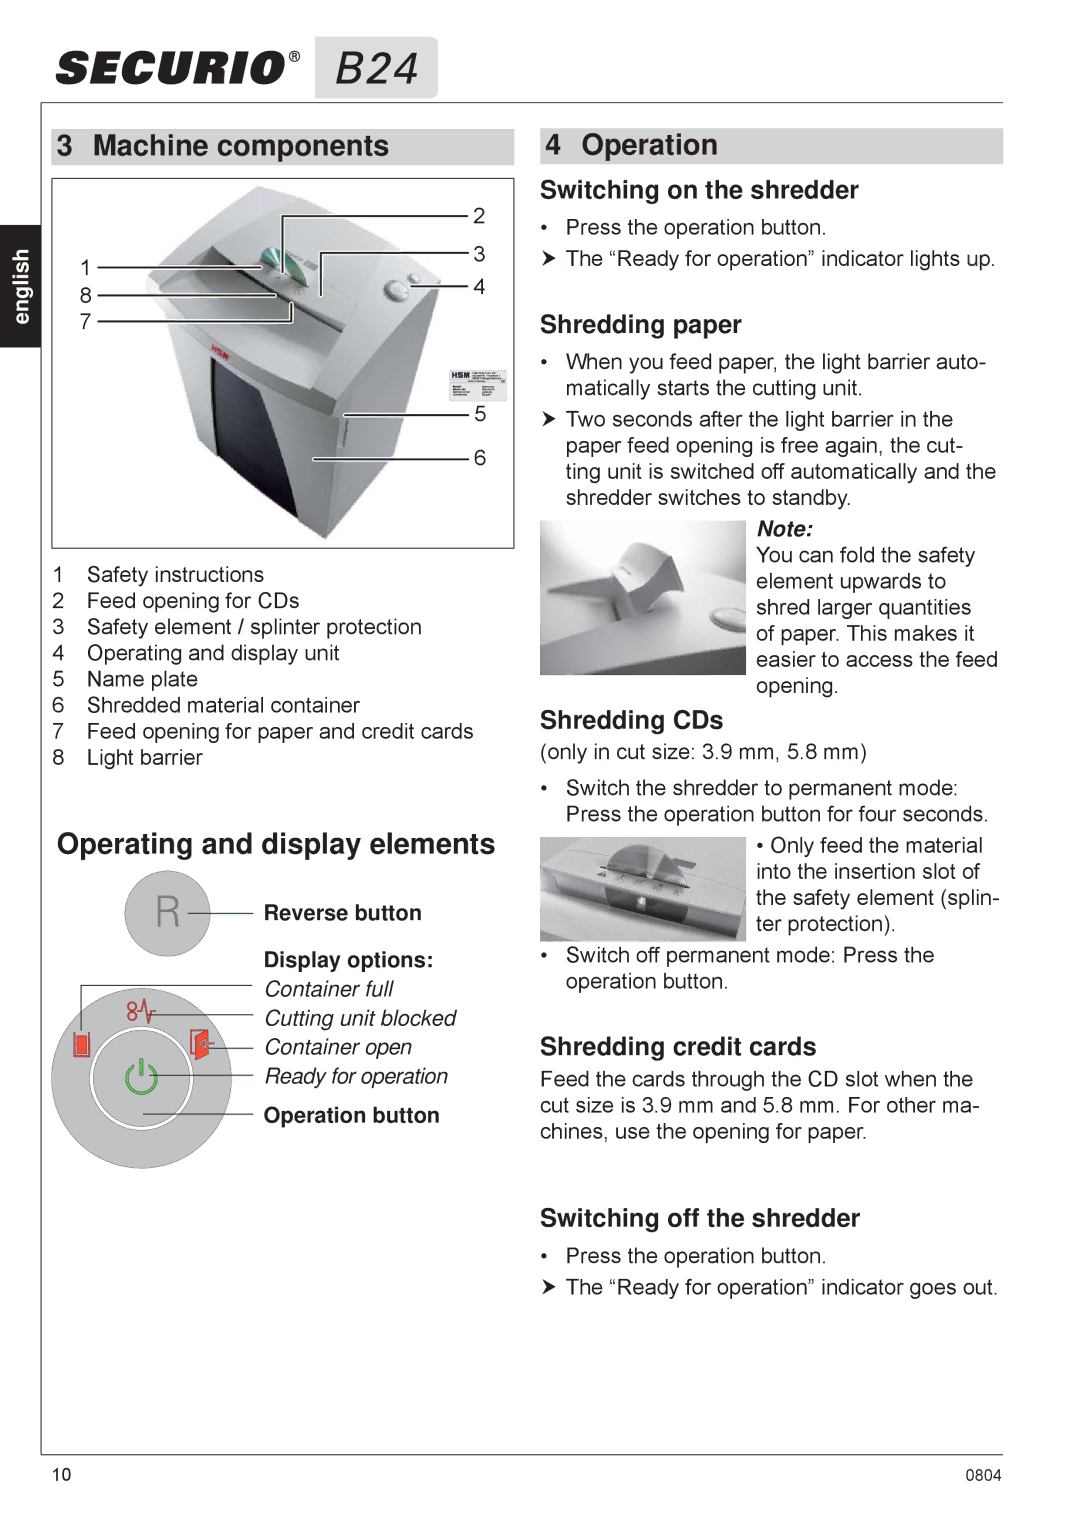
3 Machine components
|
| 2 | |
english | 1 | 3 | |
4 | |||
8 | |||
| |||
7 |
| ||
|
| ||
|
| 5 | |
|
| 6 |
1Safety instructions
2Feed opening for CDs
3Safety element / splinter protection
4Operating and display unit
5Name plate
6Shredded material container
7Feed opening for paper and credit cards
8Light barrier
Operating and display elements
![]()
![]() Reverse button
Reverse button
Display options:
Container full
![]()
![]() Cutting unit blocked
Cutting unit blocked
![]()
![]() Container open
Container open
![]() Ready for operation
Ready for operation
Operation button
4 Operation
Switching on the shredder
•Press the operation button.
The “Ready for operation” indicator lights up.
Shredding paper
•When you feed paper, the light barrier auto- matically starts the cutting unit.
Two seconds after the light barrier in the paper feed opening is free again, the cut- ting unit is switched off automatically and the shredder switches to standby.
Note:
You can fold the safety element upwards to shred larger quantities of paper. This makes it easier to access the feed opening.
Shredding CDs
(only in cut size: 3.9 mm, 5.8 mm)
•Switch the shredder to permanent mode: Press the operation button for four seconds.
•Only feed the material into the insertion slot of the safety element (splin- ter protection).
•Switch off permanent mode: Press the operation button.
Shredding credit cards
Feed the cards through the CD slot when the cut size is 3.9 mm and 5.8 mm. For other ma- chines, use the opening for paper.
Switching off the shredder
•Press the operation button.
The “Ready for operation” indicator goes out.
10 | 0804 |